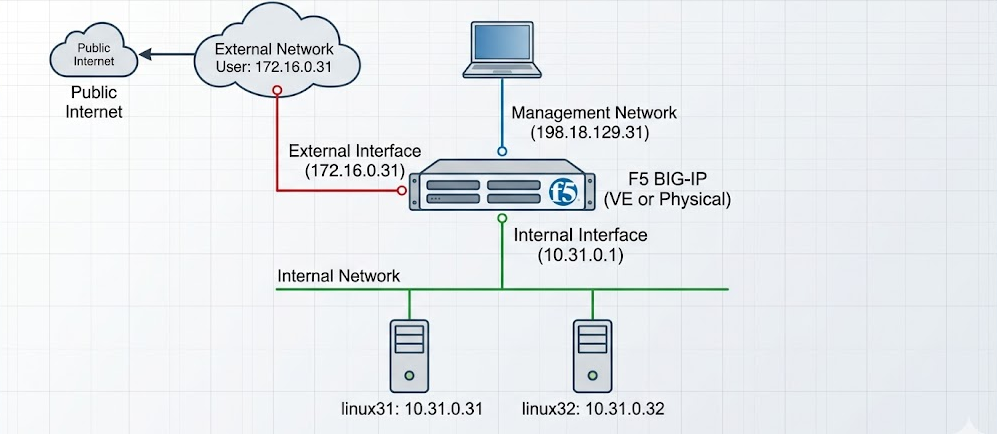
F5 LTM (Local Traffic Manager) is a load balancer that distributes client traffic across multiple backend servers to improve availability and performance. In this lab, we configure the F5 BIG-IP with external, internal, and management interfaces, then use it to receive traffic from the external network and load balance it to internal Linux servers (10.31.0.31 and 10.31.0.32).
Networking
First we setup the F5 with LTM enabled
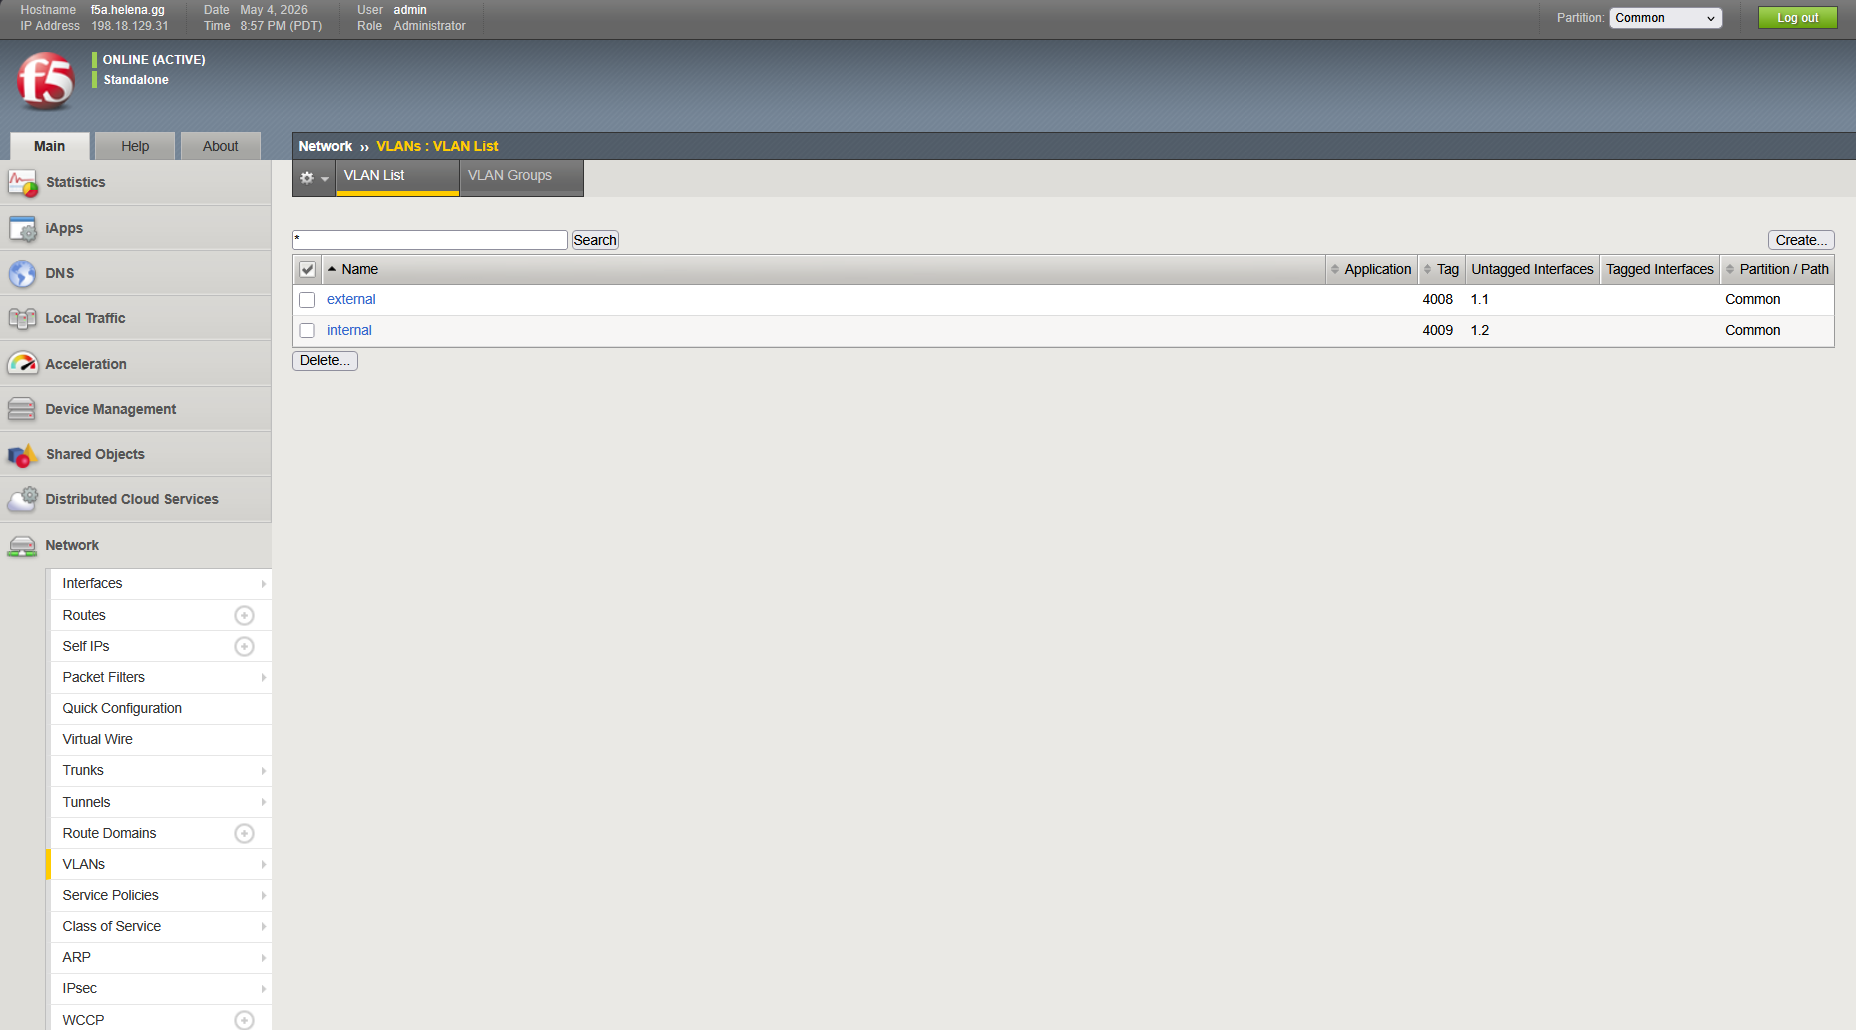
Next on Network » VLANs, create the untagged External and Internal VLANs on port 1.1 and port 1.2
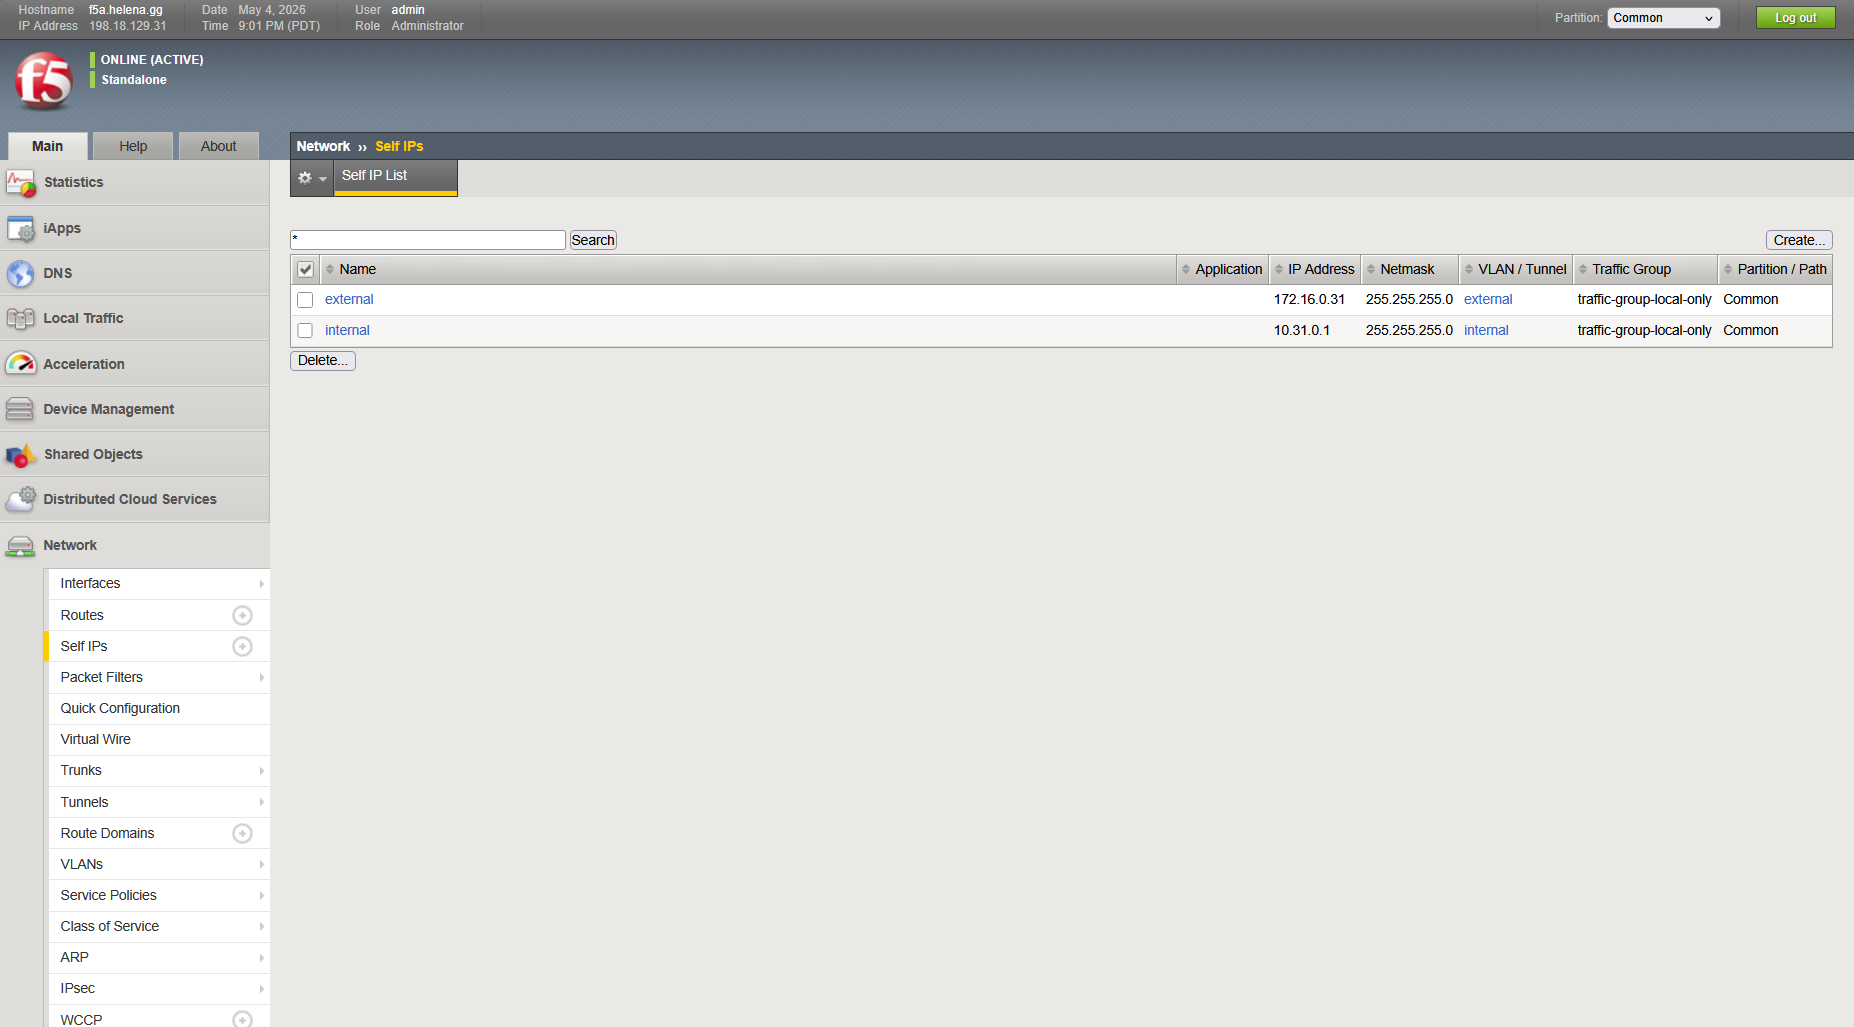
Then on Network » Self IPs, add both External and Internal IP Addresses and associate it with each VLAN
LTM
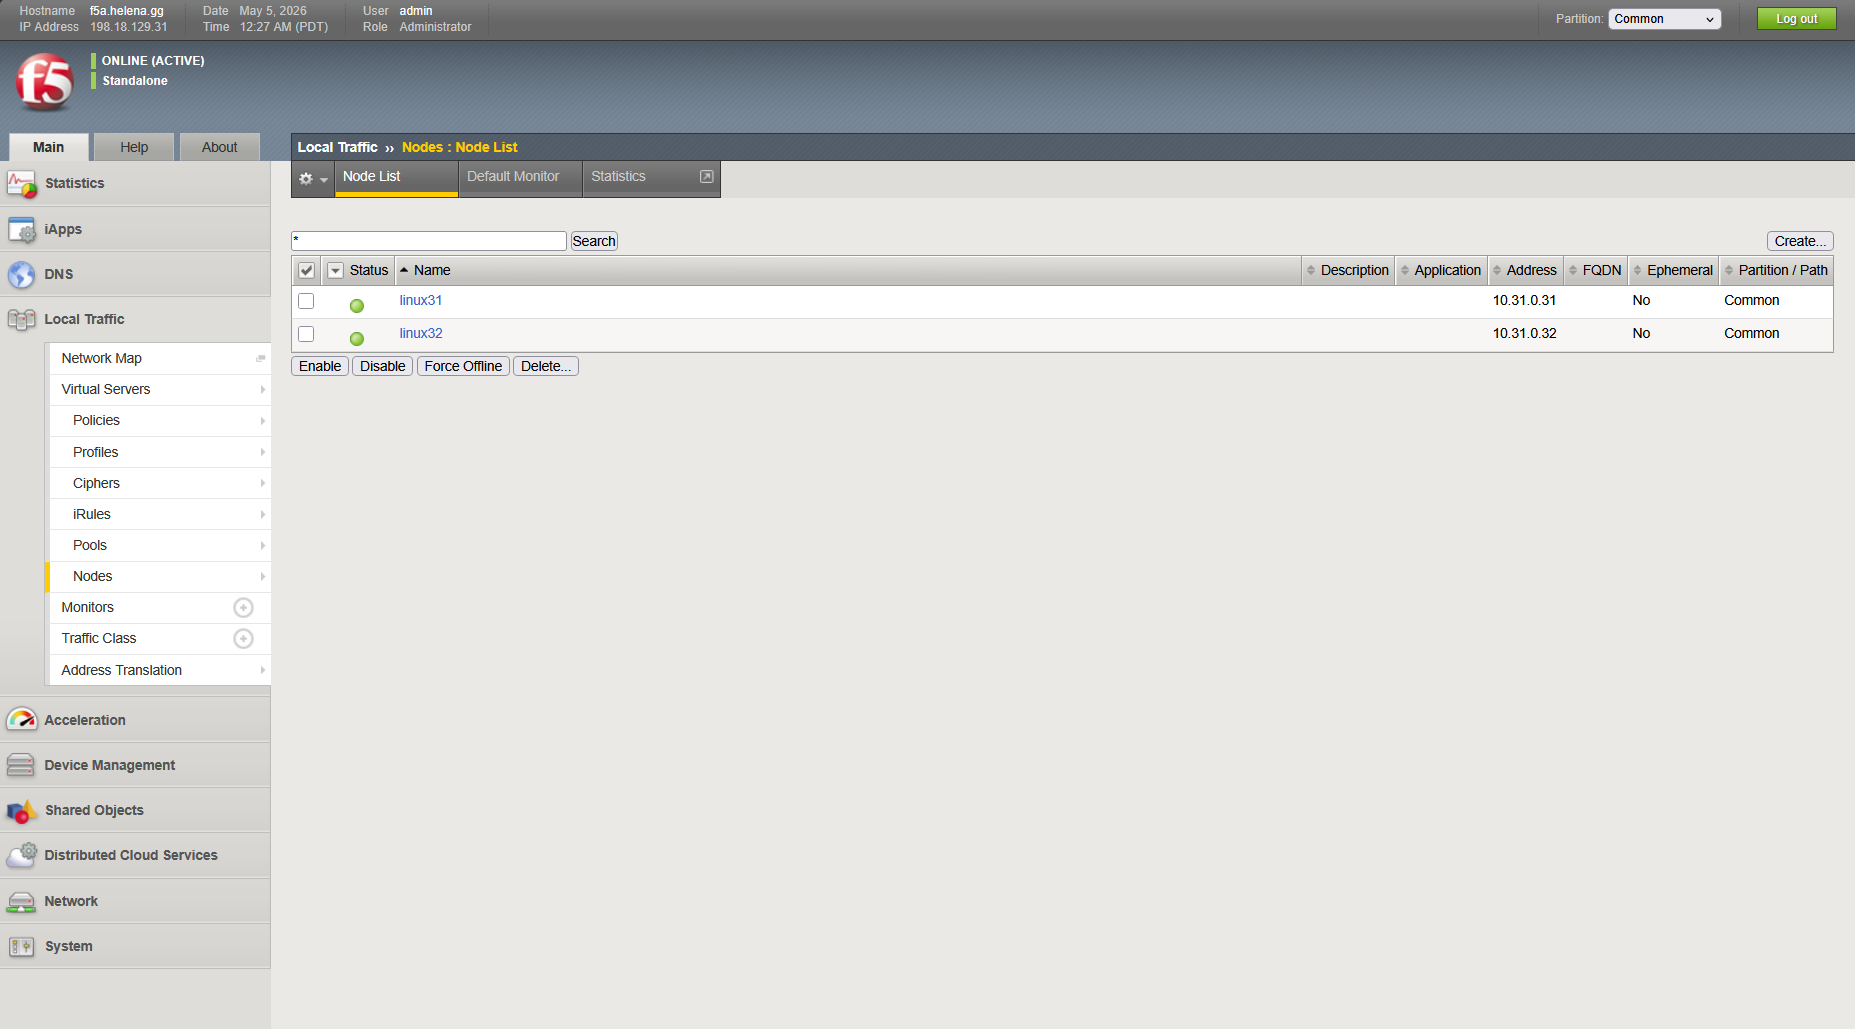
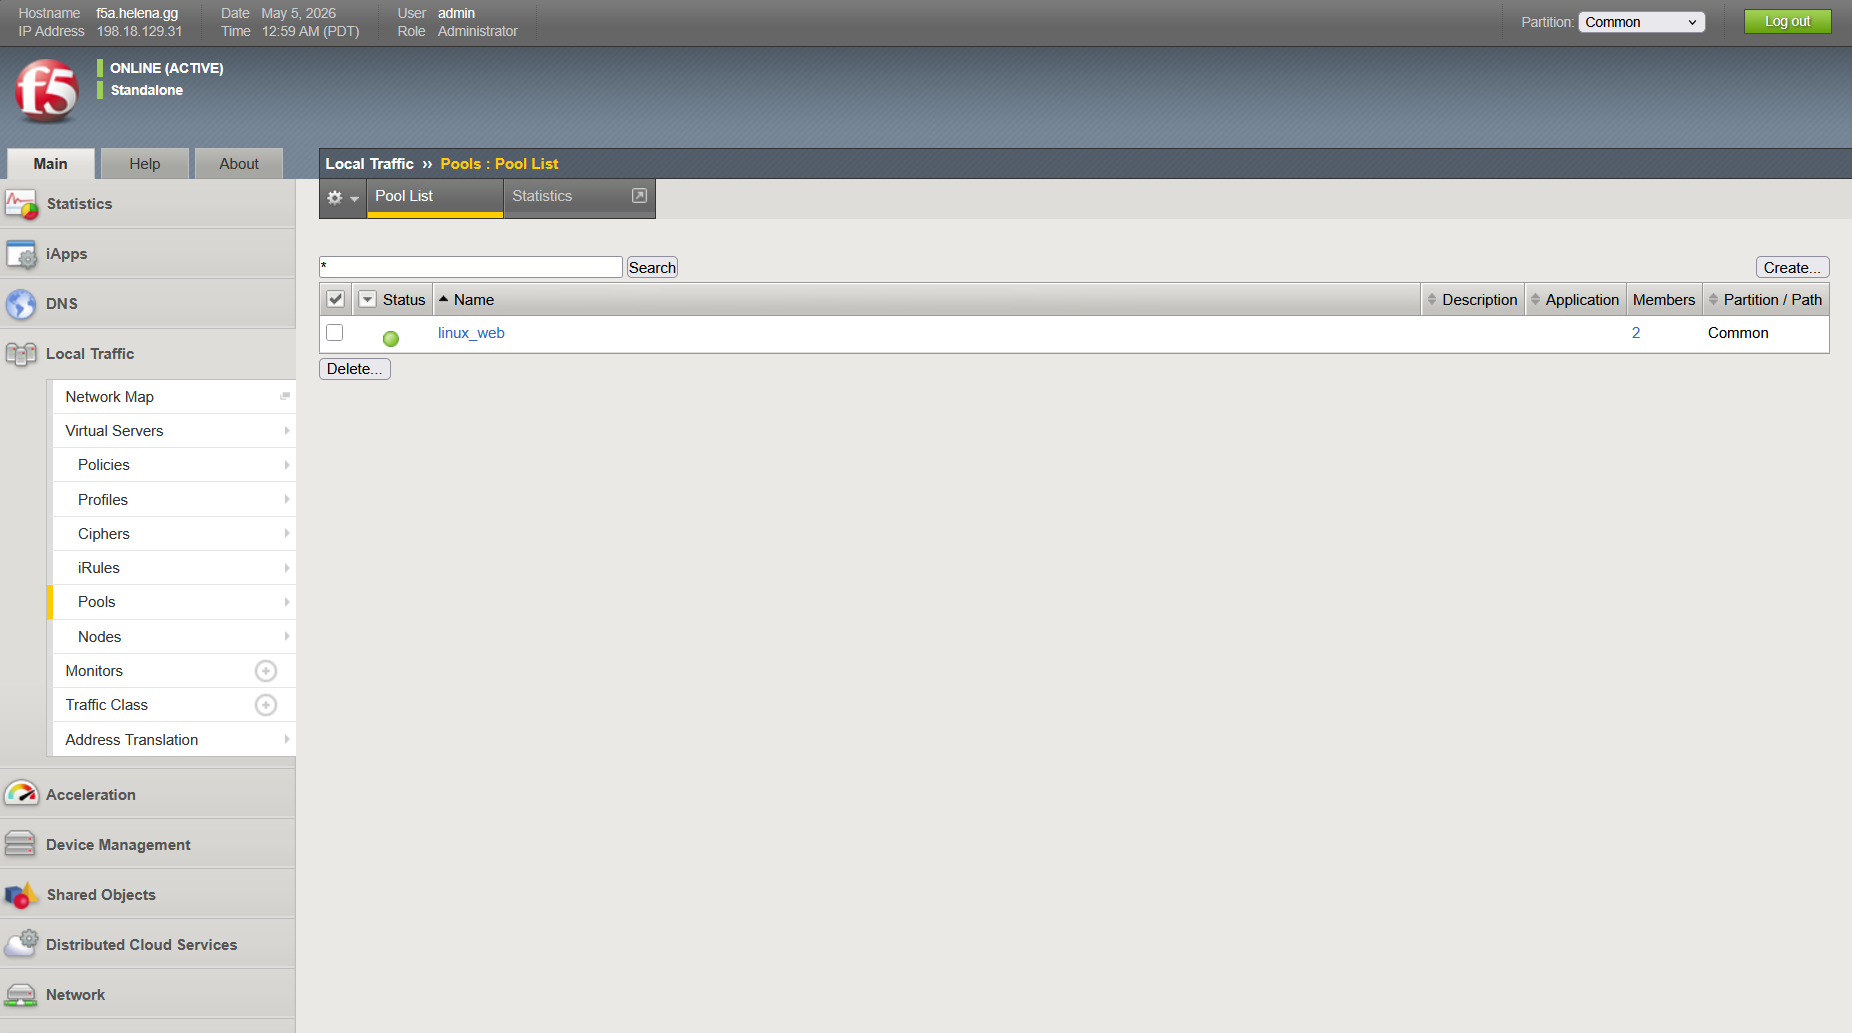
After that we can configure our LTM, first we add our Linux Servers on Local Traffic » Nodes
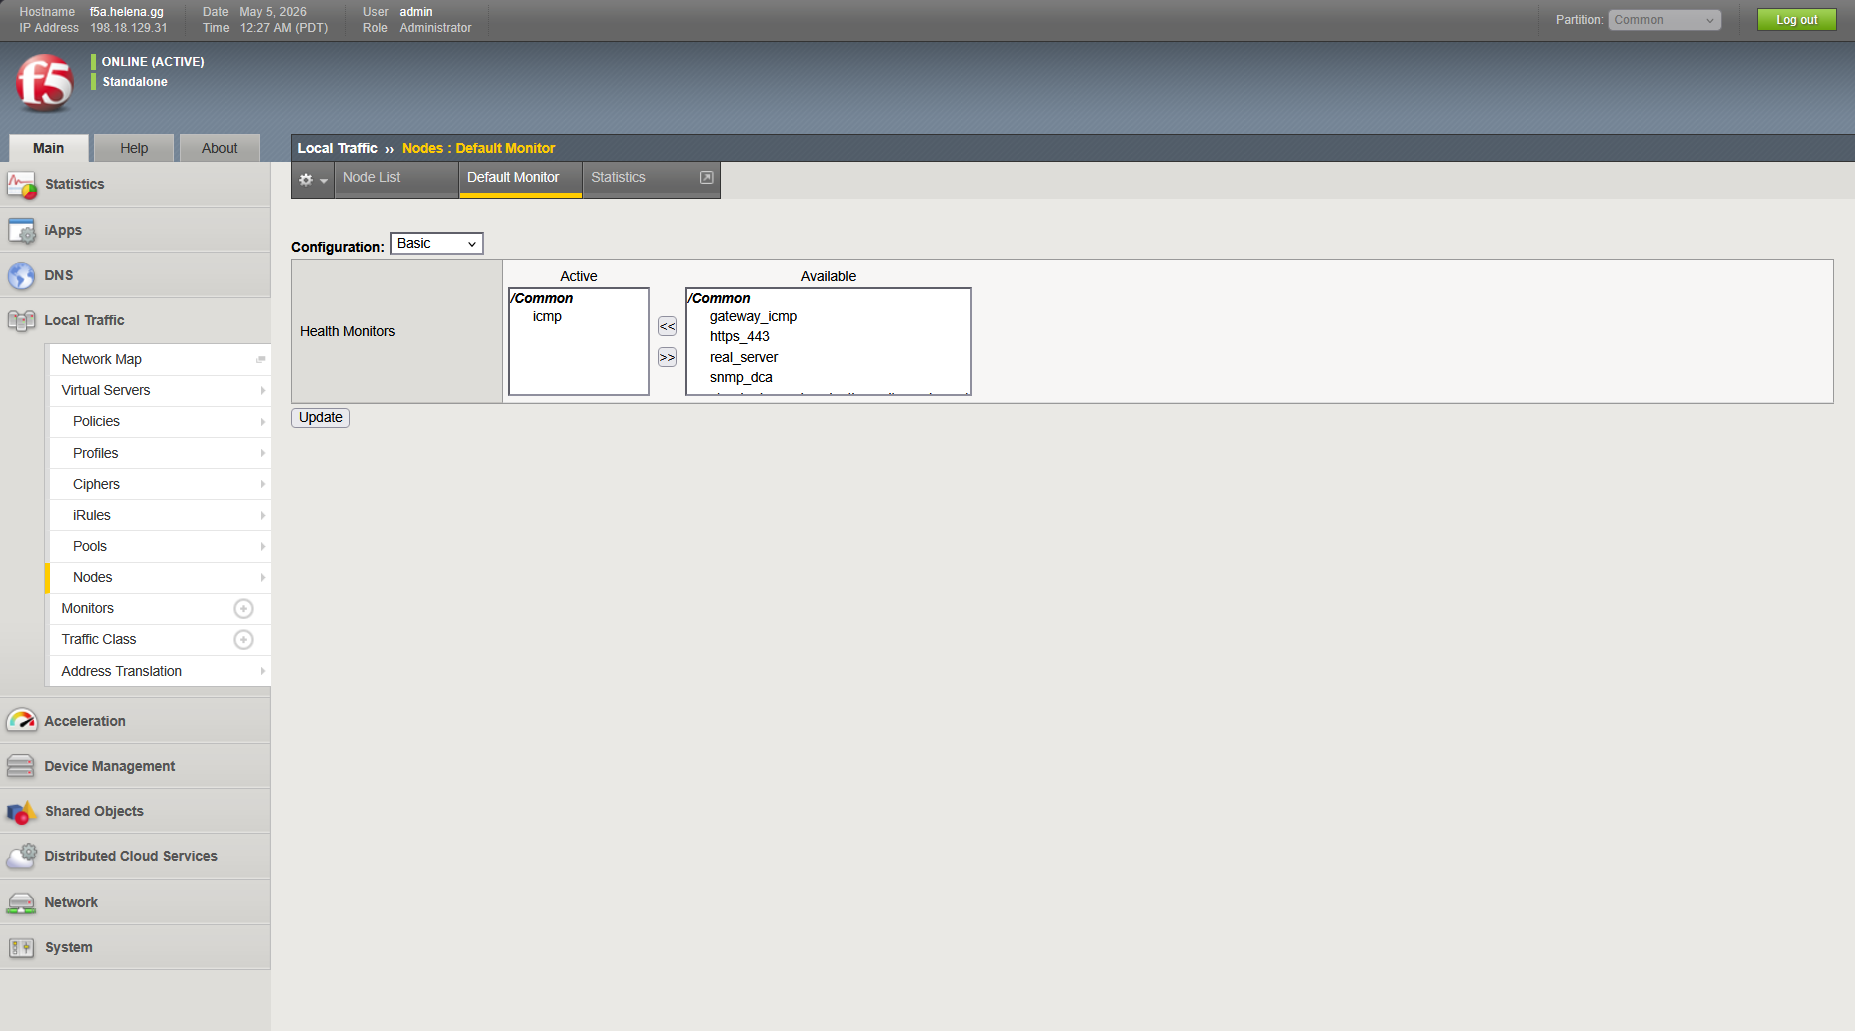
We also configure the default monitor method, for simplicty we will use ping
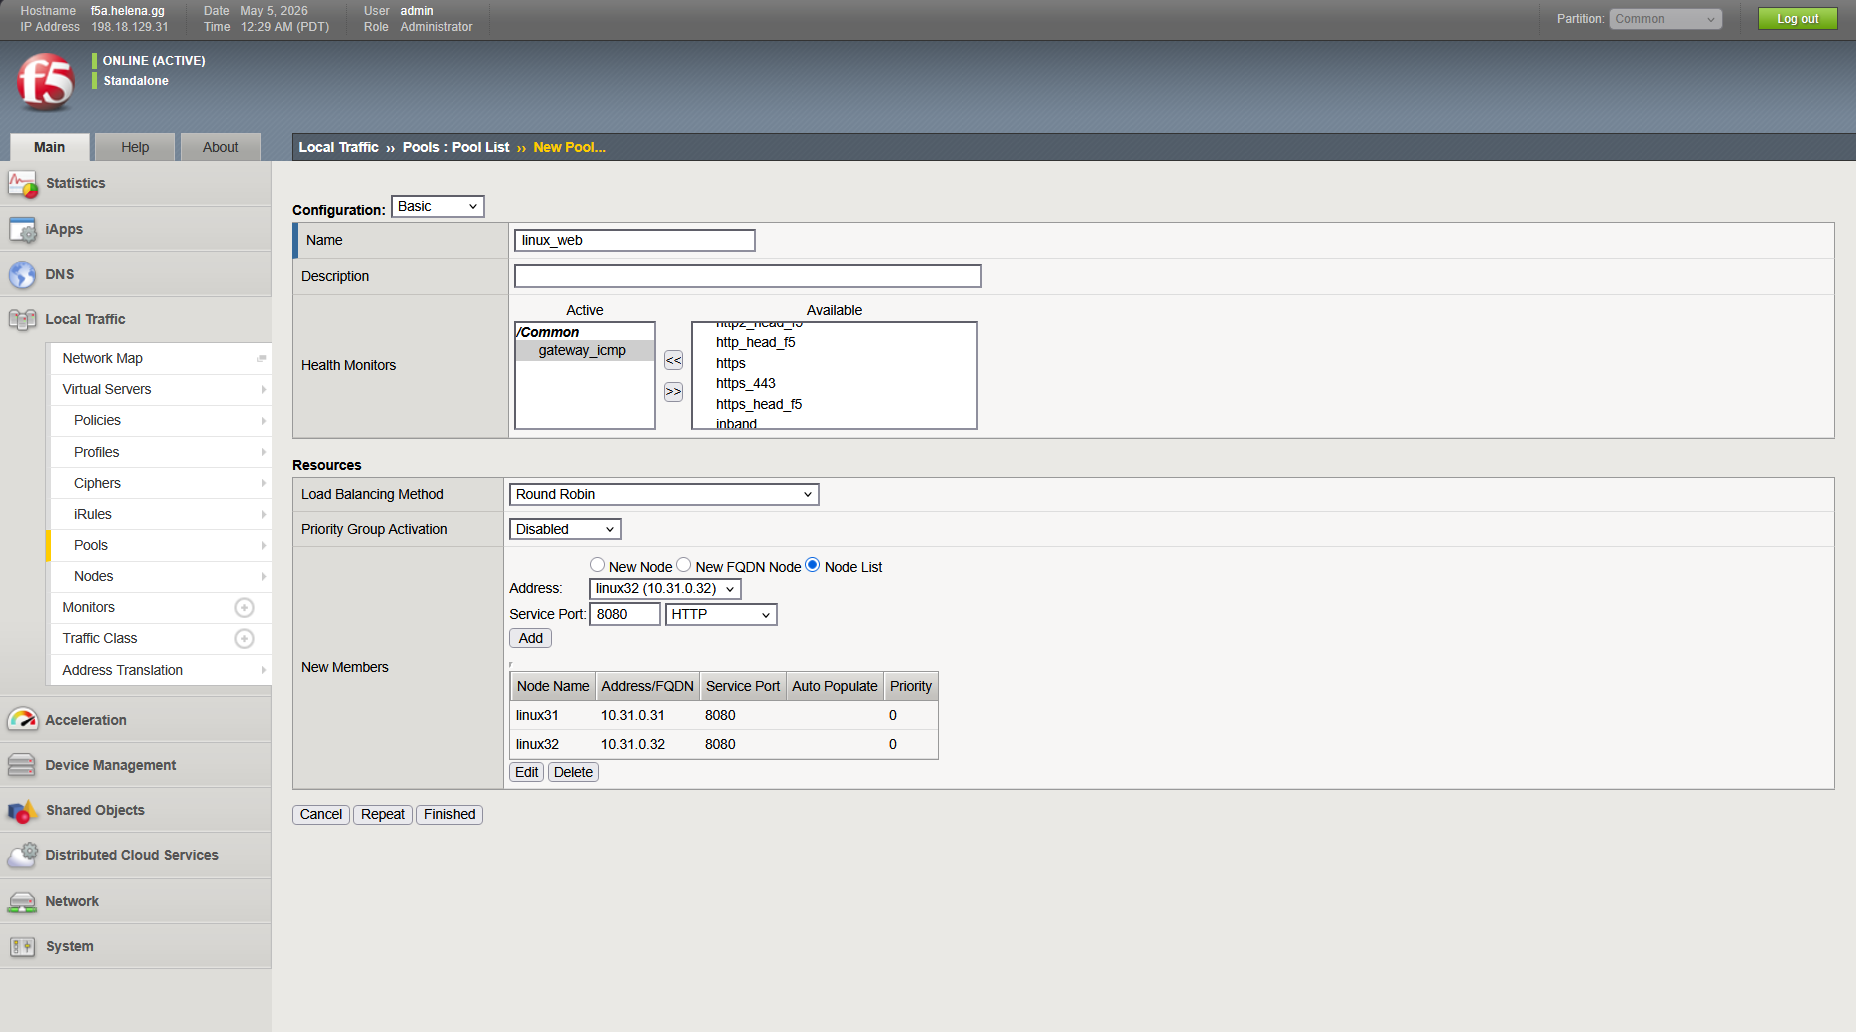
Next we create the Node Pool on Local Traffic » Pools, here we add both our nodes on port 8080 with the load balancing method
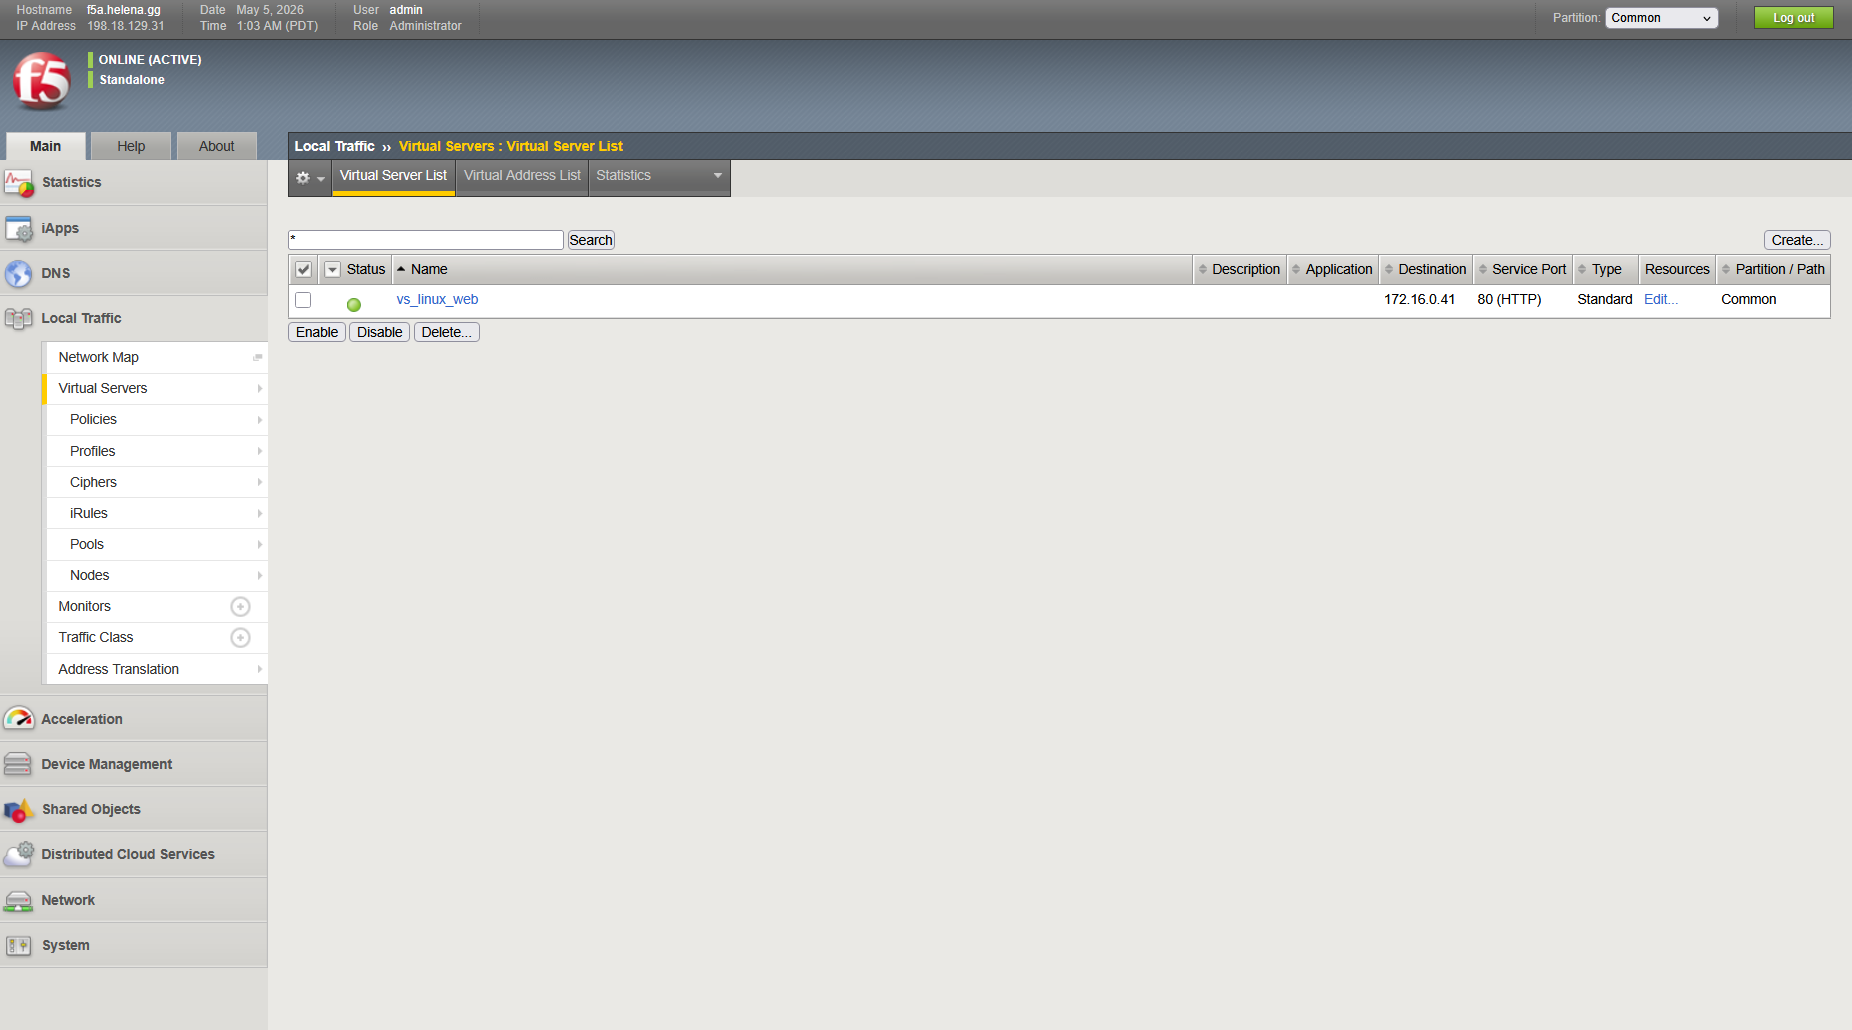
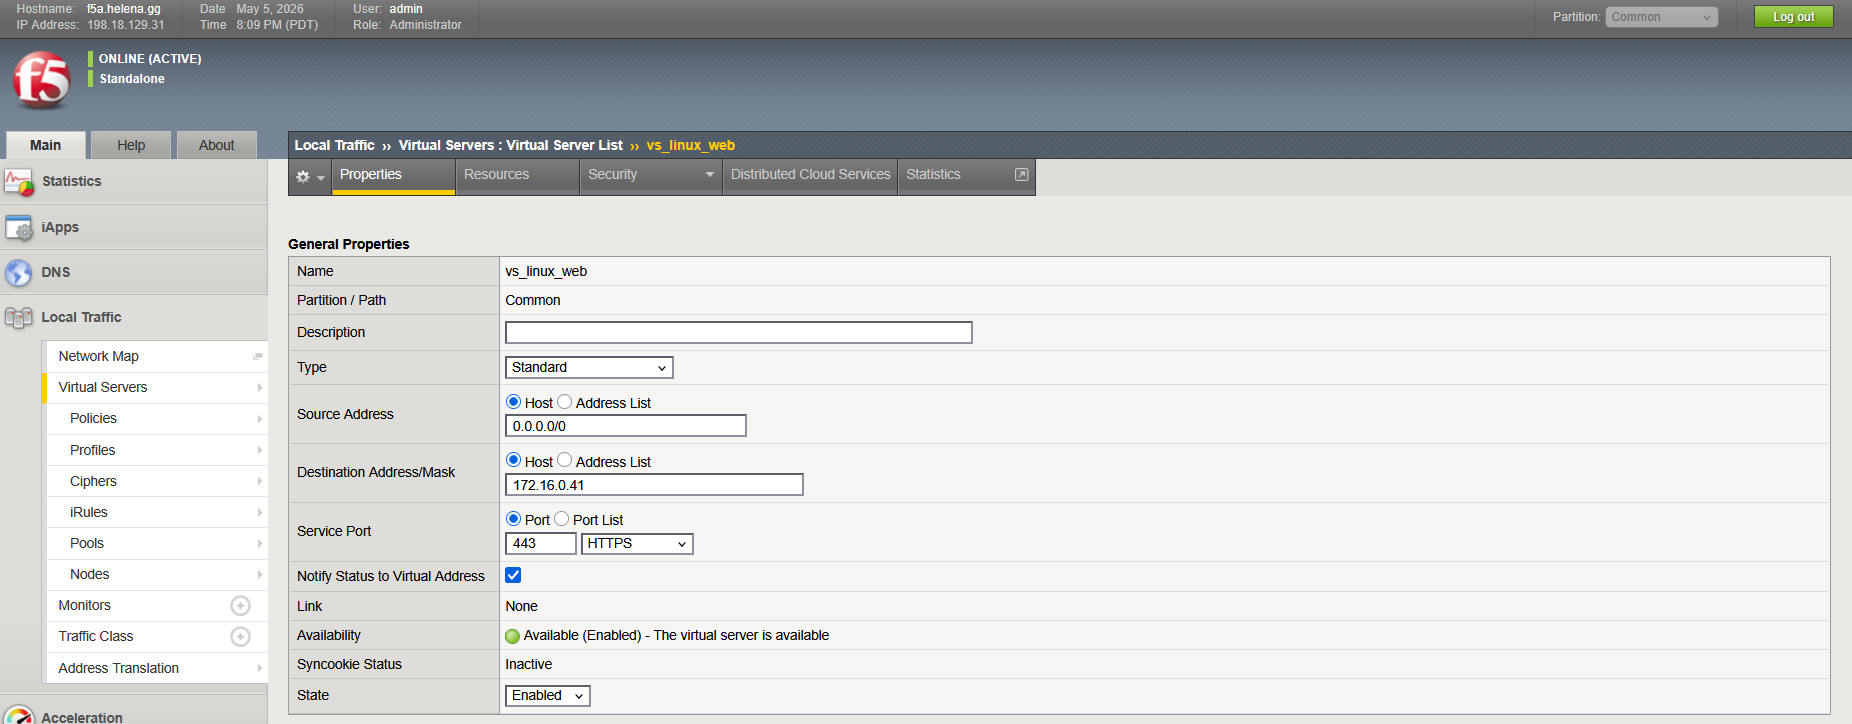
Finally we can create the Virtual Server (VS), here we add the Virtual IP with the targeted external port, which is port 80 (http) because we will not deal with SSL yet
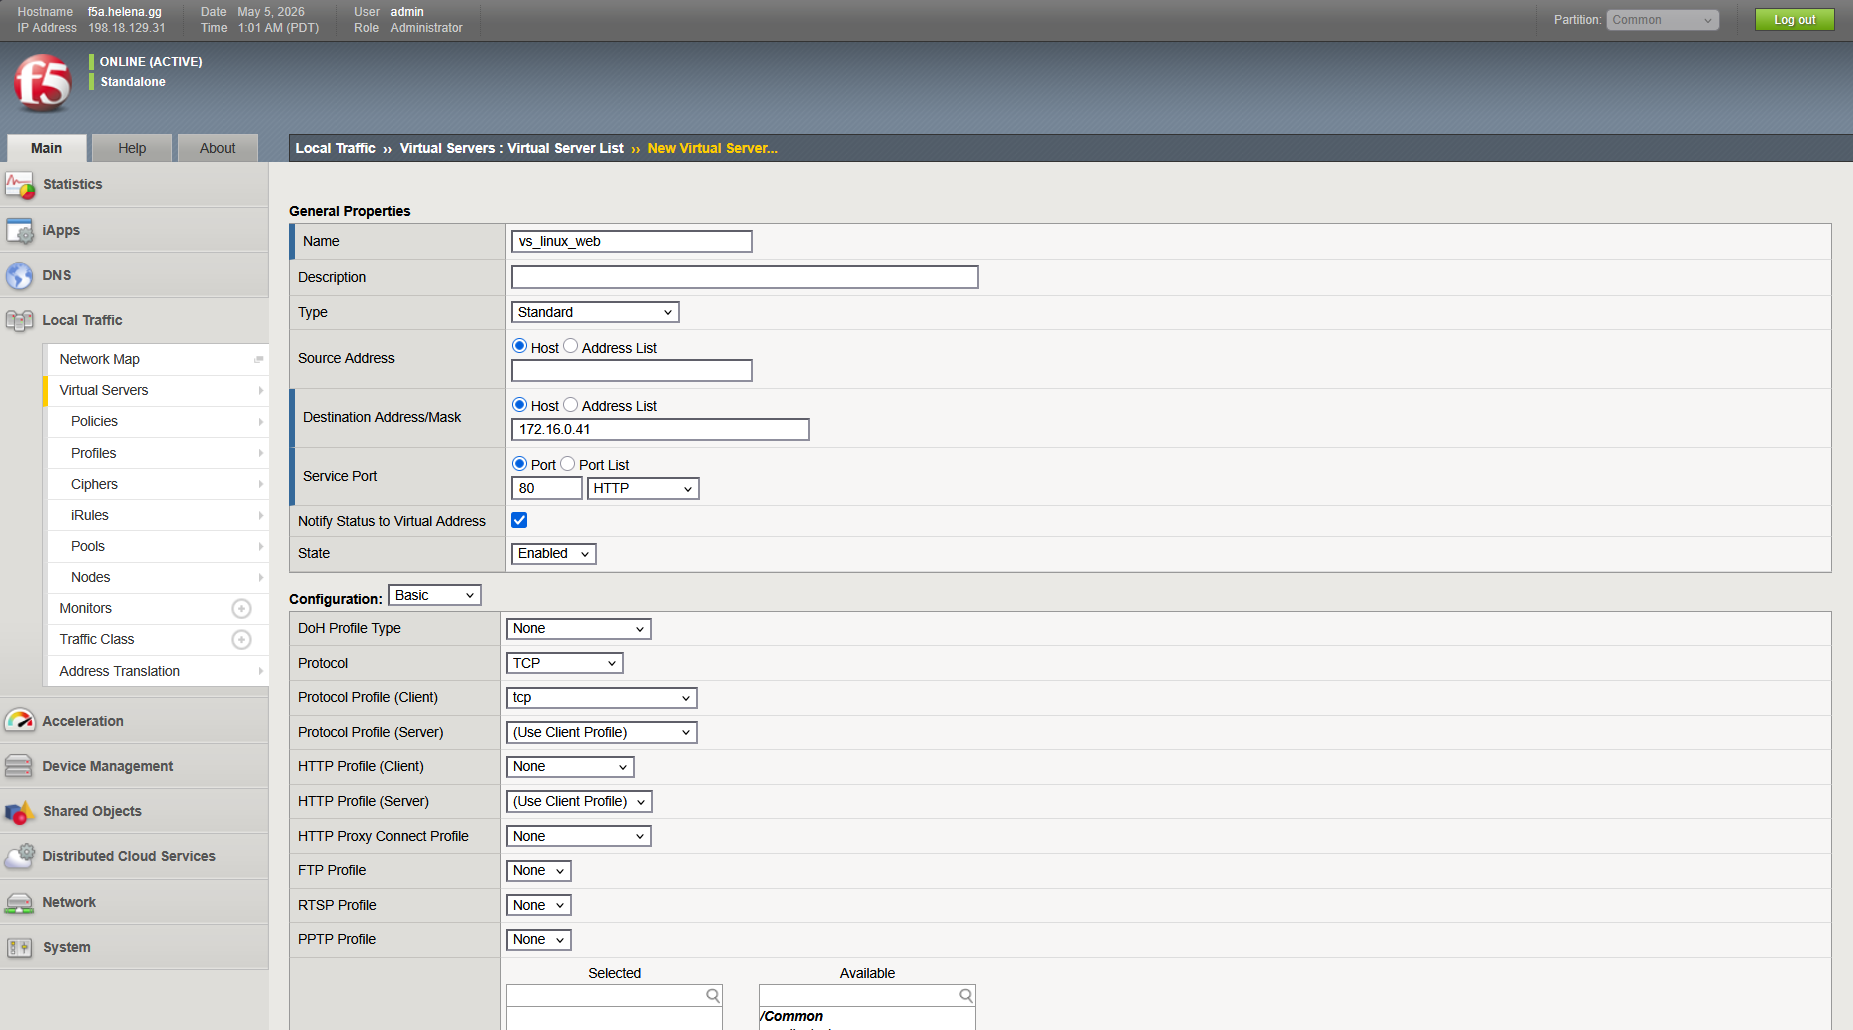
And on Resources, point it to the pool we created earlier
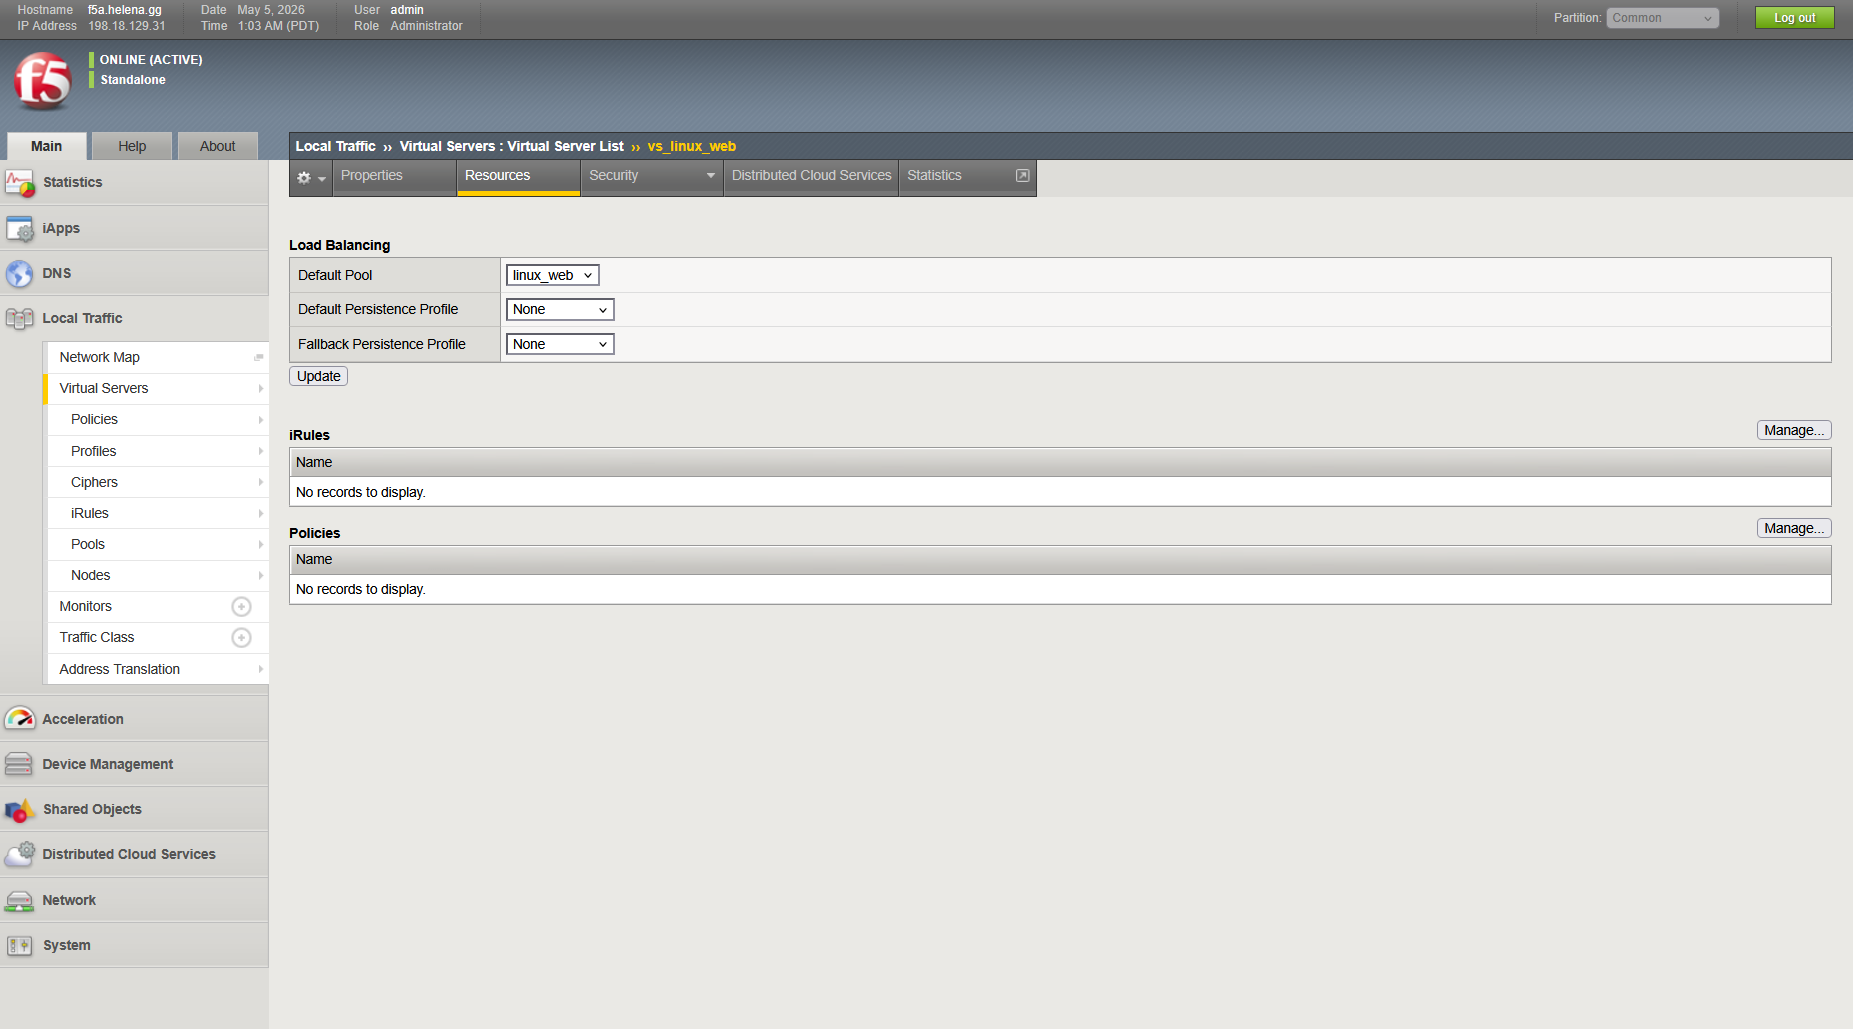
Now we have our VS up and running, listening on port 80 and forwarding it to port 8080
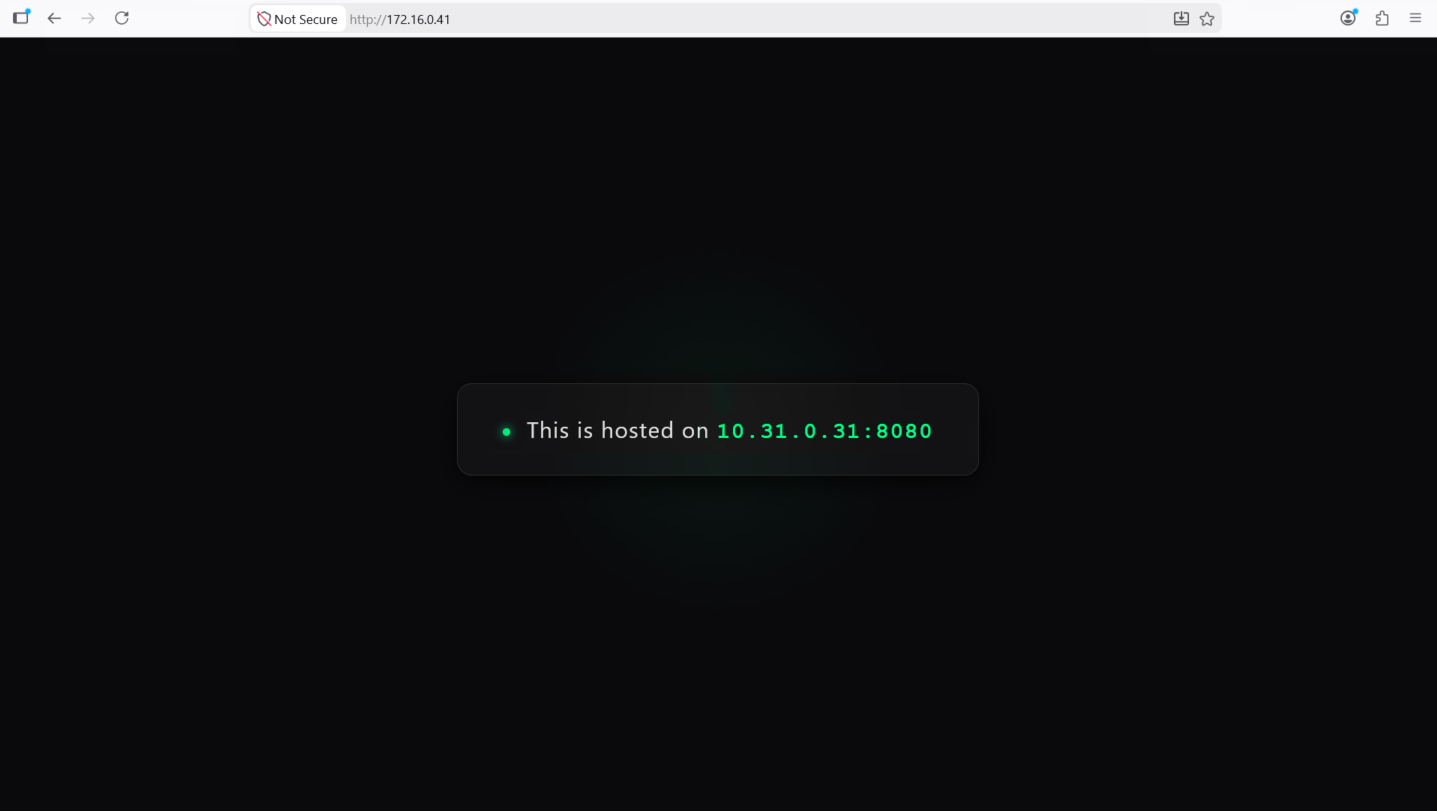
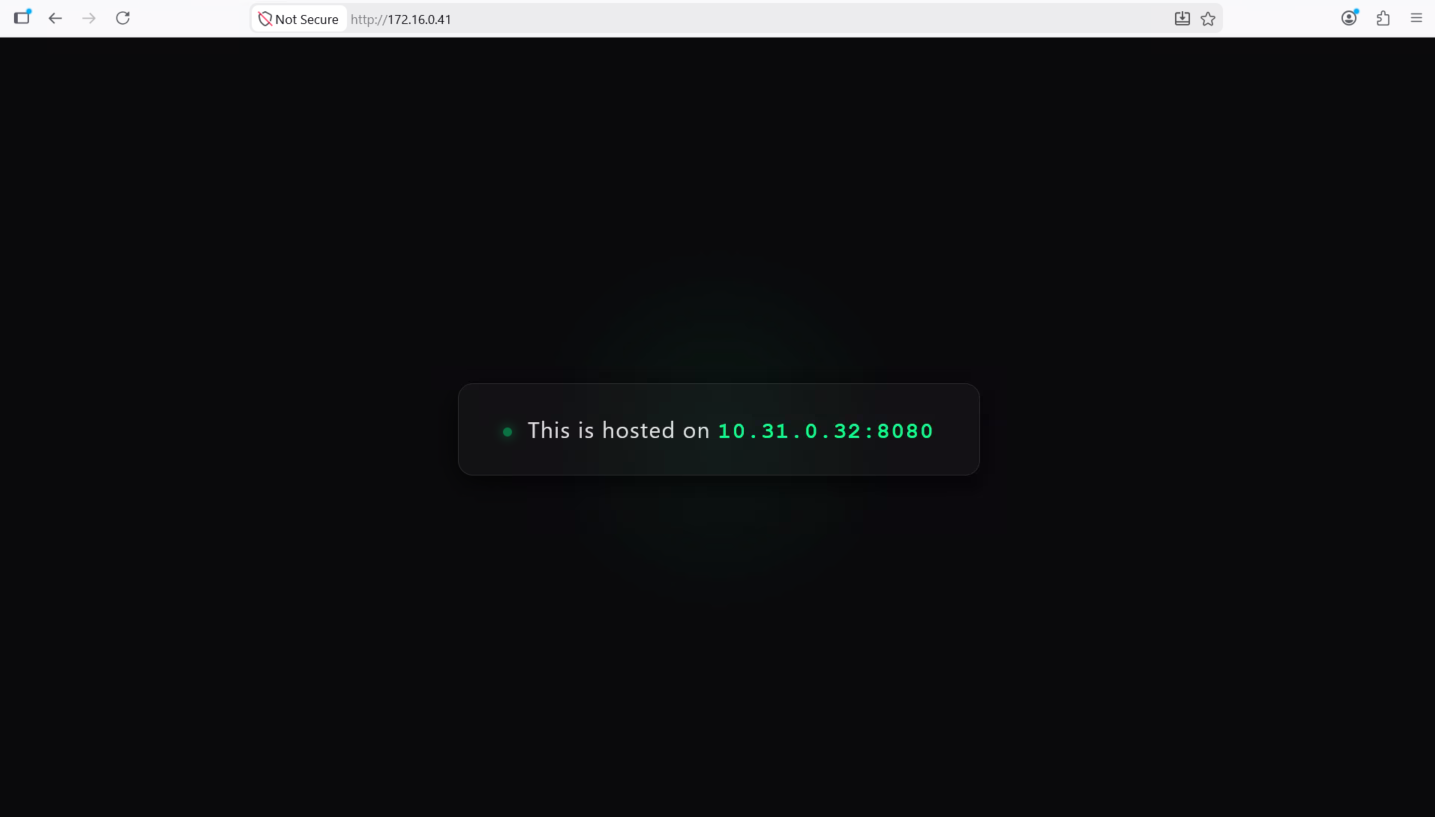
And if we try accessing the VIP, we will be served the web from both linuxs load balanced in round robin style
SSL Offloading
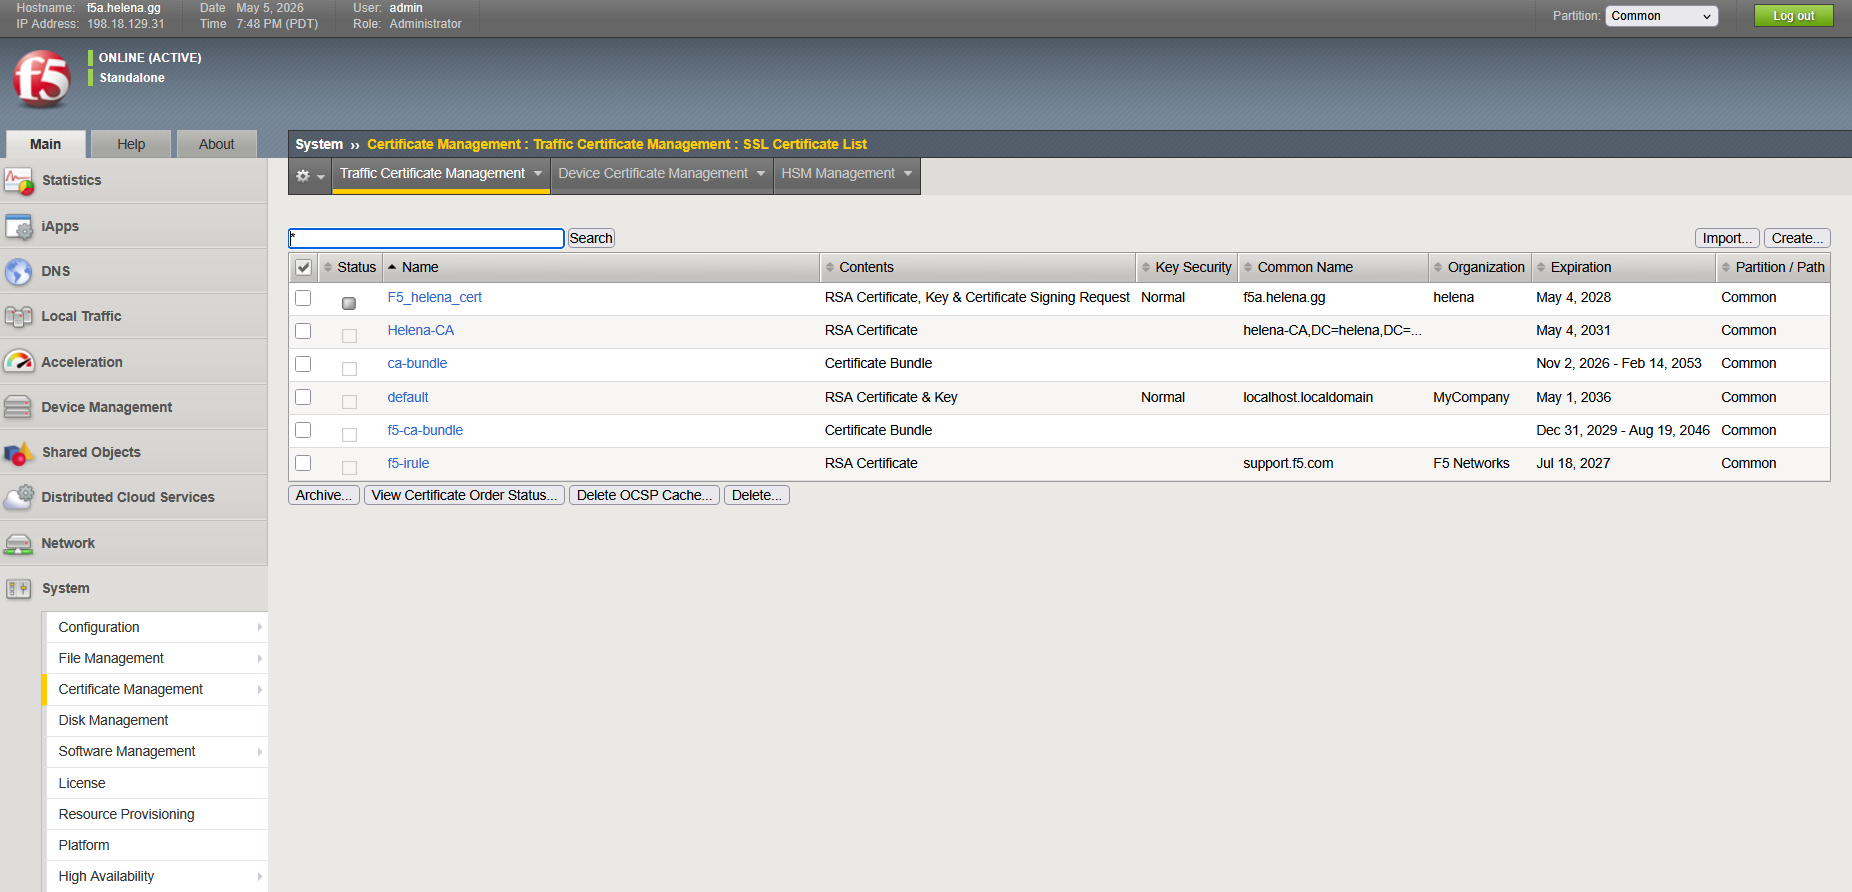
Next we will tackle SSL to enbale HTTPS, first we will import our CA Certificate to F5 on System » Certificate Management

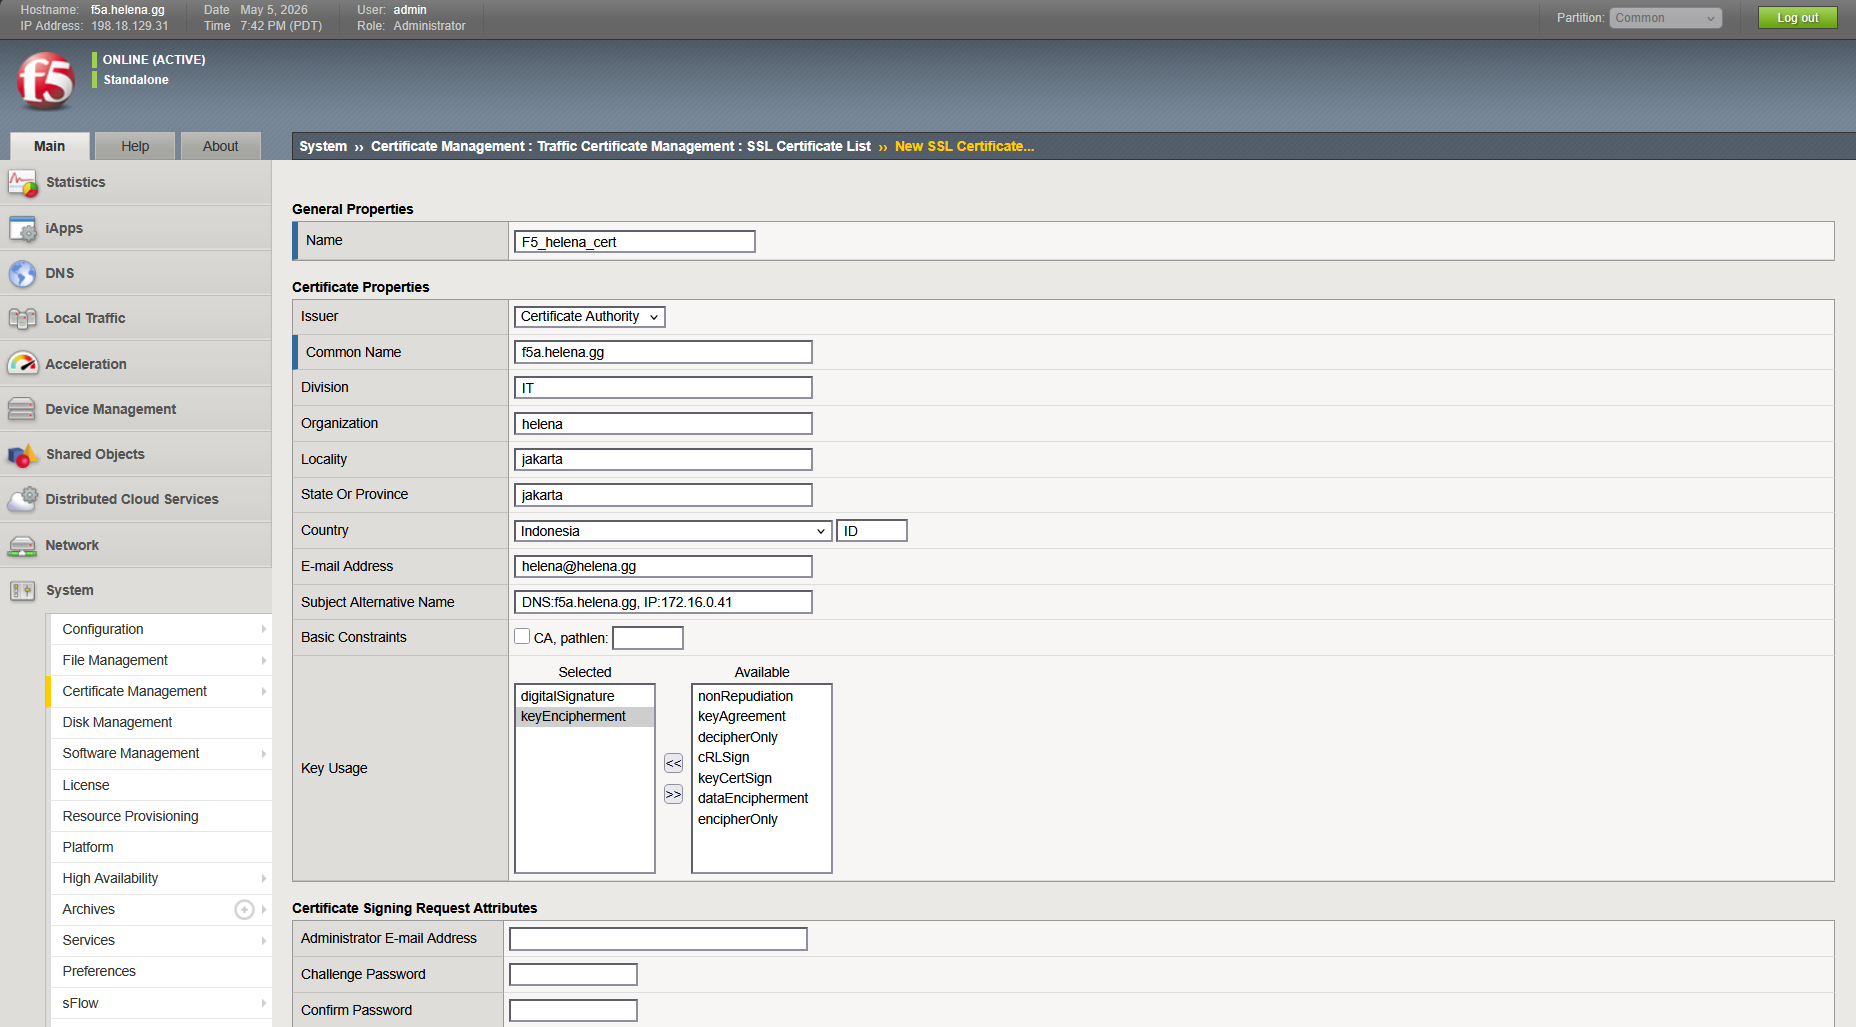
Next generate a Certificate Signing Request (CSR)
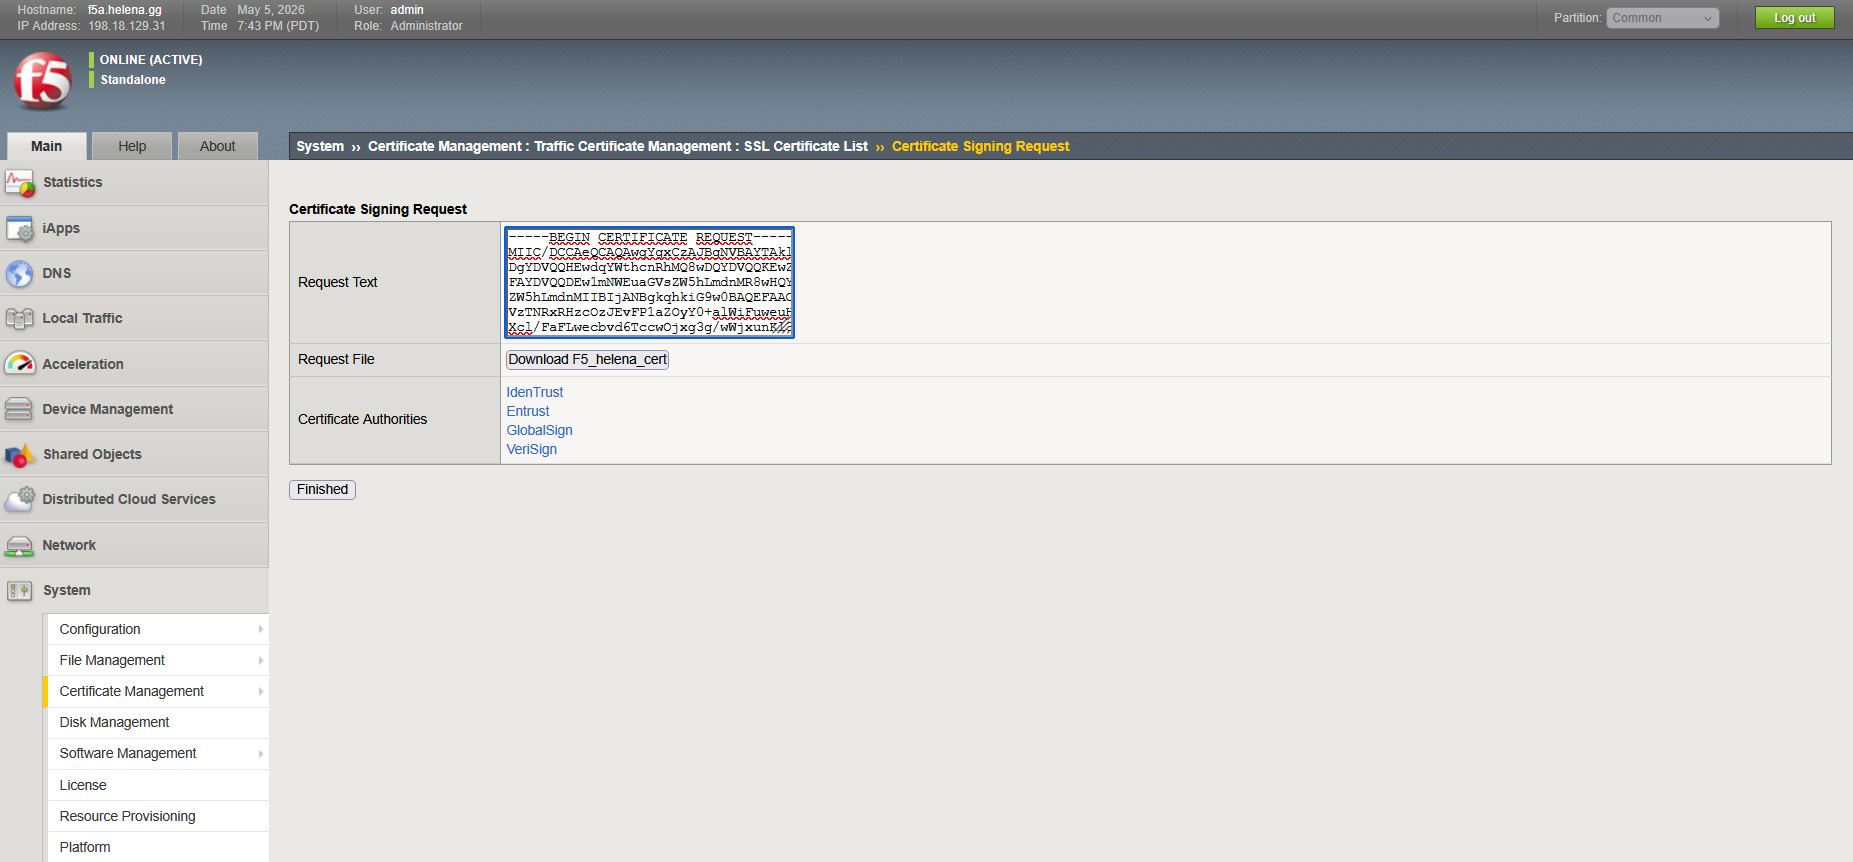
Then sign it on our CA server
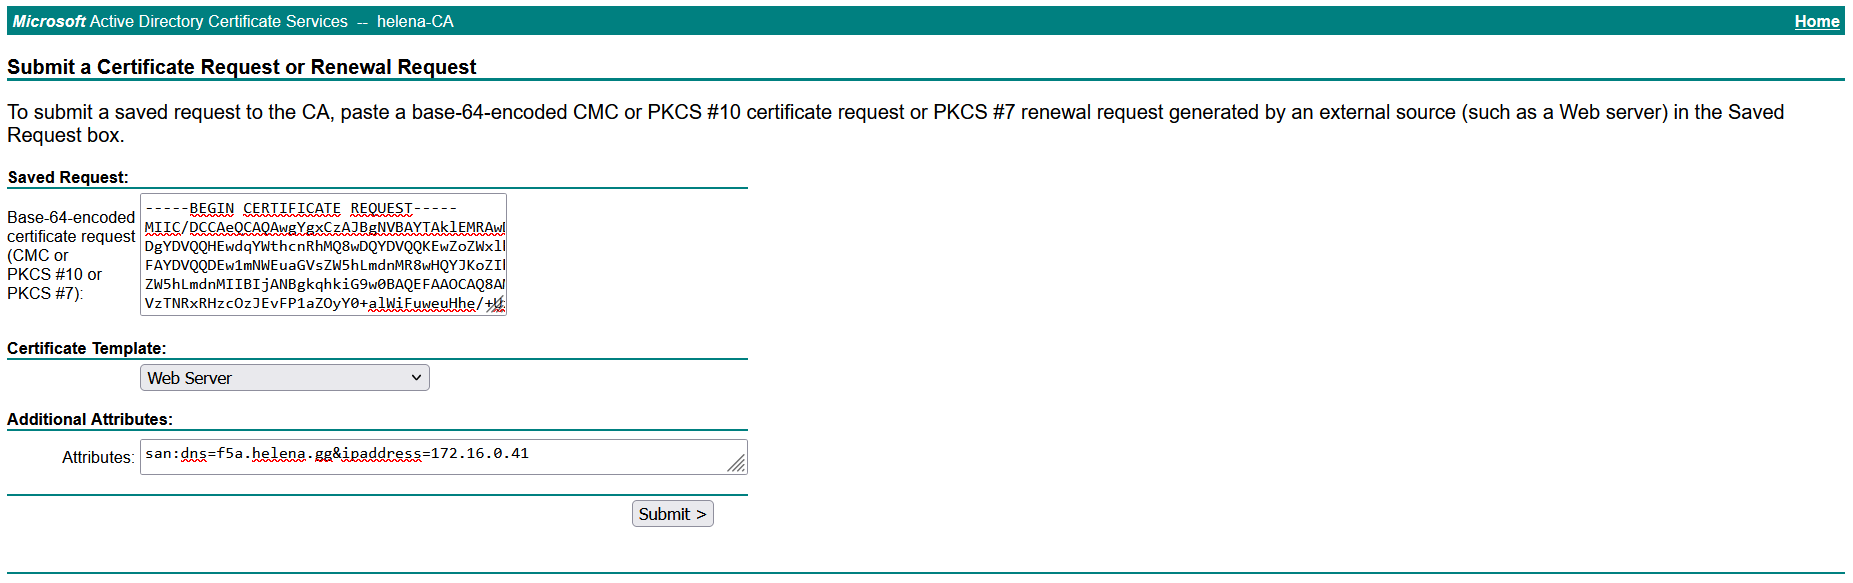
And then import the Certificate to complete the CSR process
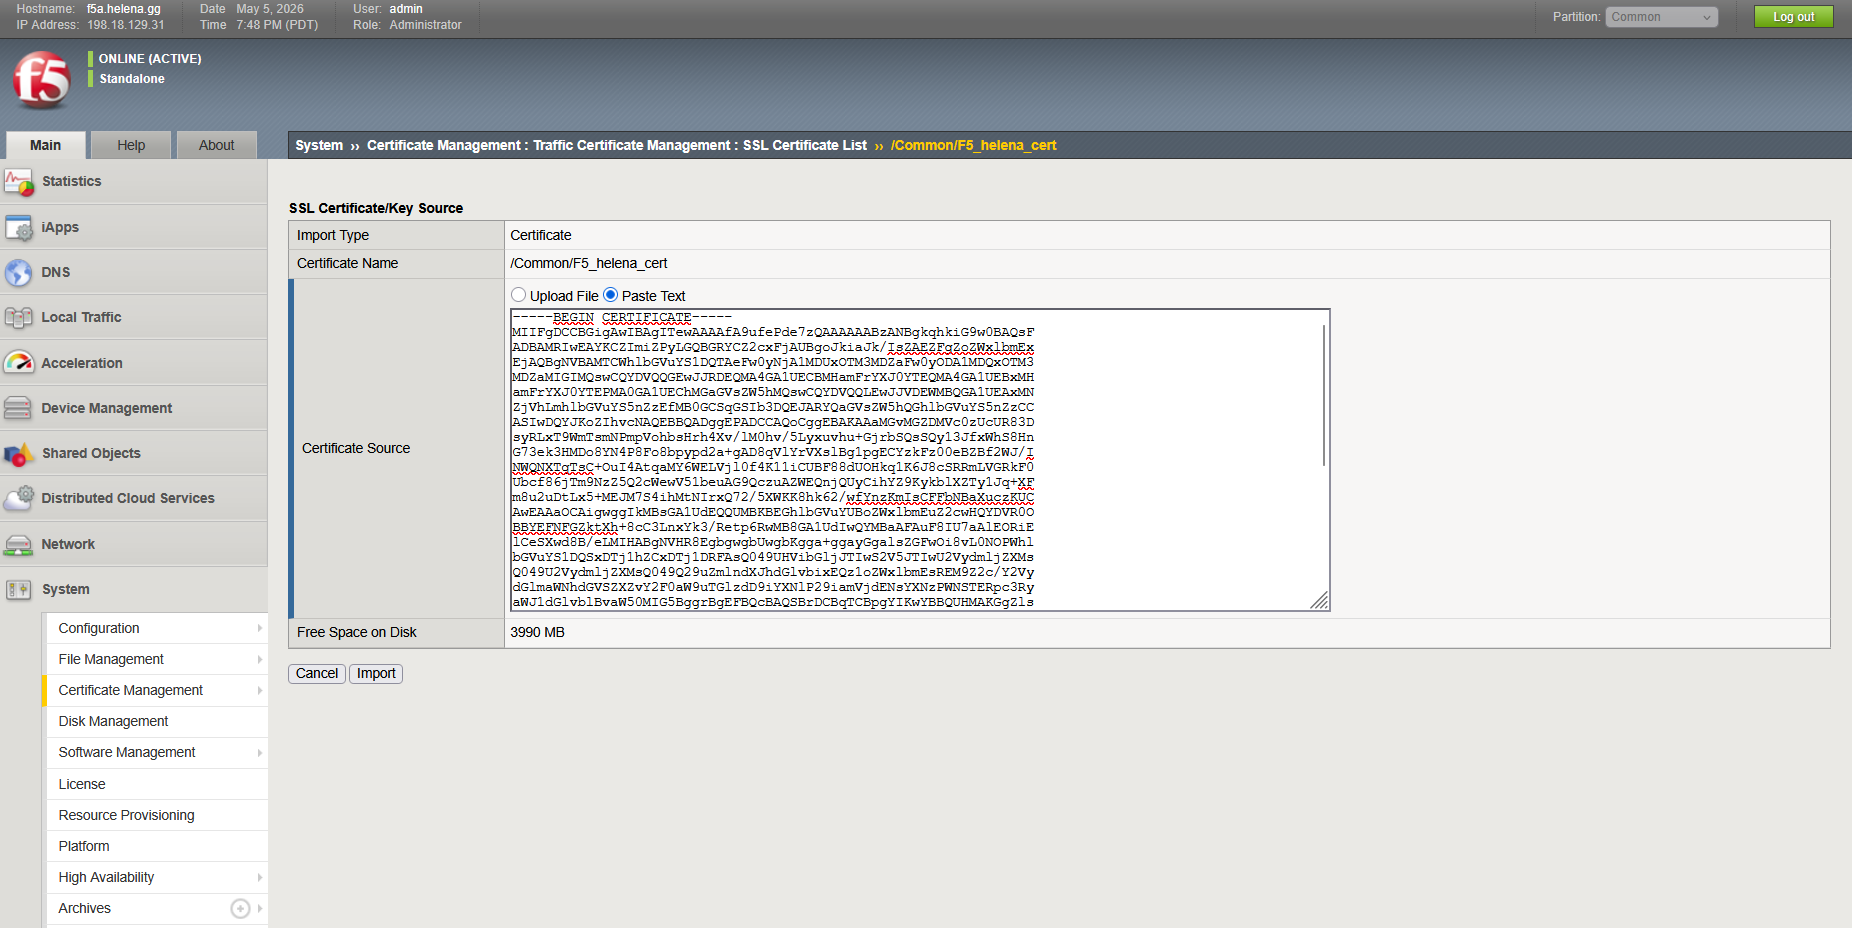
Now we have both our CA Certificate and our Signed Server Certificate
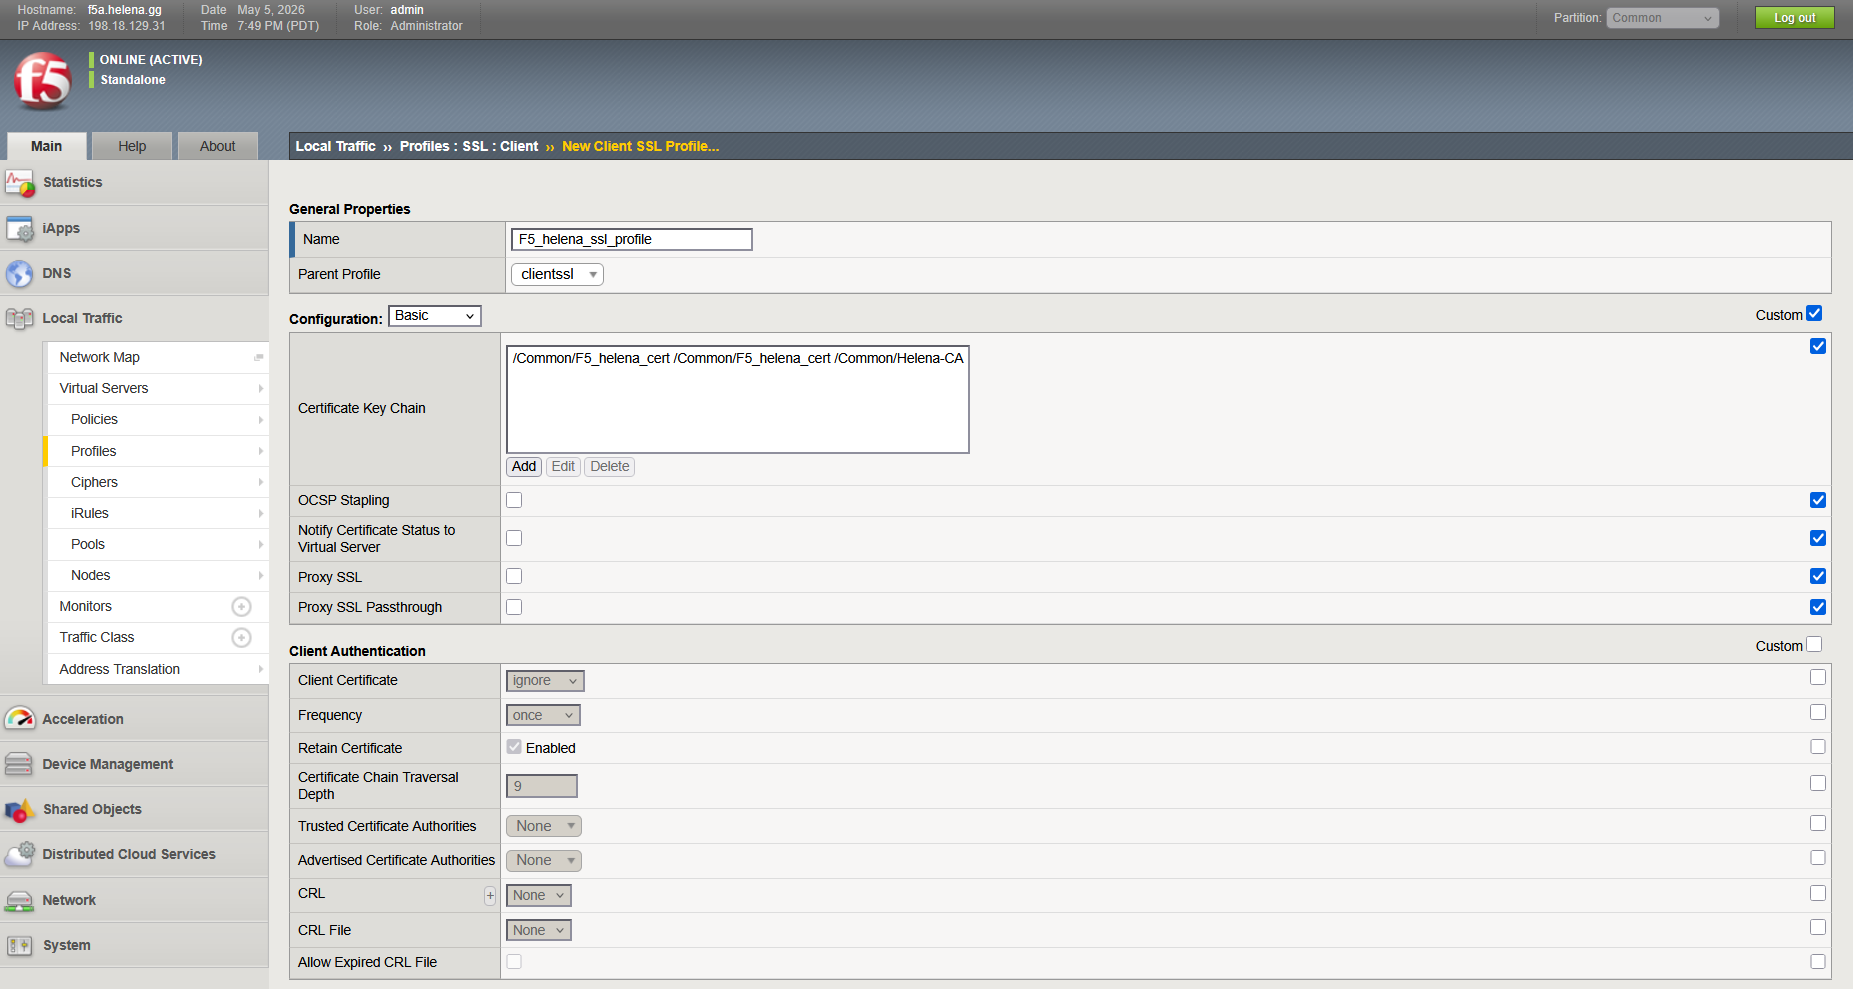
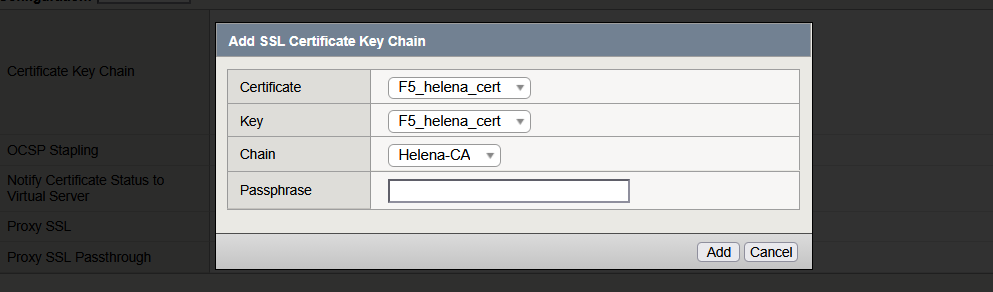
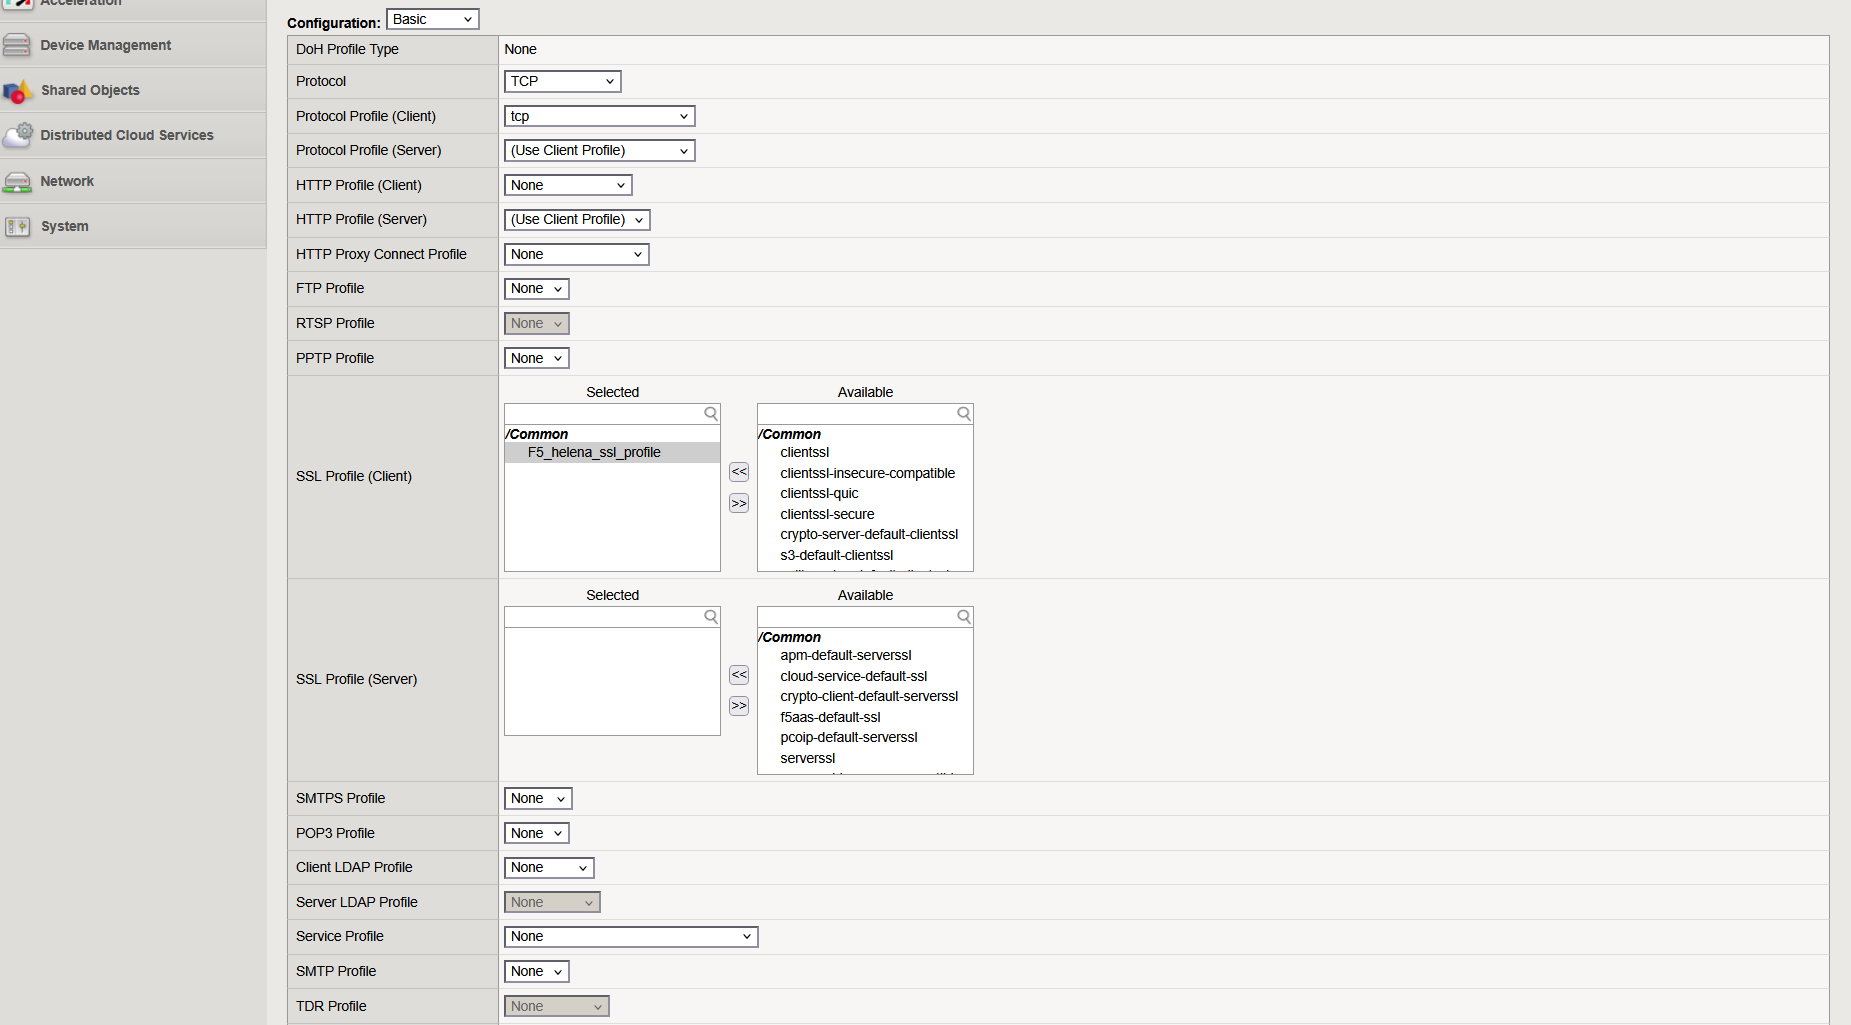
Next we create an SSL Profile on Local Traffic » Profiles, here we point the profile to use the 2 cerificates we configured
And finally now we can enable the HTTPS on our VS by enabling port 443 and selecting our SSL Client Profile
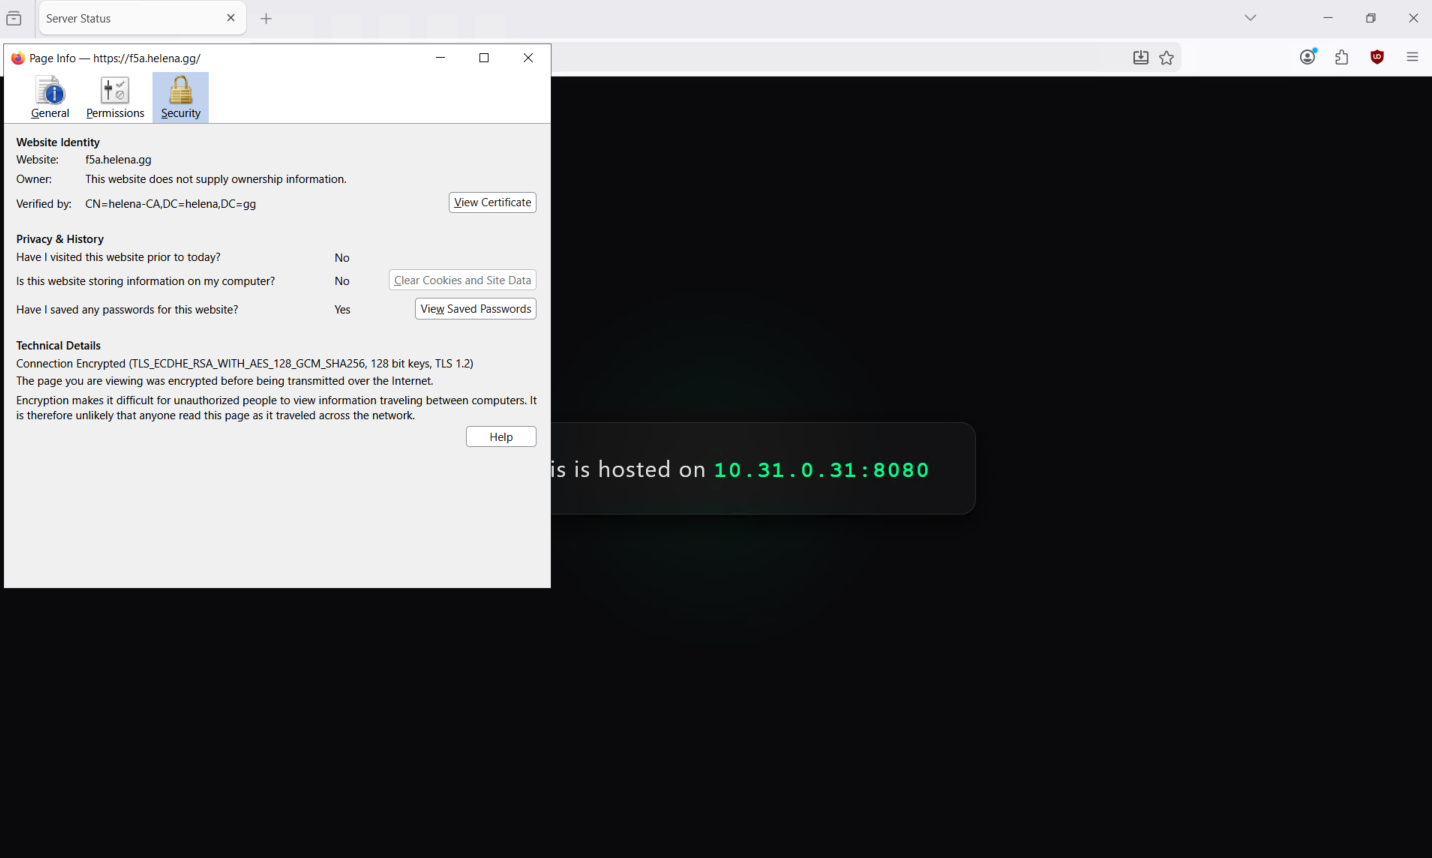
Now we can access our VIP using HTTPS
Cookie Persistence
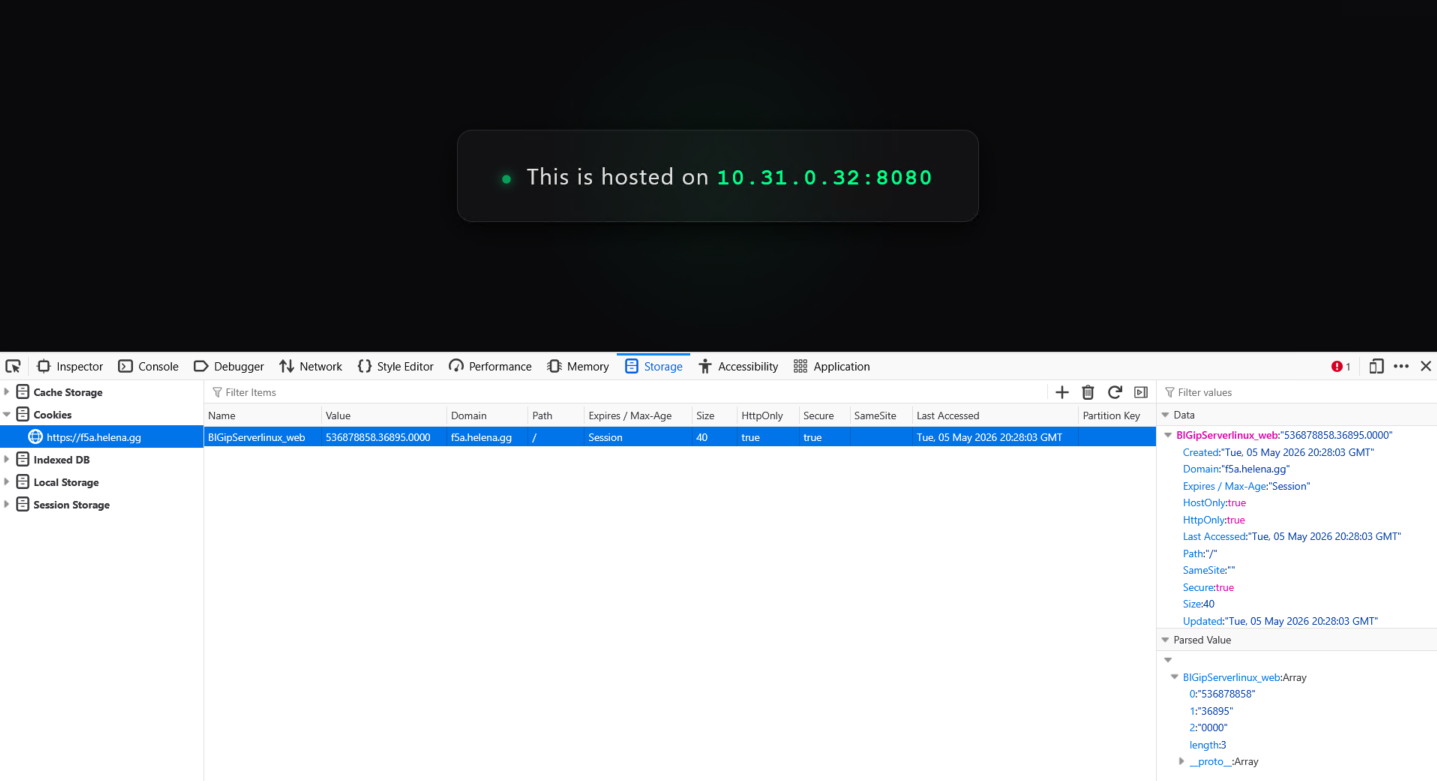
So far our sessios is load balanced everytime we refresh the page, if we want it to stick using browser’s cookie, we can enable it in our VS
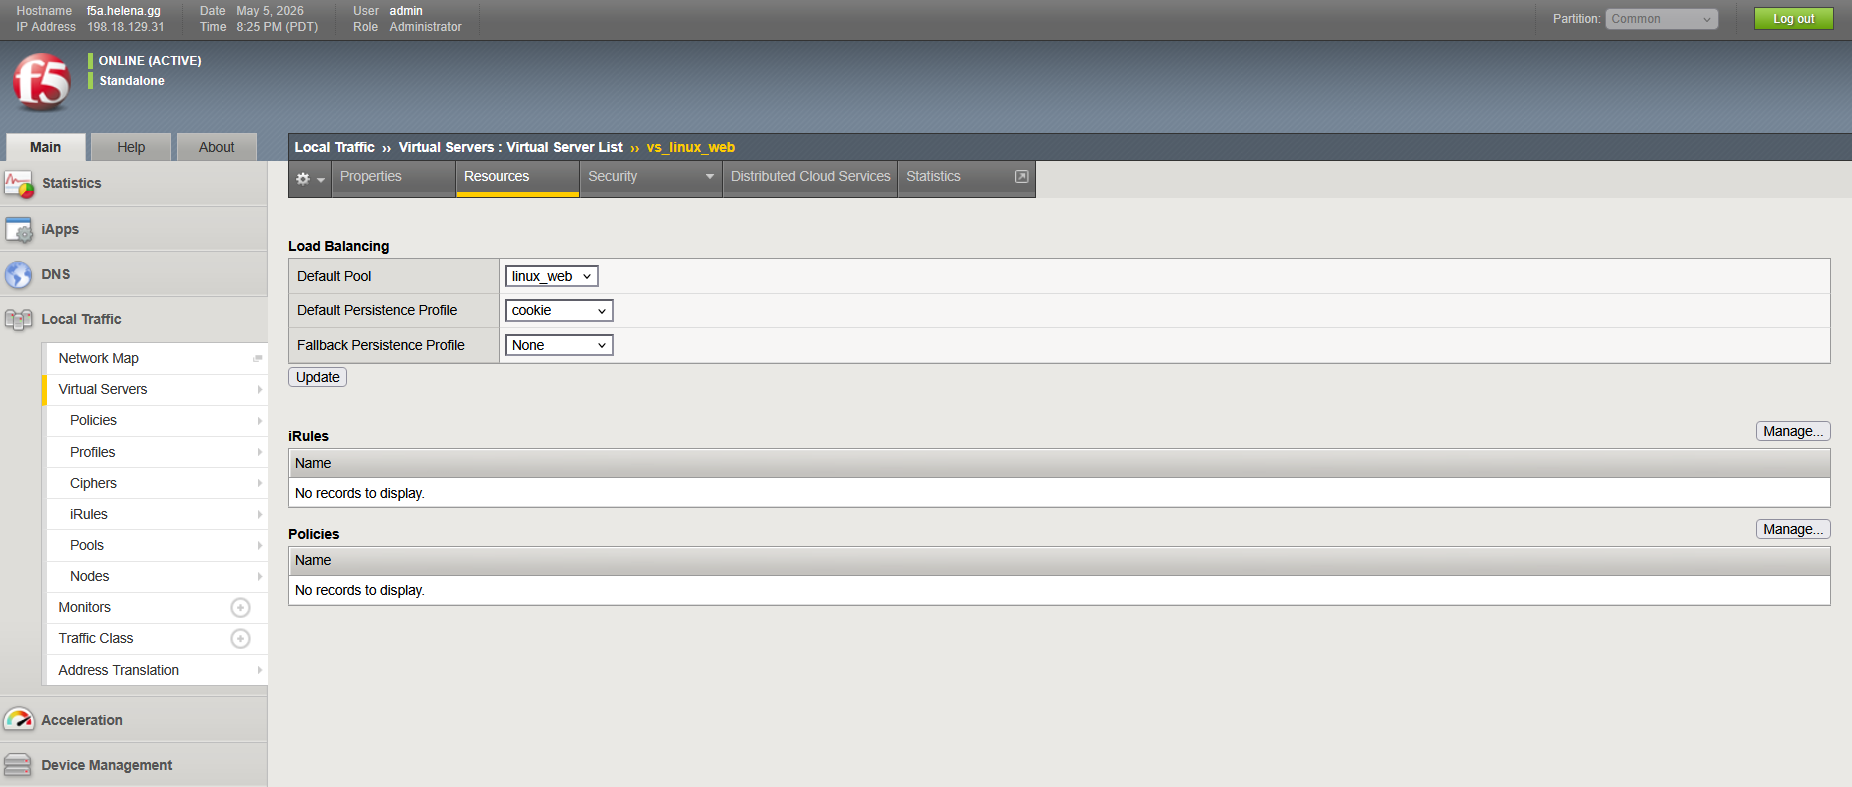
Now no matter how many times we refresh the page, each session will stick to one backend server shown by the cookie on the browser
Auto Redirect
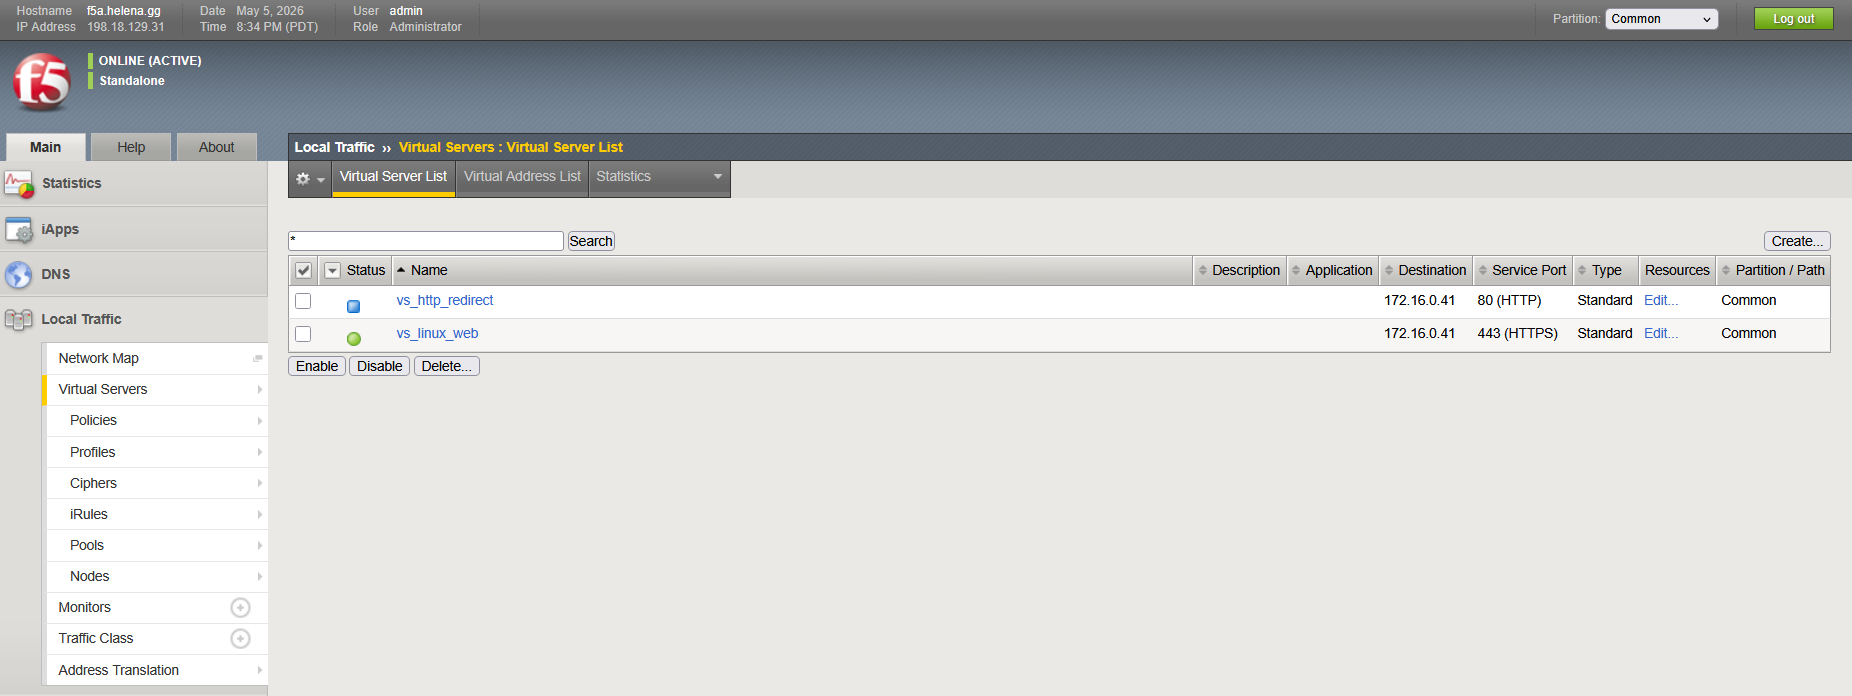
We’d also like to automatically redirect HTTP request to HTTPS, to do that we will create a new VS with same VIP, but using port 80

On the Resources tab, we enable iRules “_sys_https_redirect”

Now we have 2 VSs, one listening on port 80 and redirects it to port 443, and the other one that accepts it on port 443
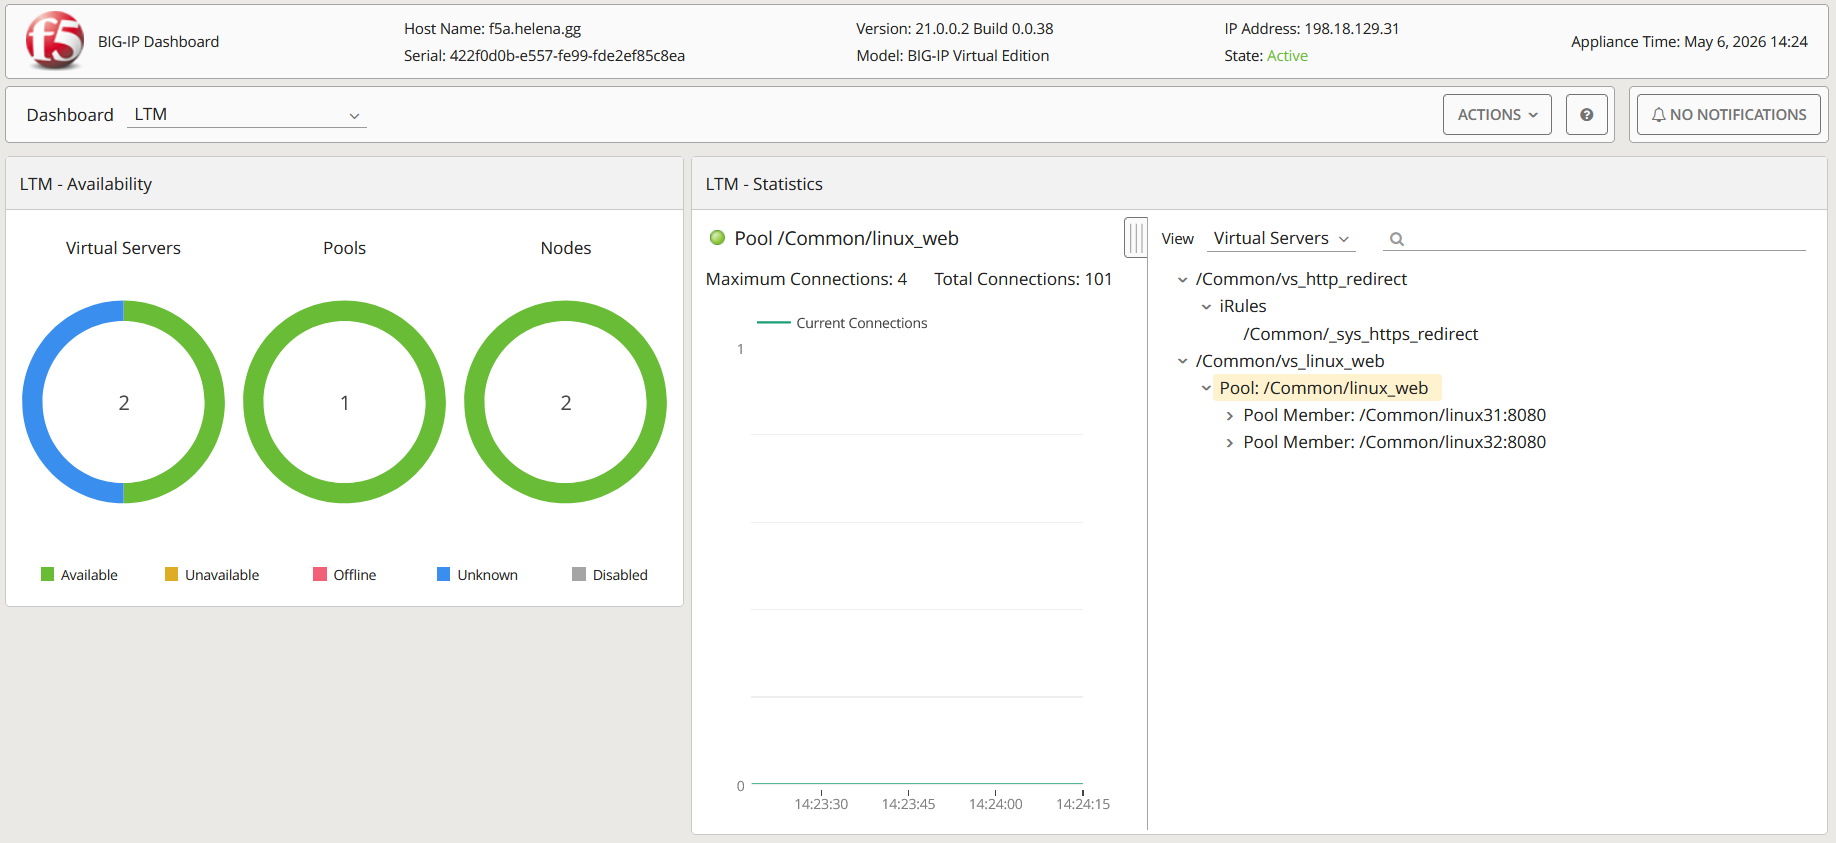
Lastly, here’s the monitoring status of our LTM