In our previous load balancing labs (LTM and GTM), we successfully routed traffic across our network. However, high-availability routing alone does not protect our services from web exploits or unauthorized network access. In this lab, we build a multi-layered security infrastructure. We will start by exposing our web server to simulate common web attacks, configure F5 ASM (Application Security Manager / WAF) to block Layer 7 exploits, deploy F5 AFM (Advanced Firewall Manager) to control Layer 3/4 network boundaries, and finally establish an F5 Bot Defense profile to block automated script scanners.
Pre-WAF Attack Verification
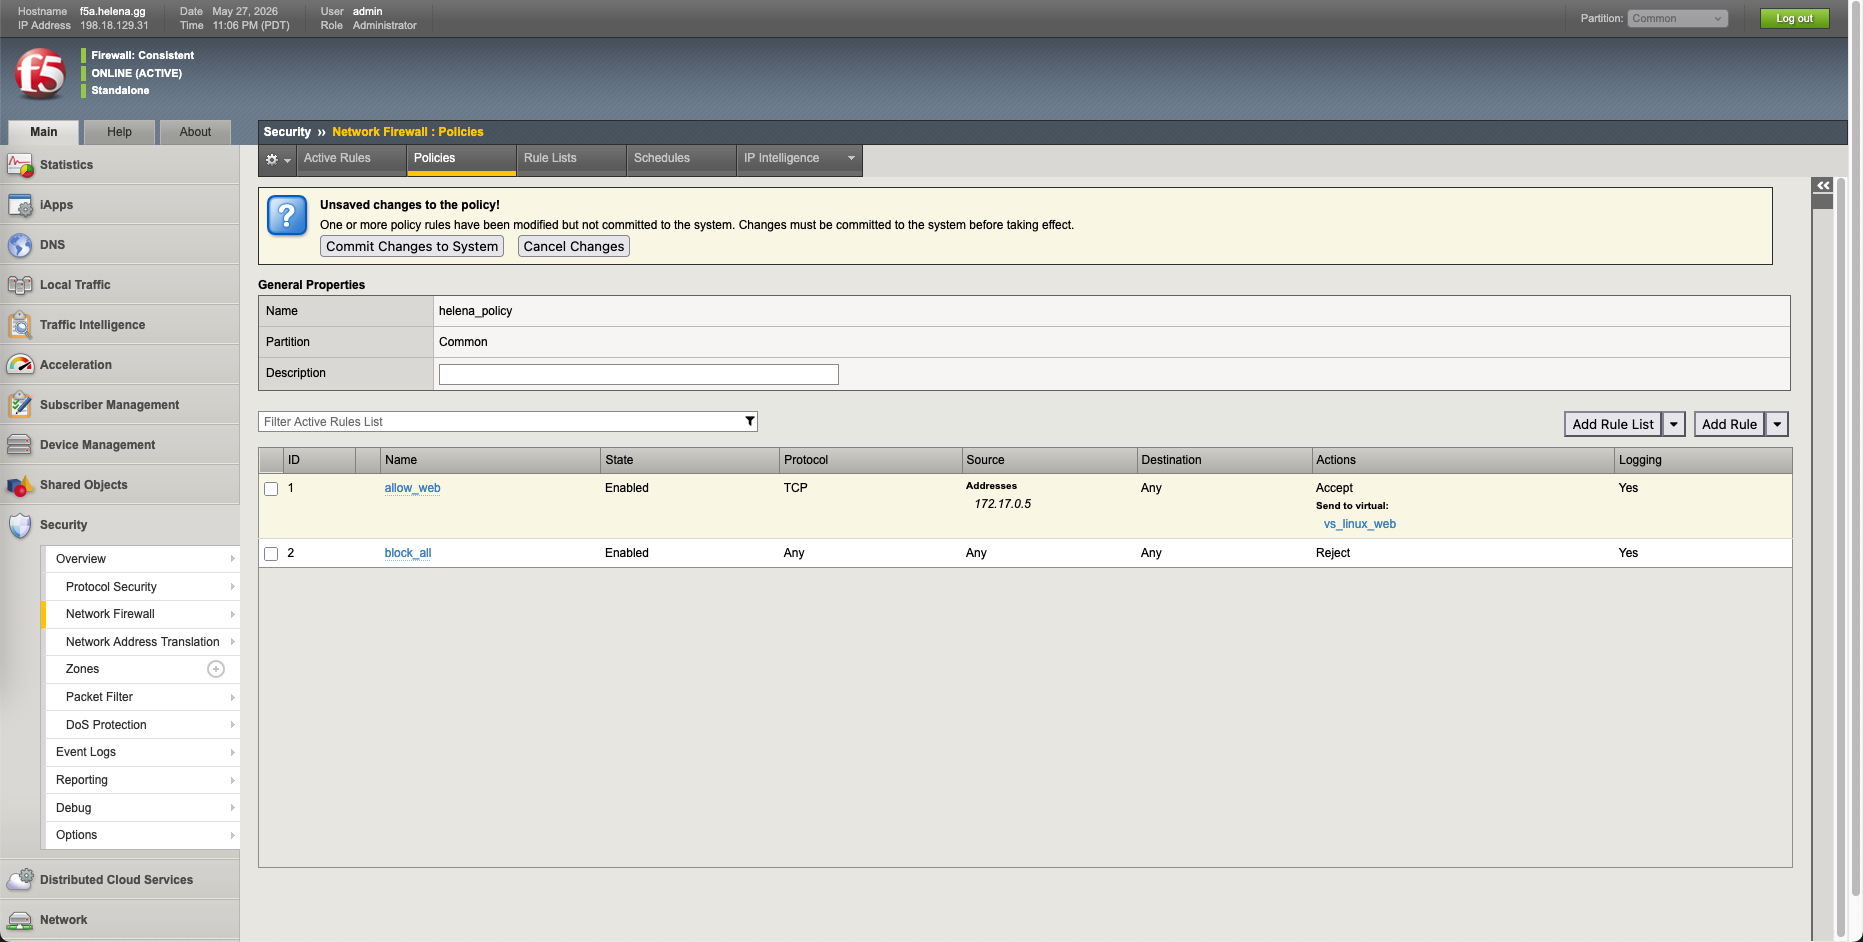
Before deploying any security controls, we perform active penetration testing from our Kali Linux attacker machine (172.17.0.5) against our HTTPS Virtual Server VIP (172.16.0.41) to verify that the backend is fully vulnerable.
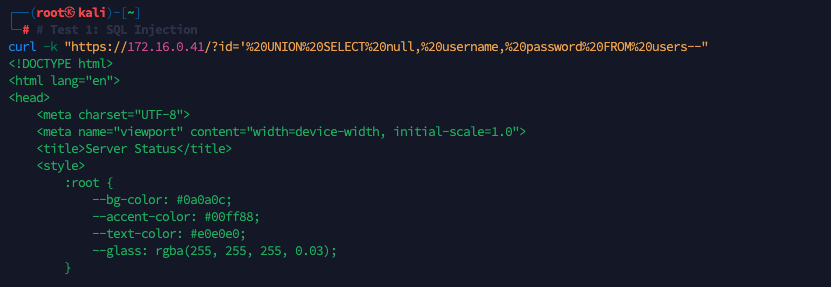
First, we perform an SQL Injection attack via a query parameter:
1
curl -k "https://172.16.0.41/?id='%20UNI0N%20SELECT%20nul1,%20username,%20passwordi20FROM%20users--"
The request successfully reaches the backend database and returns our application’s web content.
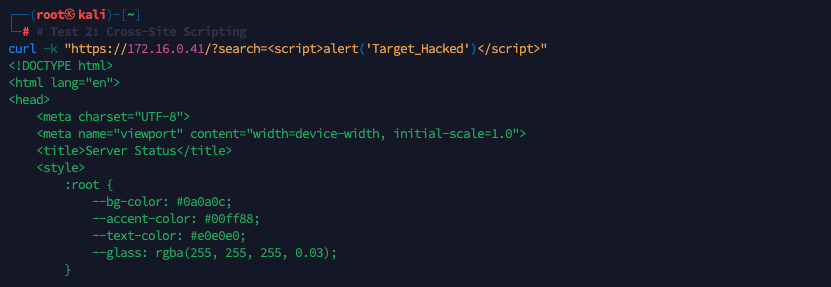
Next, we run a Cross-Site Scripting (XSS) attack payload:
1
curl -k "https://172.16.0.41/?search=<script>alert('Target_Hacked')</script>"
The server accepts the request and responds with standard web page source code.
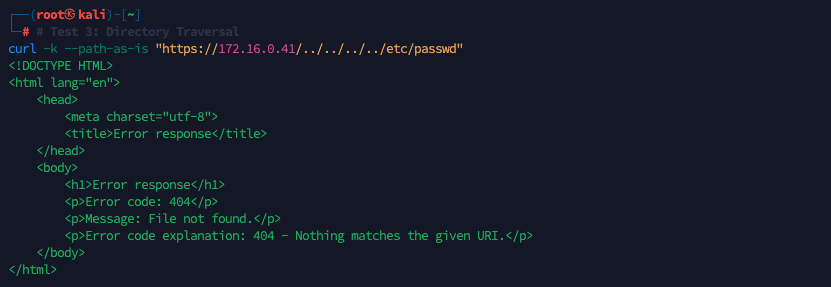
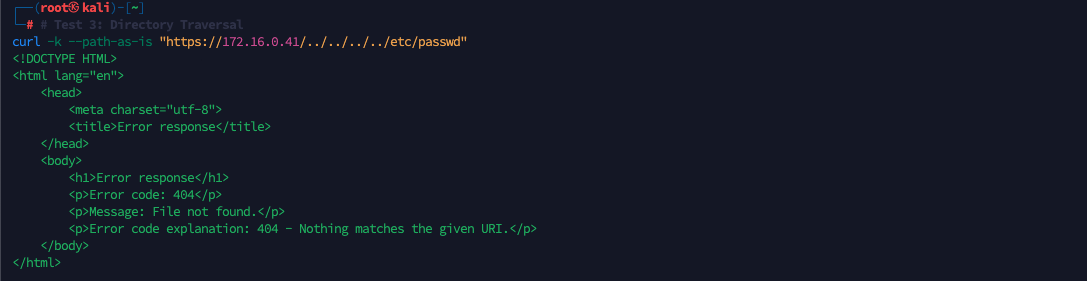
Finally, we simulate a Directory Traversal attempt to access system files:
1
curl -k --path-as-is "https://172.16.0.41/./../.././etc/passwd"
The request bypasses all intermediate devices, reaching our backend python web server directly (which returns its native 404 File Not Found response).
Deploying F5 ASM (WAF)
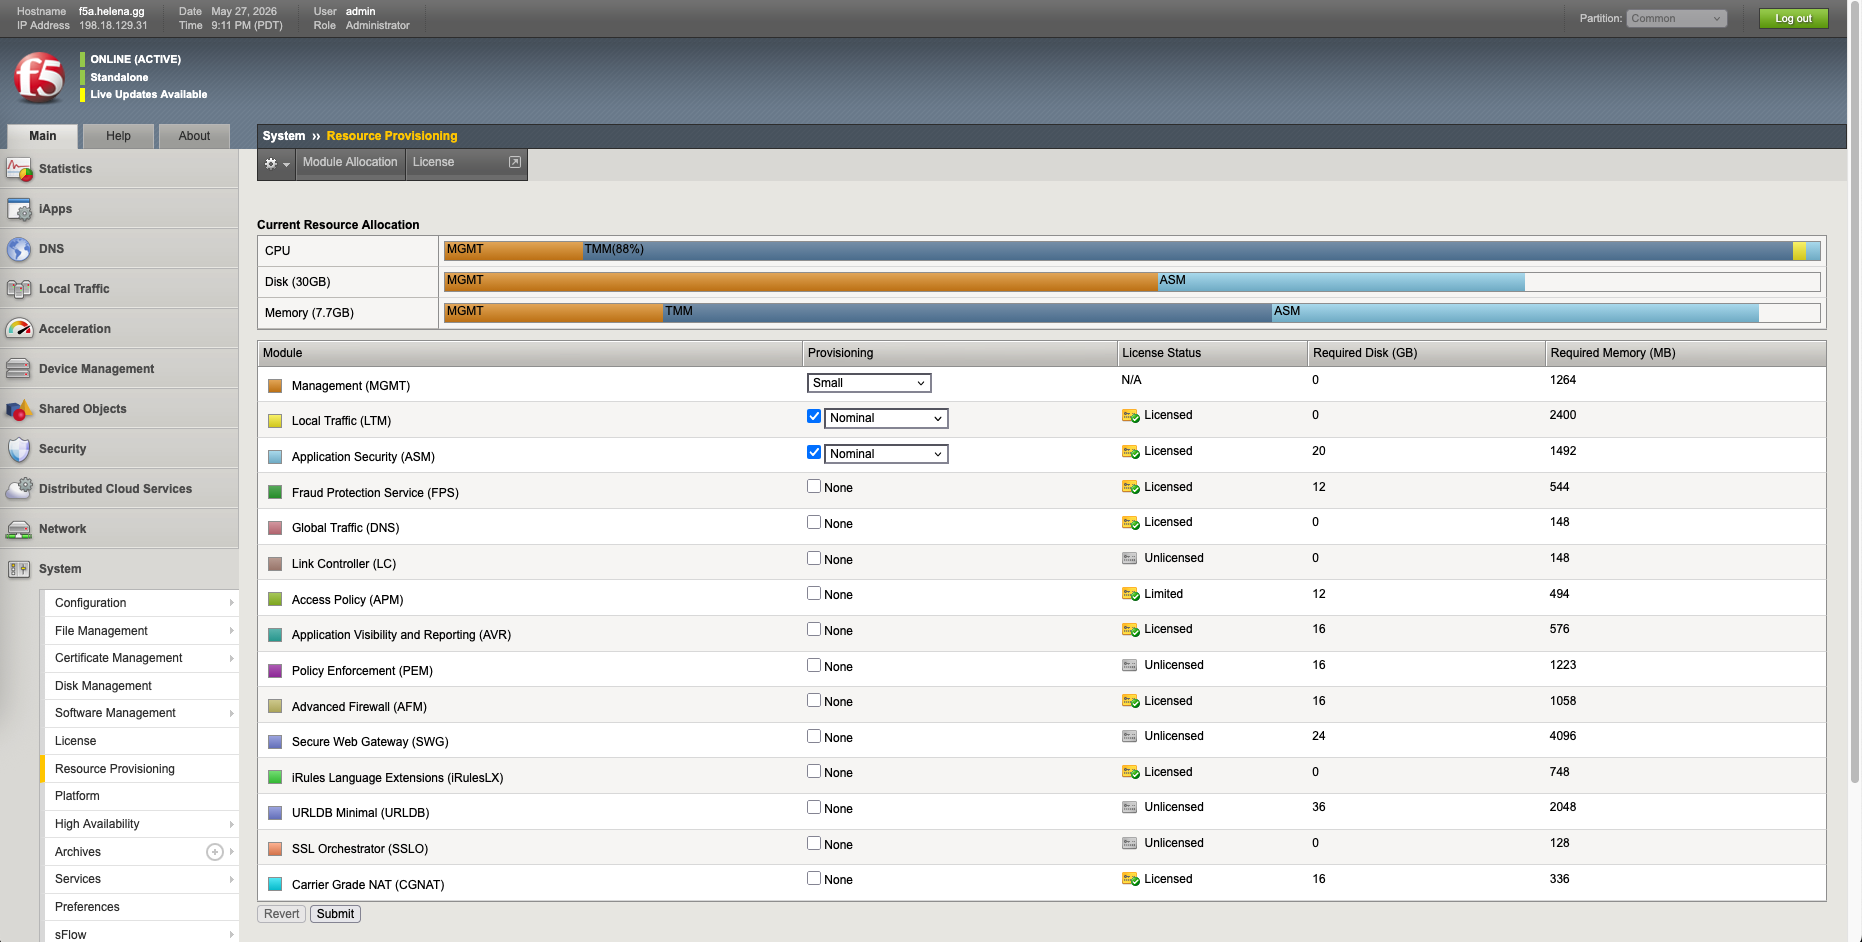
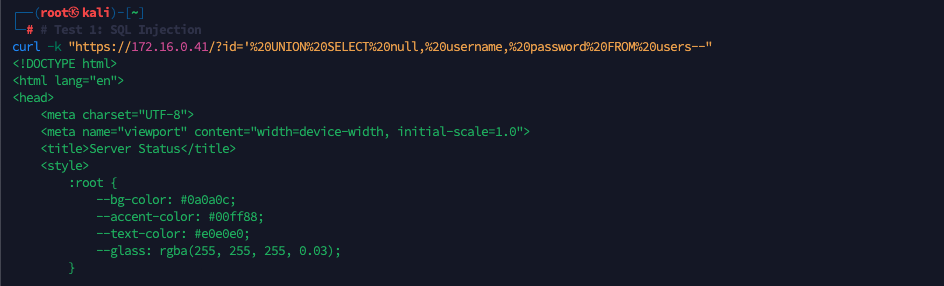
With the backend’s vulnerabilities exposed, we deploy F5 ASM to block Layer 7 exploits. First we enable the AFM Resource
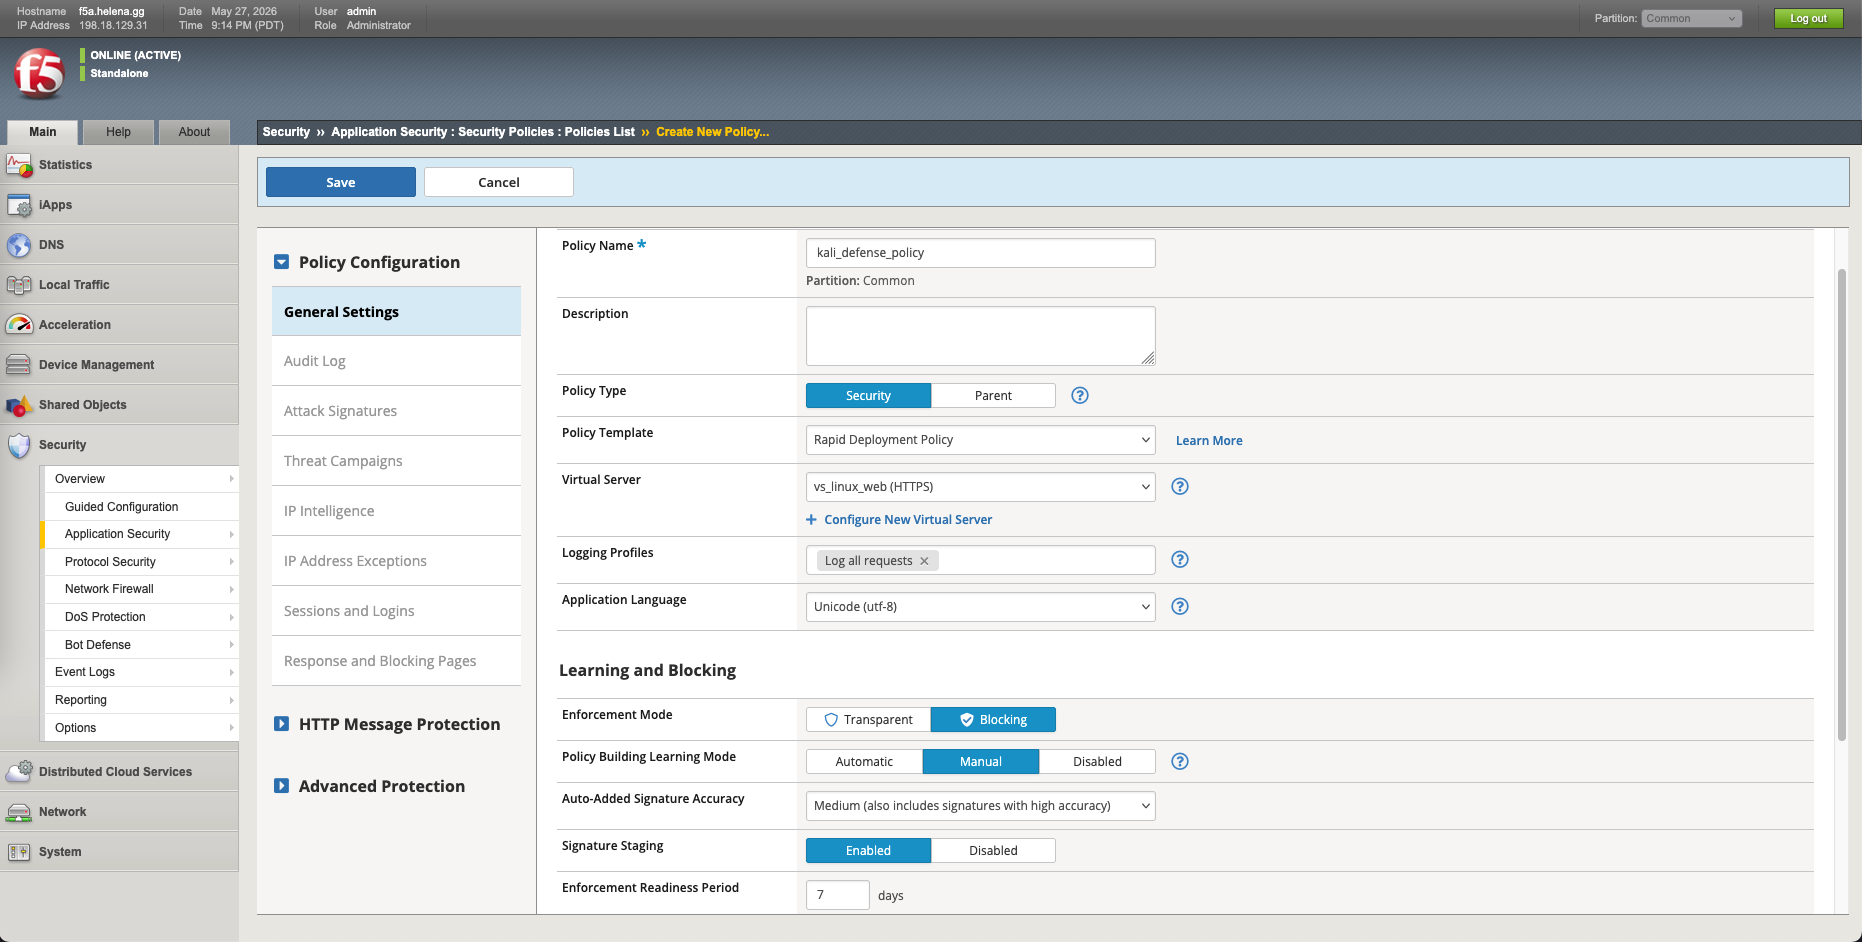
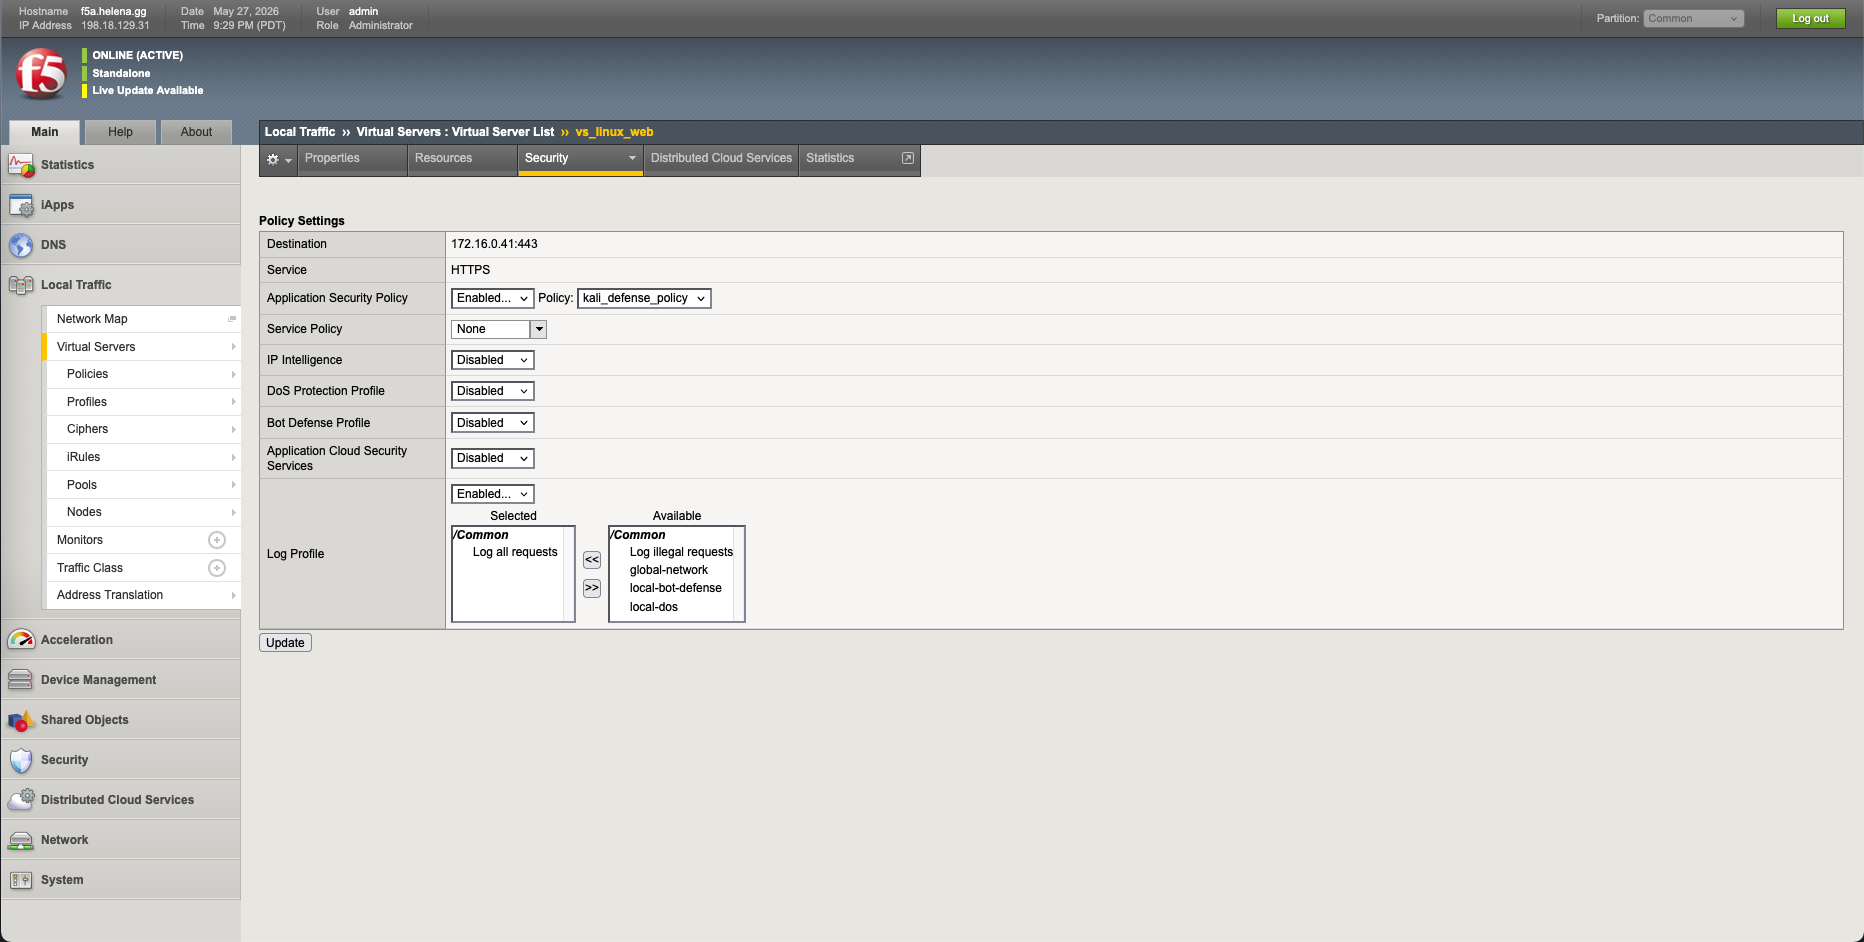
Under Security » Application Security, we create a new WAF policy named kali_defense_policy associated with our virtual server vs_linux_web. We configure our initial policy signatures. For immediate protection, we configure the WAF Enforcement Mode to Blocking and set the Learning Mode to Manual.
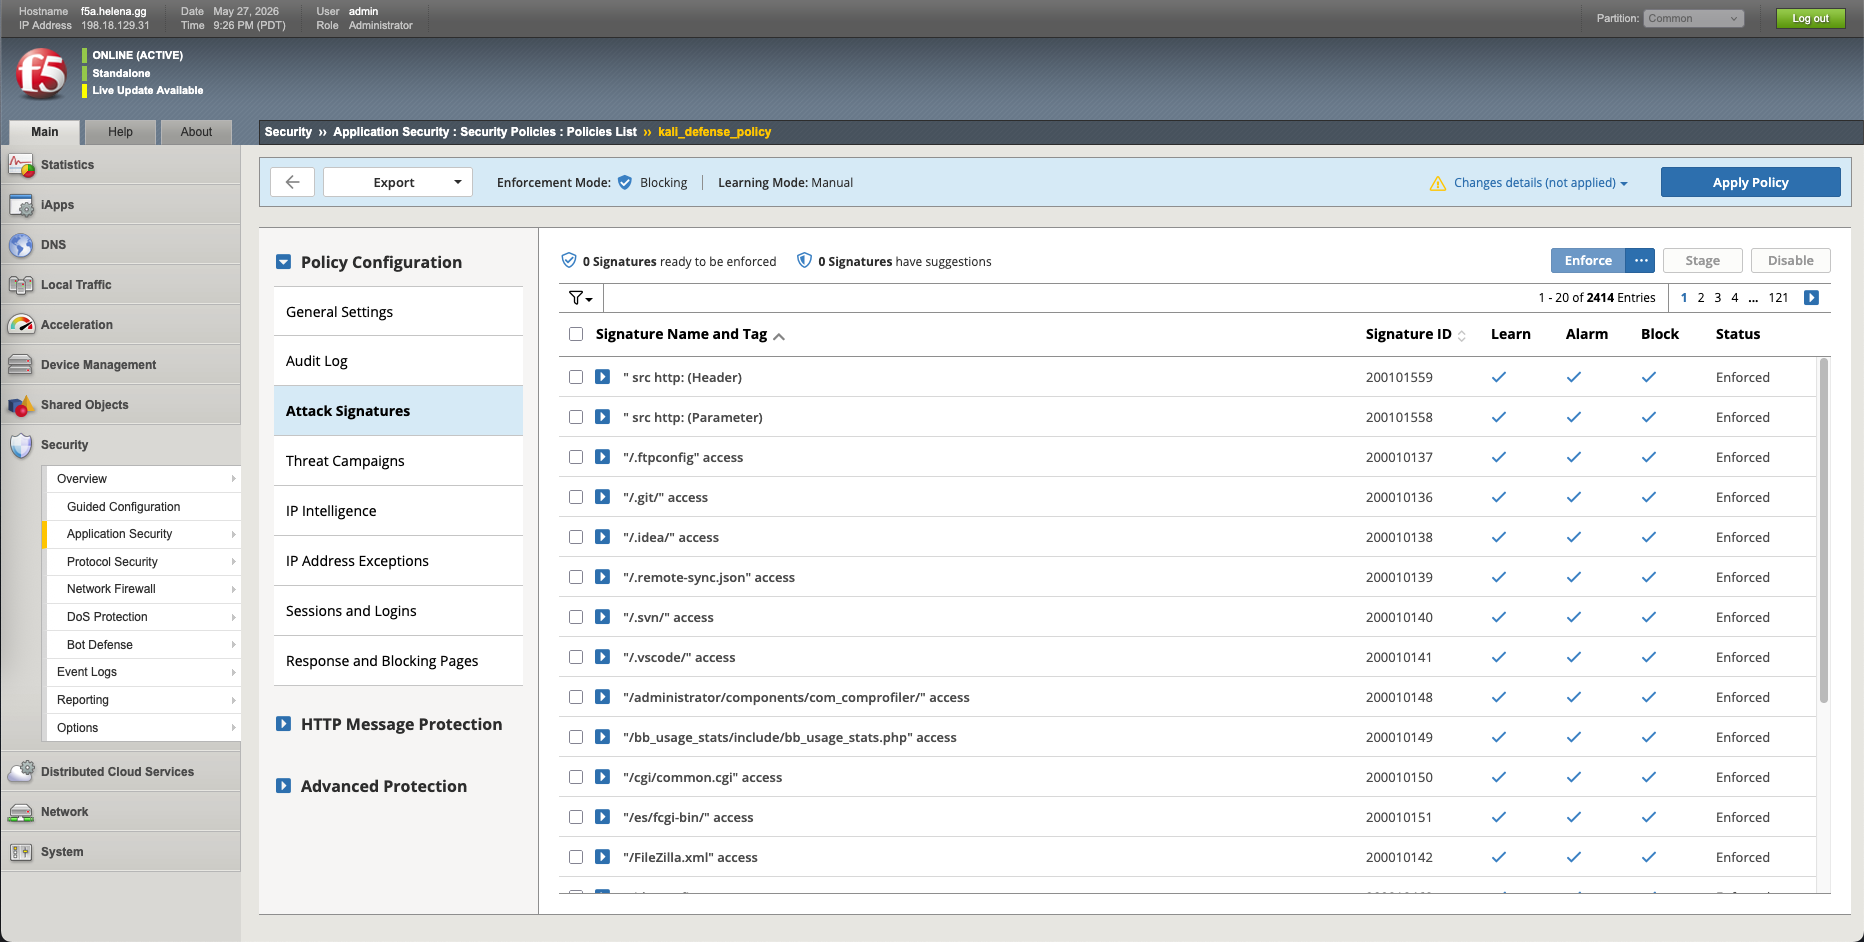
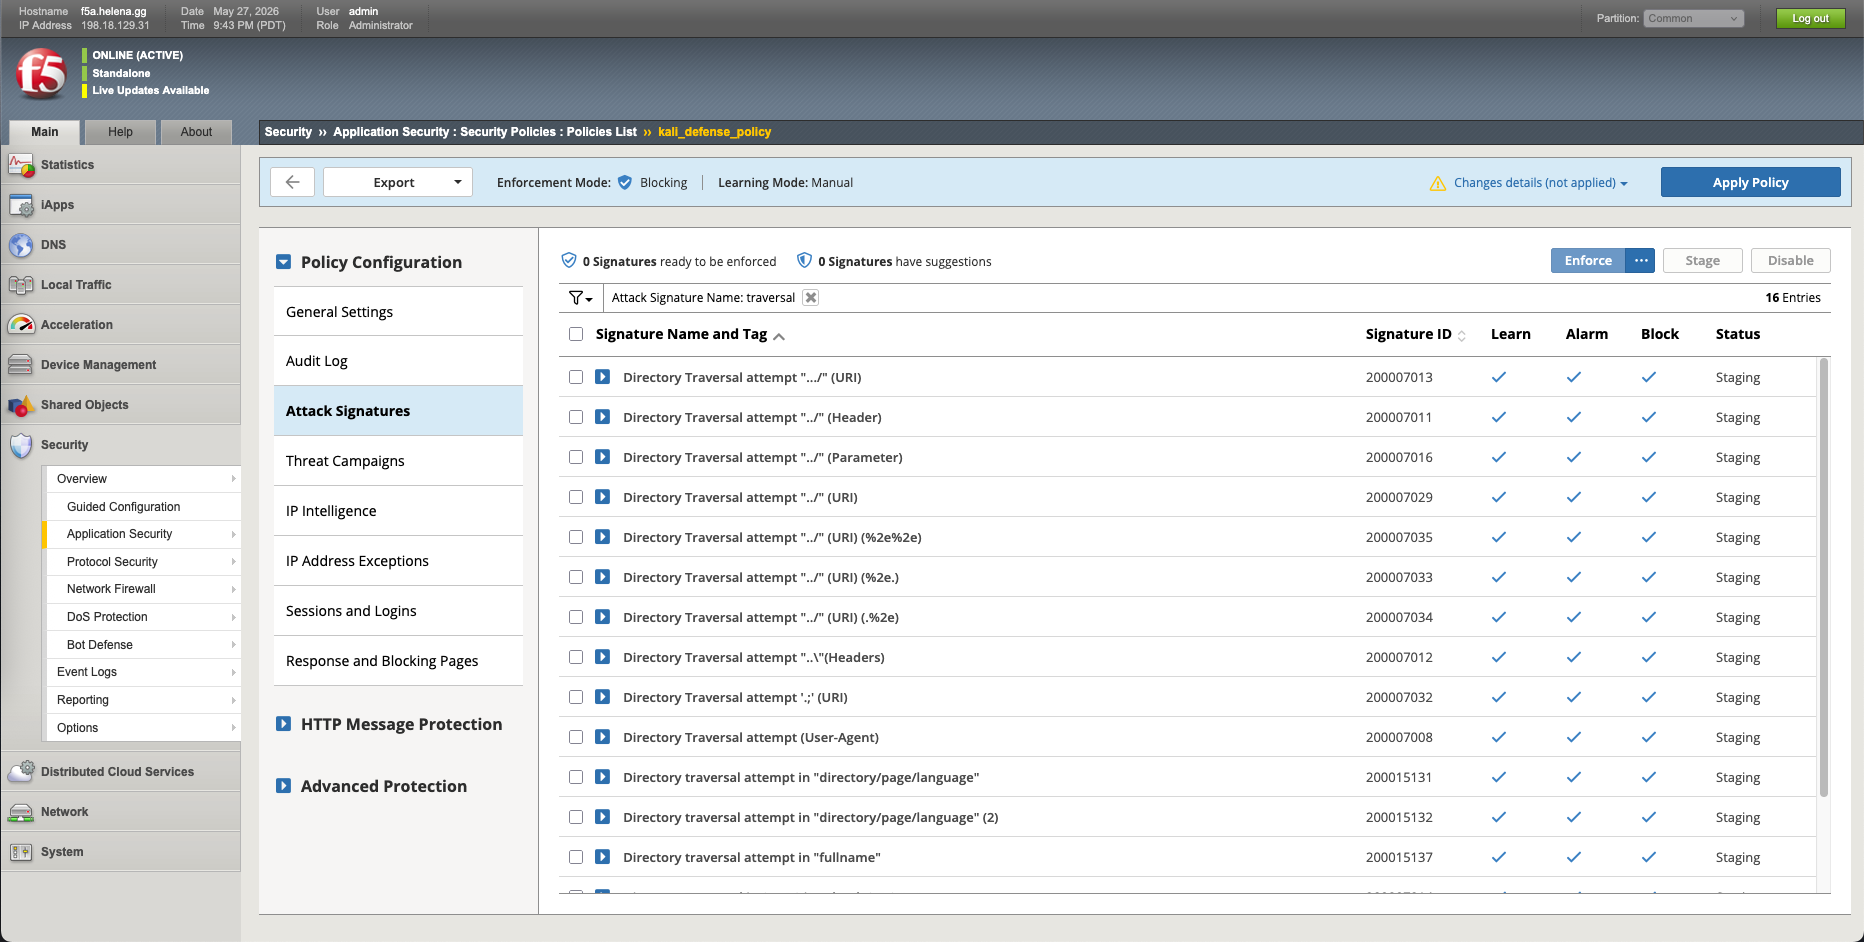
Then we enforce all the Attack Signatures
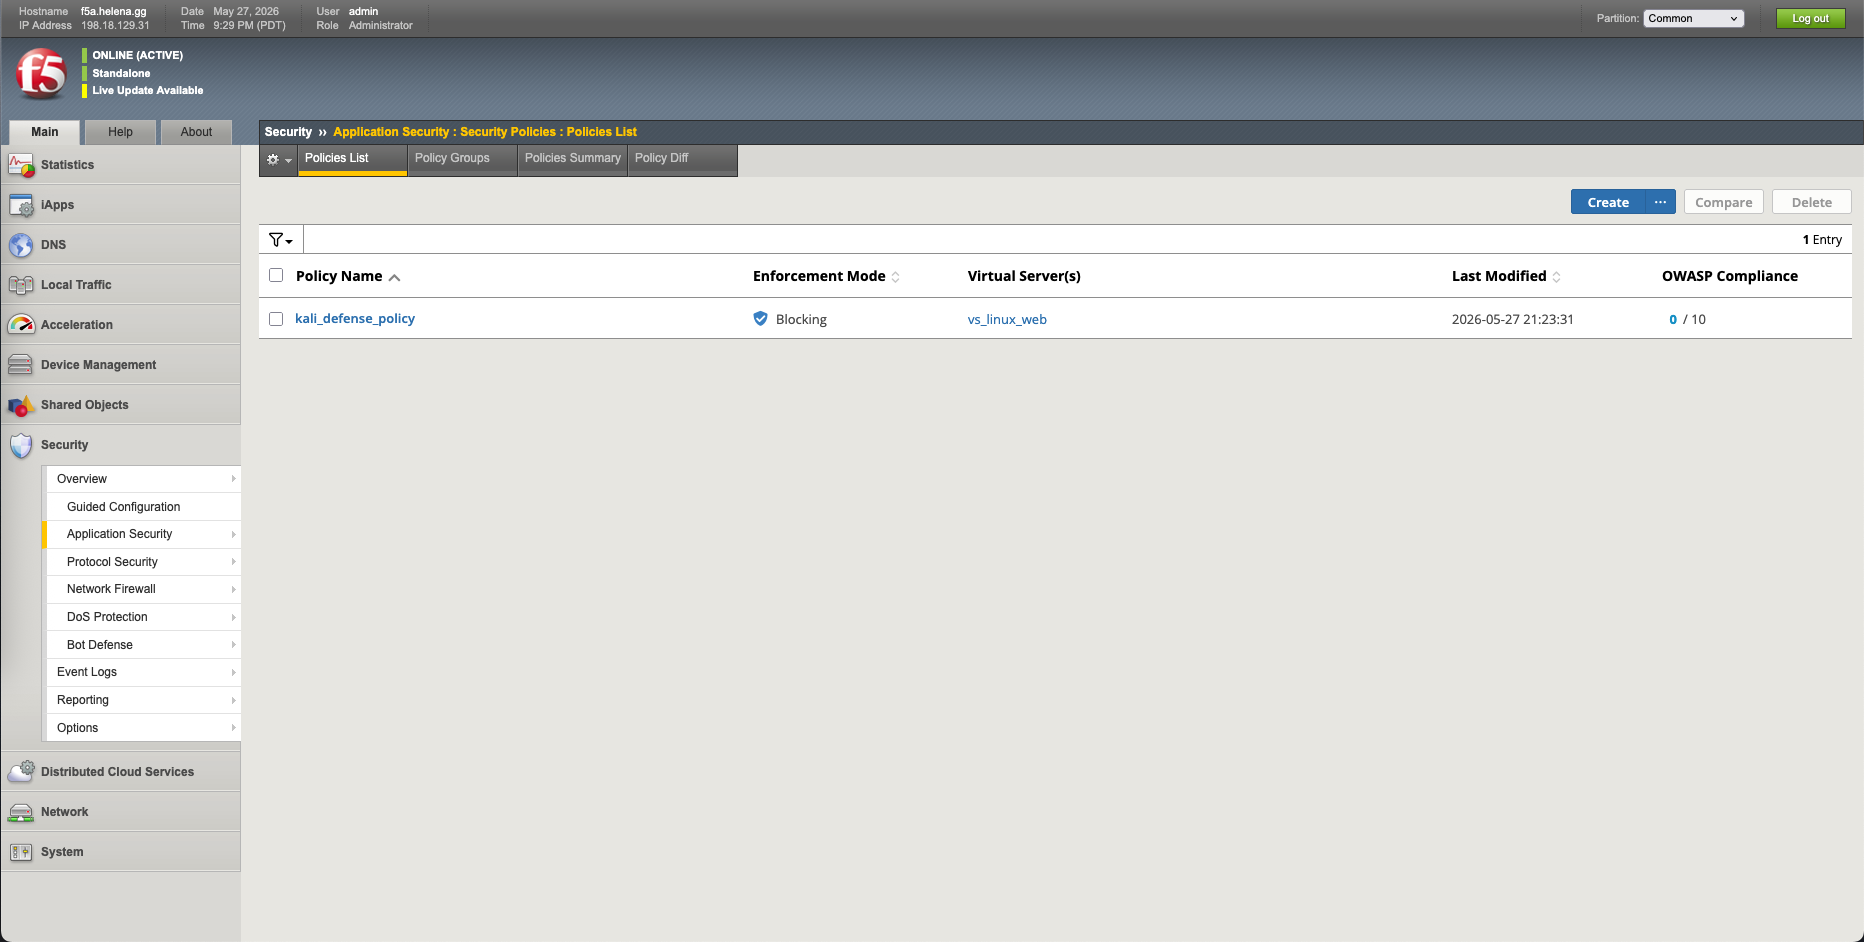
We verify that our new kali_defense_policy is active and successfully associated with our HTTPS virtual server.
Verifying Active WAF Blocking
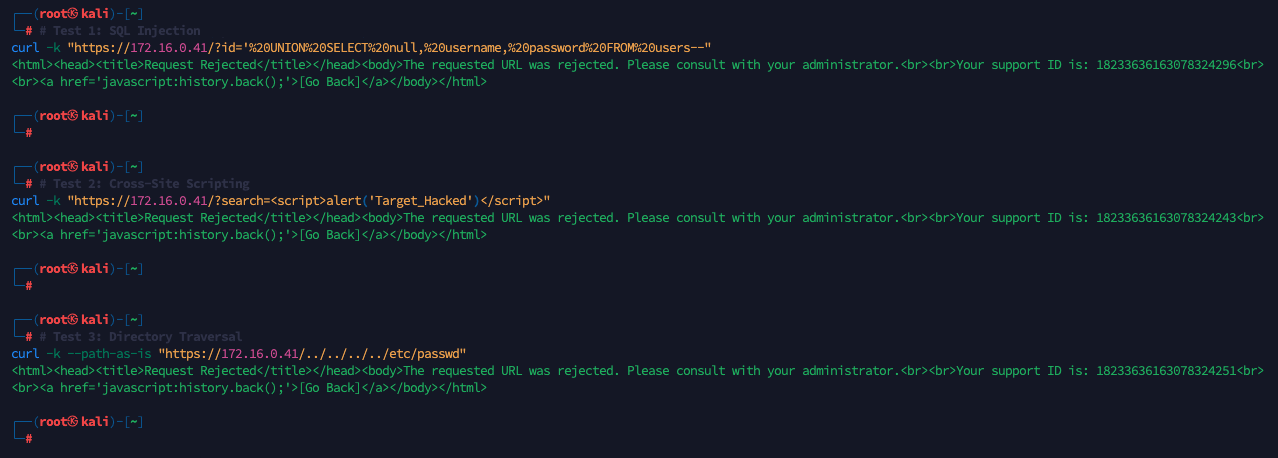
With F5 ASM active, we execute our previous Kali Linux exploits again. All attacks are immediately intercepted. F5 ASM drops the connections and serves the standard WAF rejection page with unique Support IDs:
- SQL Injection: Blocked (Support ID:
18233636163078324296). - Cross-Site Scripting (XSS): Blocked (Support ID:
18233636163078324243). - Directory Traversal: Blocked (Support ID:
18233636163078324251).
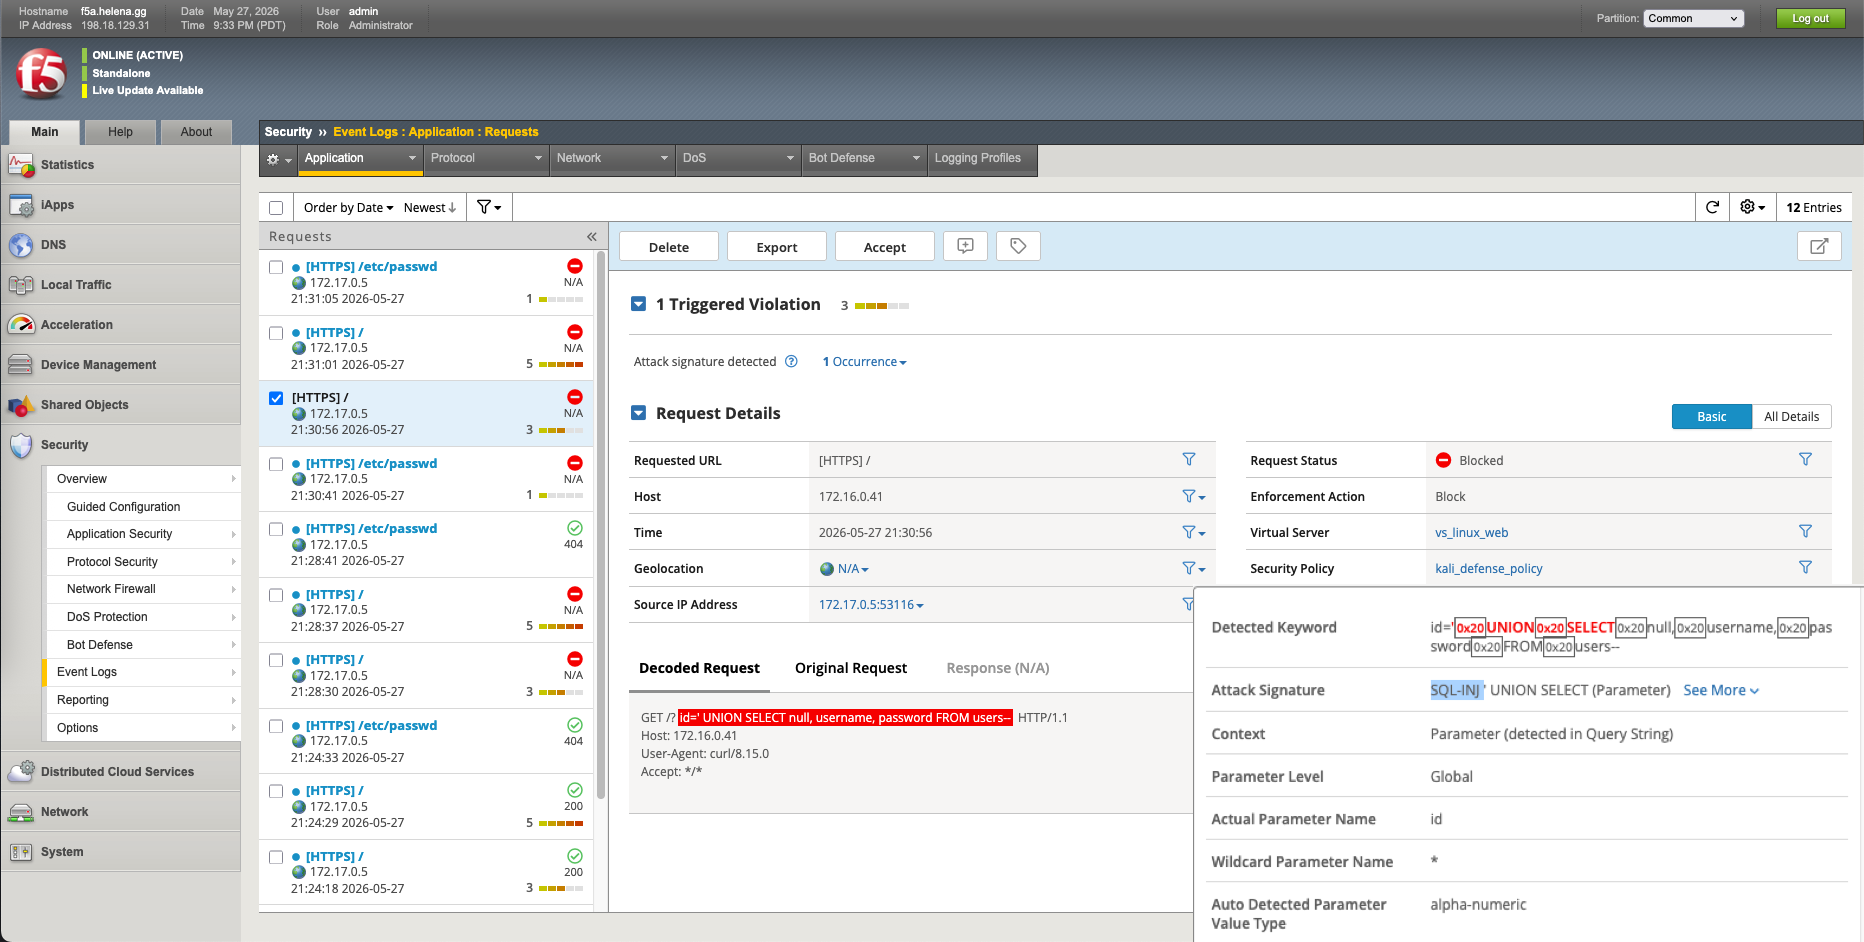
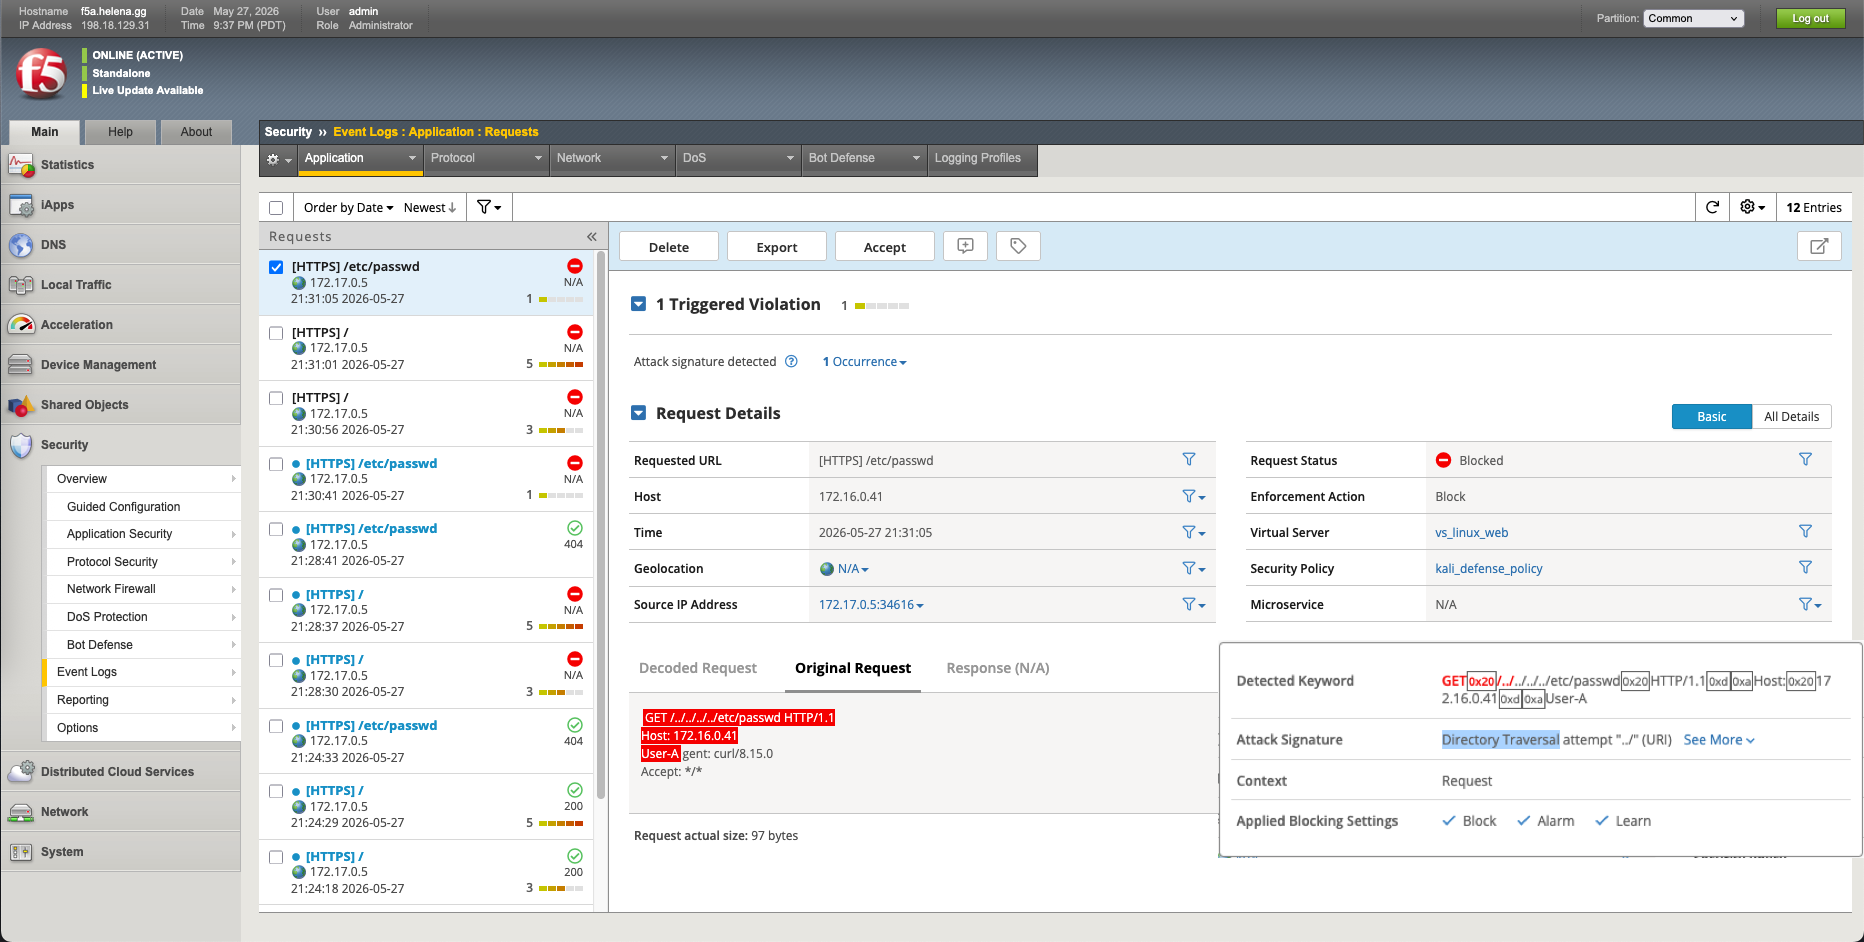
We navigate to the WAF Event Logs to inspect the detailed alerts generated by each block:
- The SQL Injection block triggers a
SQL-INJ ' UNION SELECTparameter signature match.
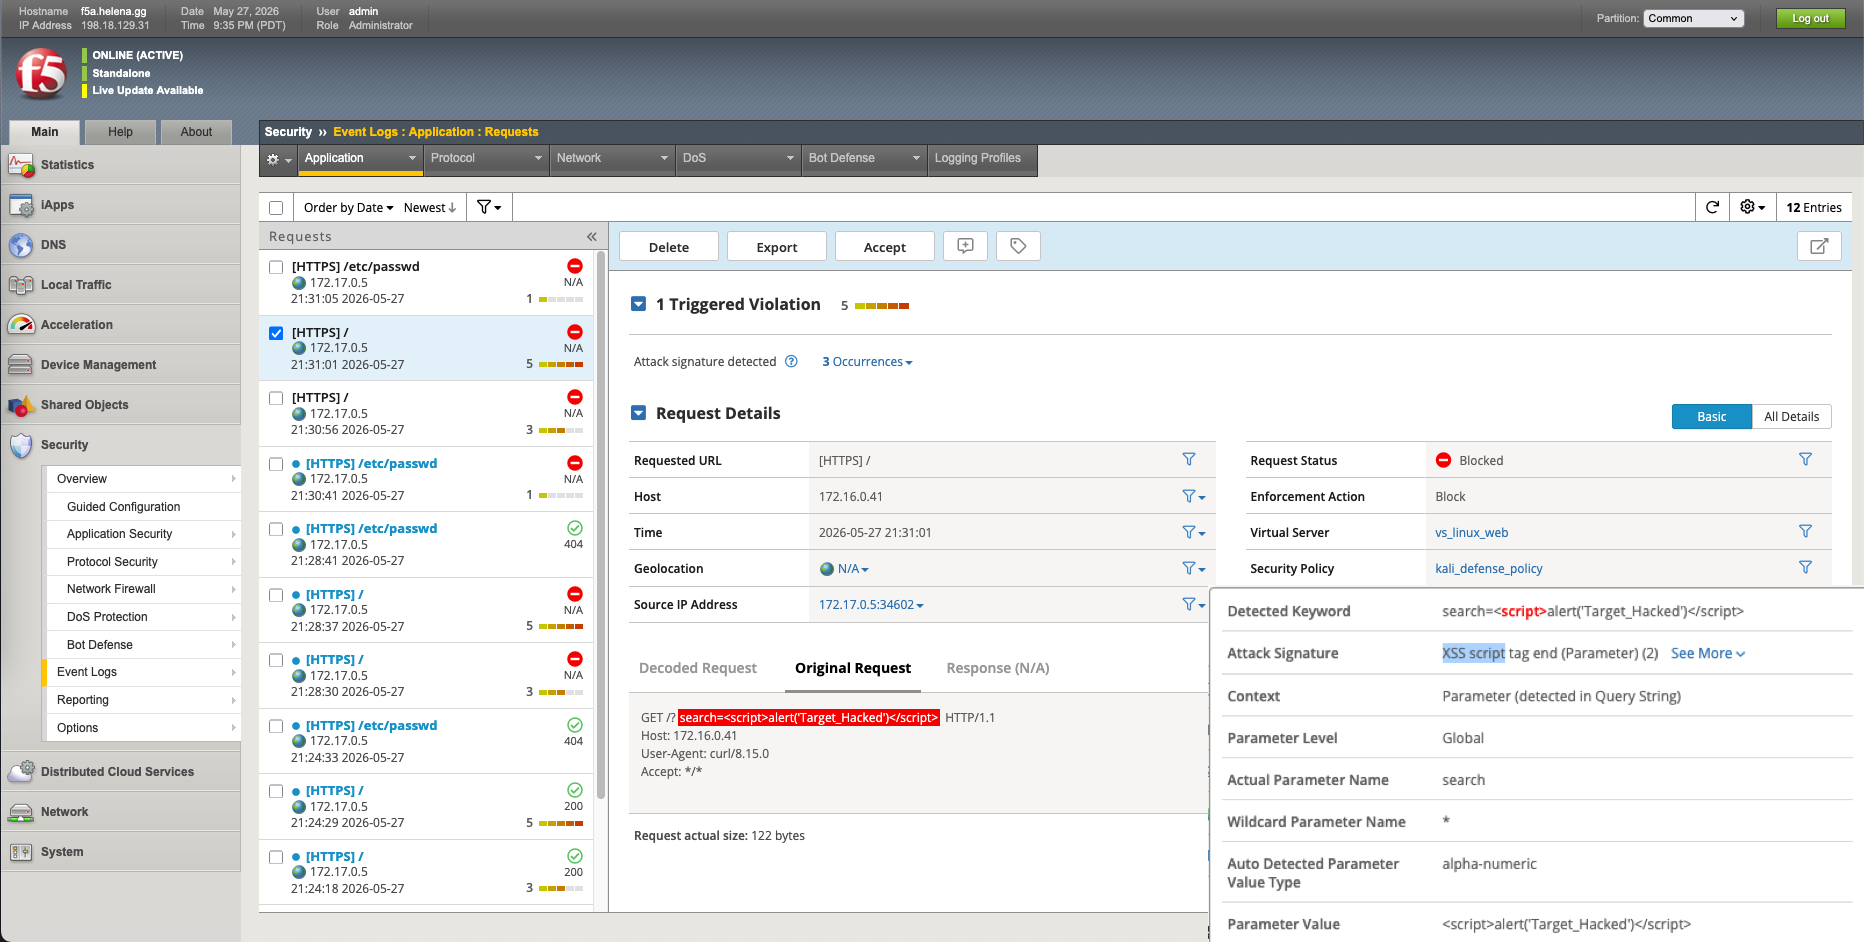
- The XSS payload triggers an
XSS script tag endattack signature match.
- The Directory Traversal block indexes the matching file access query.
Lets try to customize the Attack Signatures, here we will change the Directory Traversals to Staged.
While signatures are in staging, if we run a directory traversal attempt from our Kali machine, F5 WAF will allow the request through to the backend (returning the 404 backend response instead of our block page).
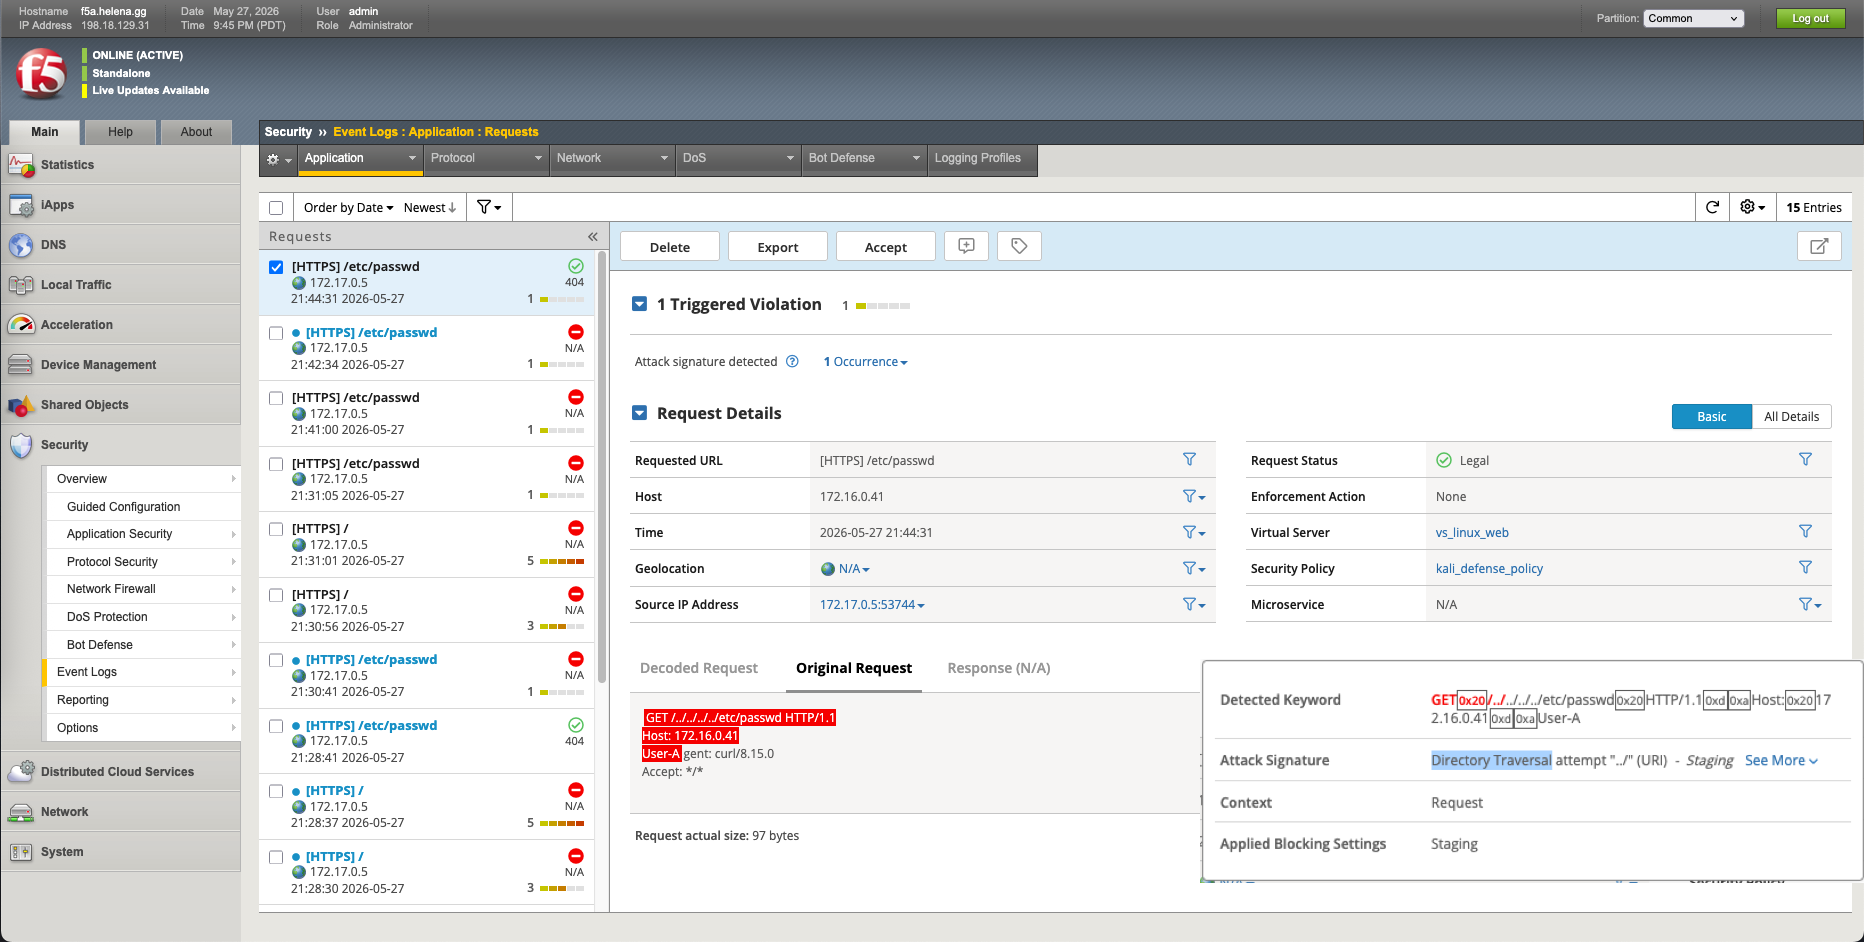
Although the request was not blocked, the F5 Event Logs flag the transaction with a staging violation warning, showing the request as Legal (green) but identifying the directory traversal match.
We can also add IP Address Exceptions.
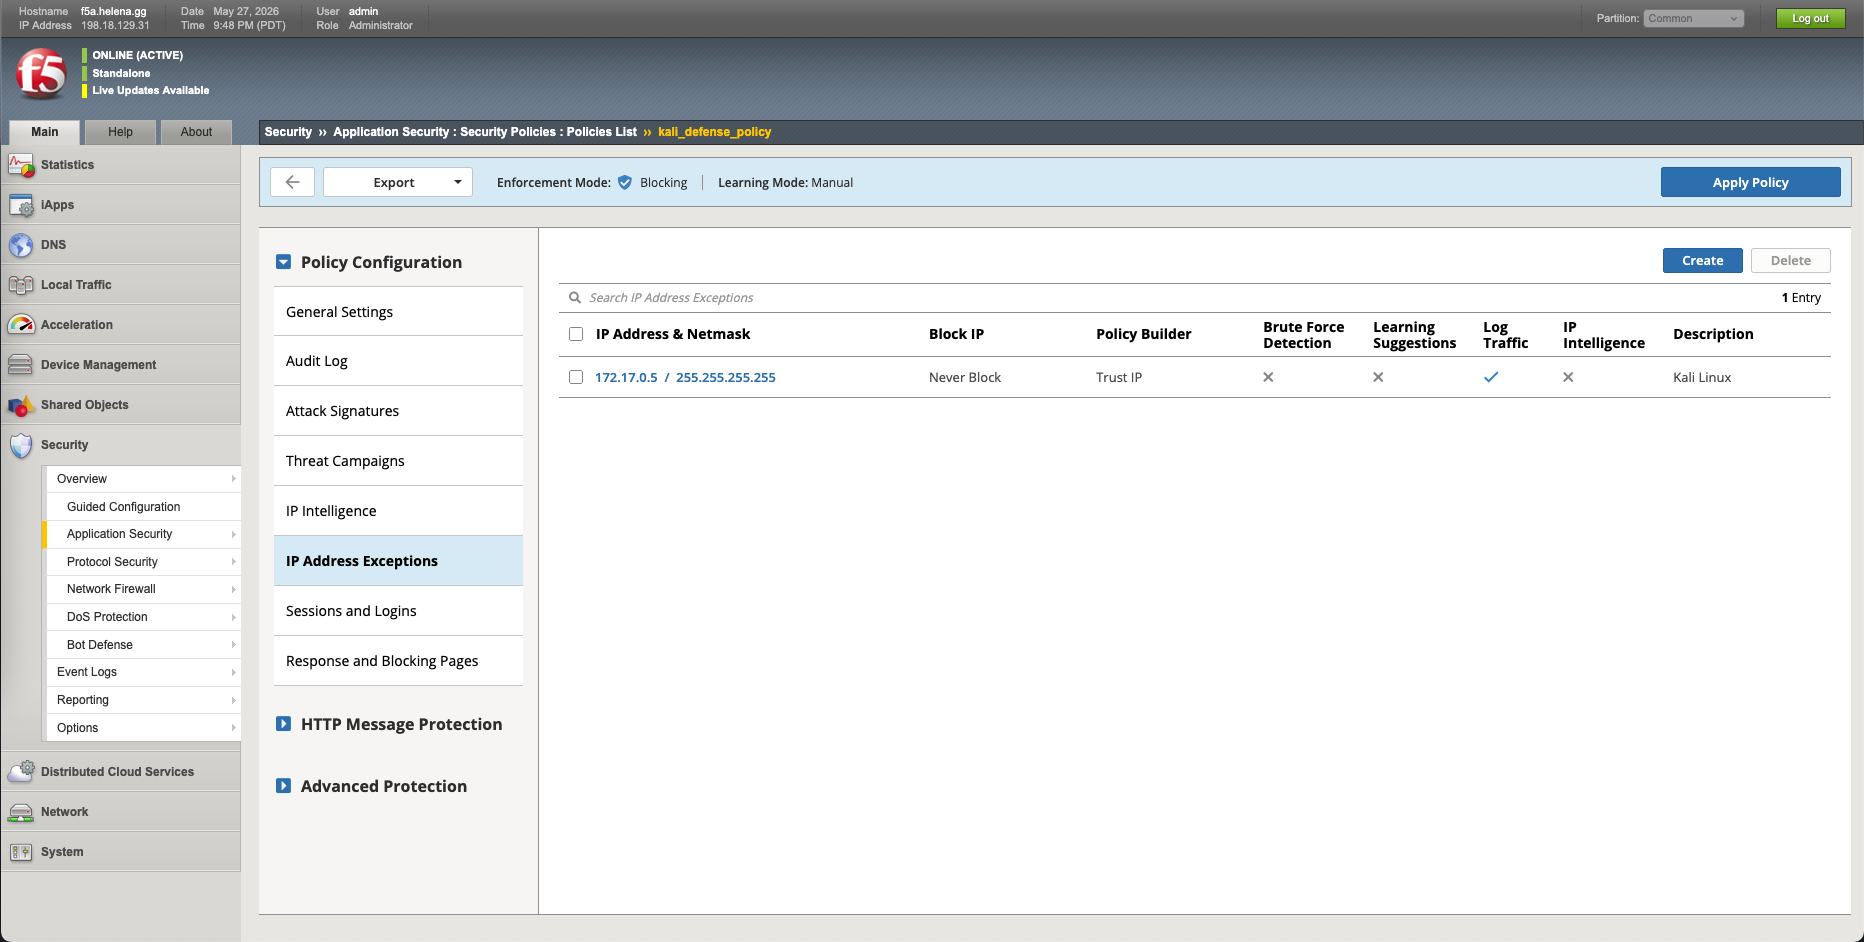
Now our whitelisted IP Address is bypassing the ASM rules.
F5 AFM (Network Firewall) Configuration
Next, we secure our Layer 3/4 boundary using F5 AFM. Lets enable the resource.
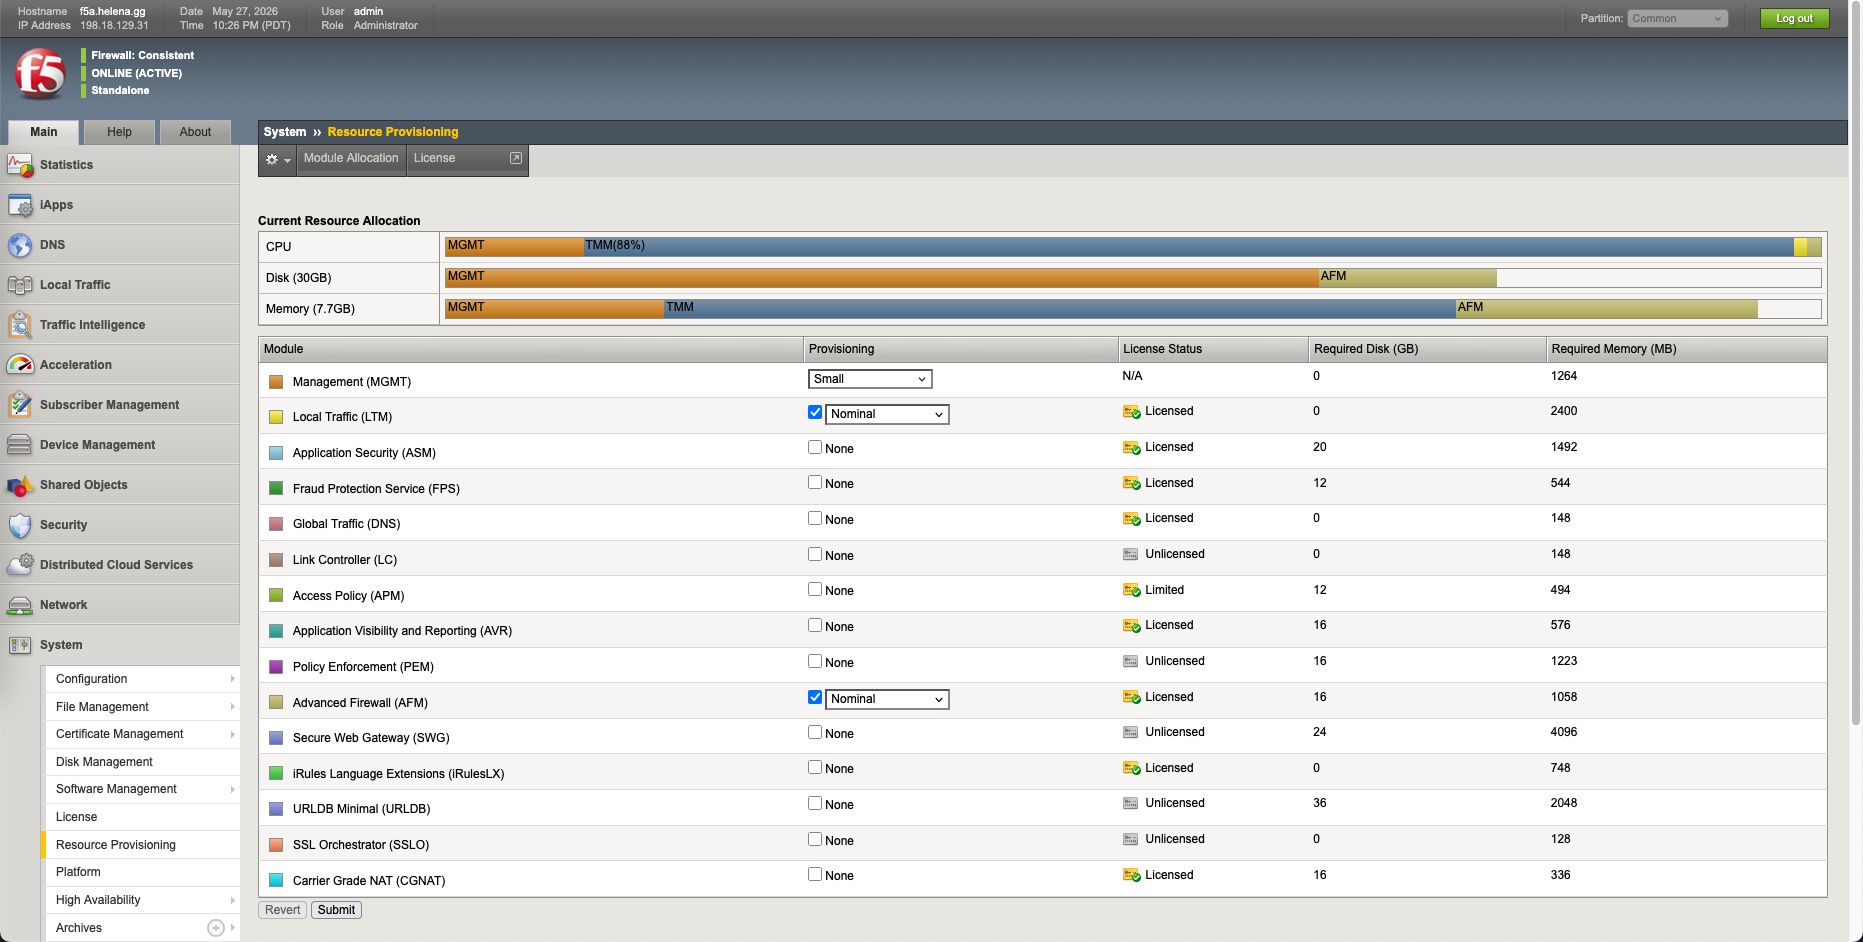
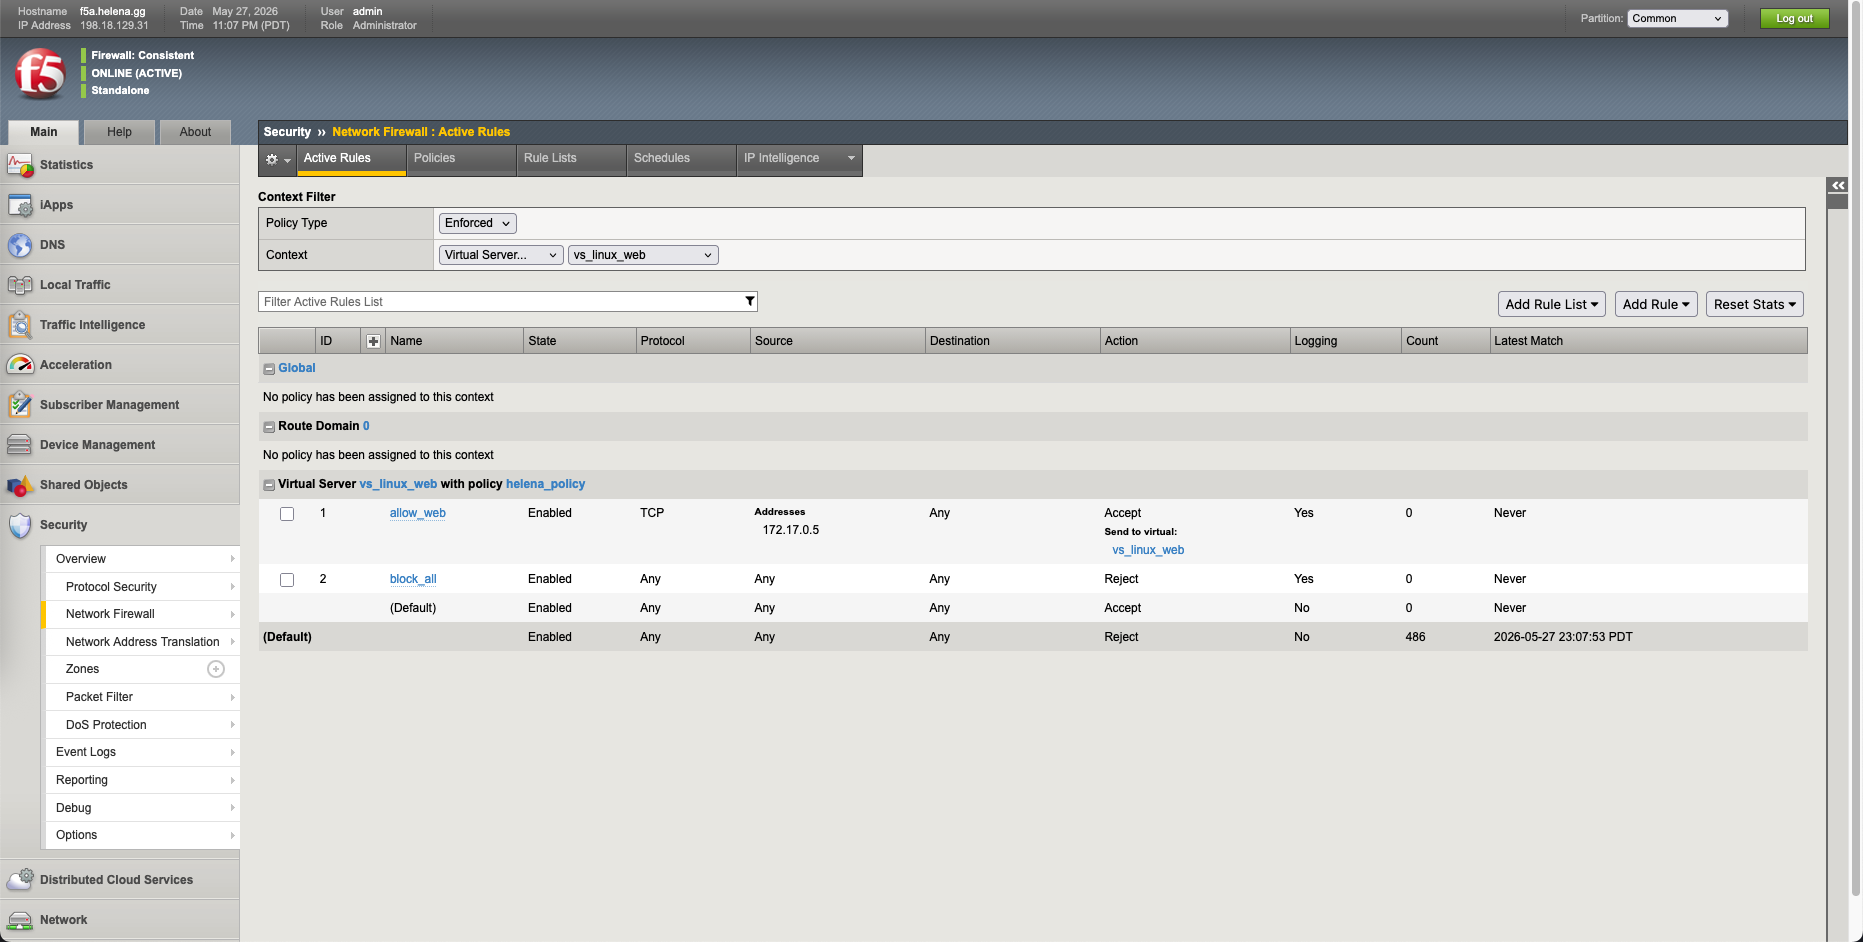
Under Security » Network Firewall » Policies, we build a secure network policy named helena_policy with two specific rules:
- allow_web: Allow incoming TCP traffic originating specifically from our Kali admin machine (
172.17.0.5) to pass through tovs_linux_web. - block_all: A catch-all drop rule that rejects all other traffic.
We attach our network firewall onto the VS.
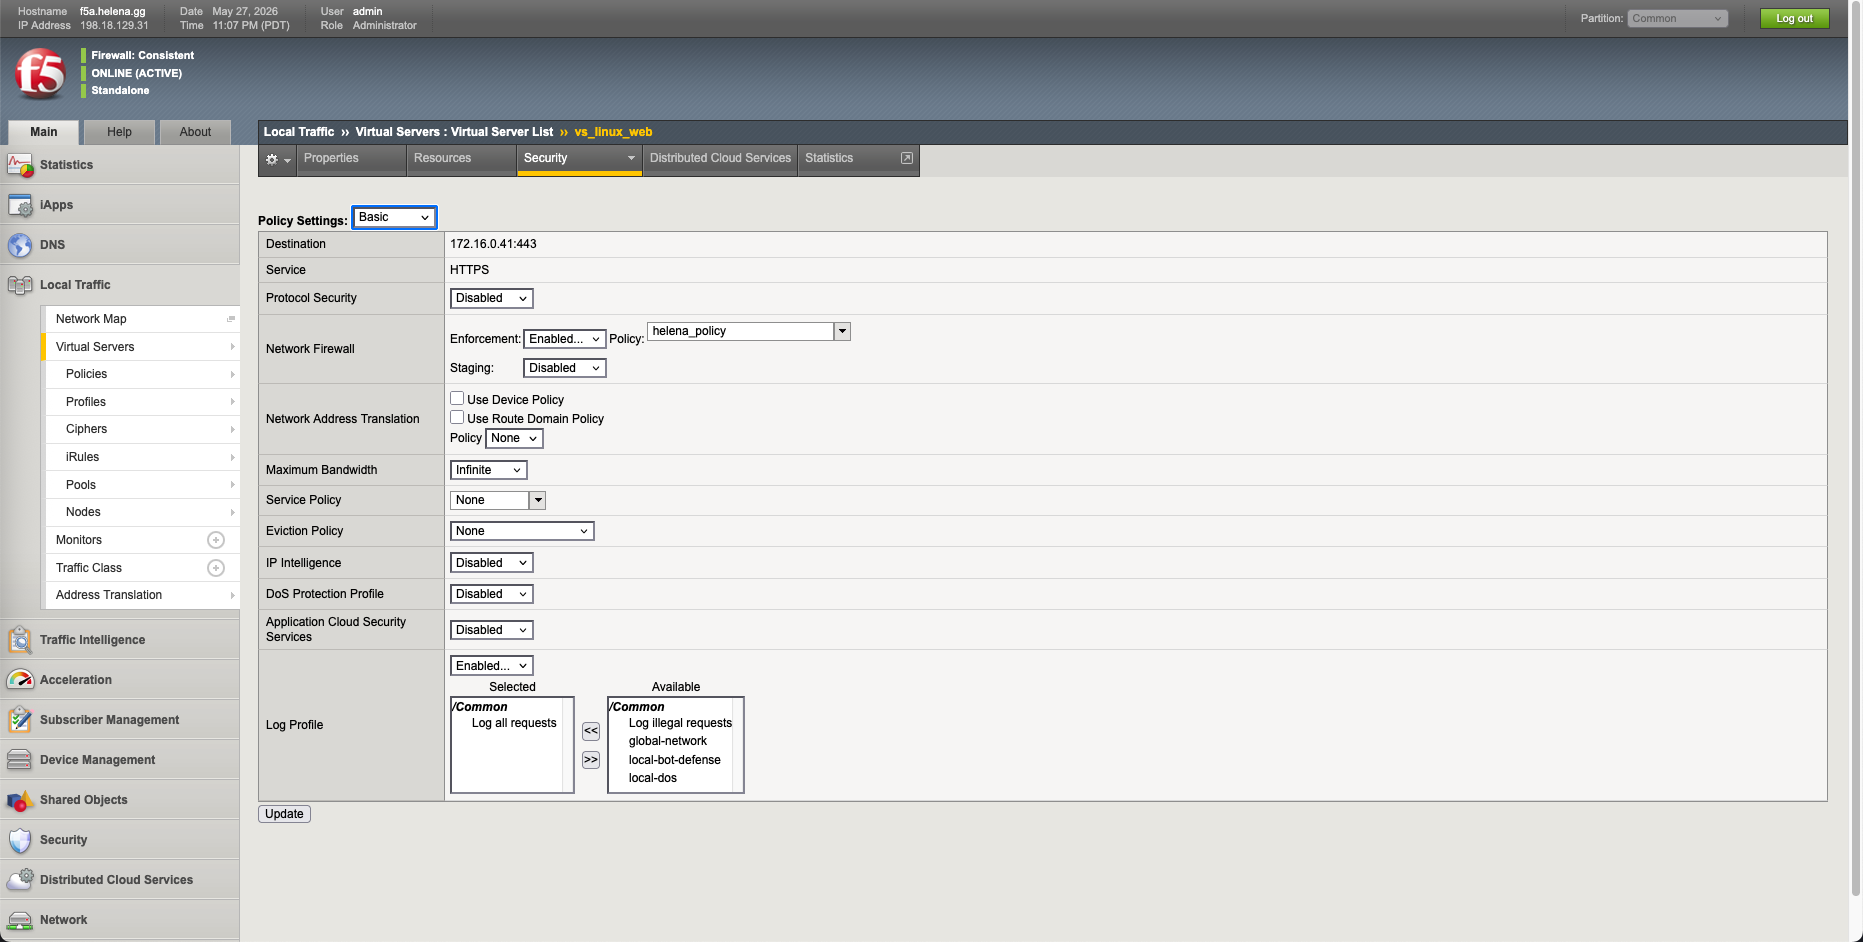
We verify that the firewall rules have been successfully compiled and applied under the active rules view.
Verifying Firewall Rule Boundaries
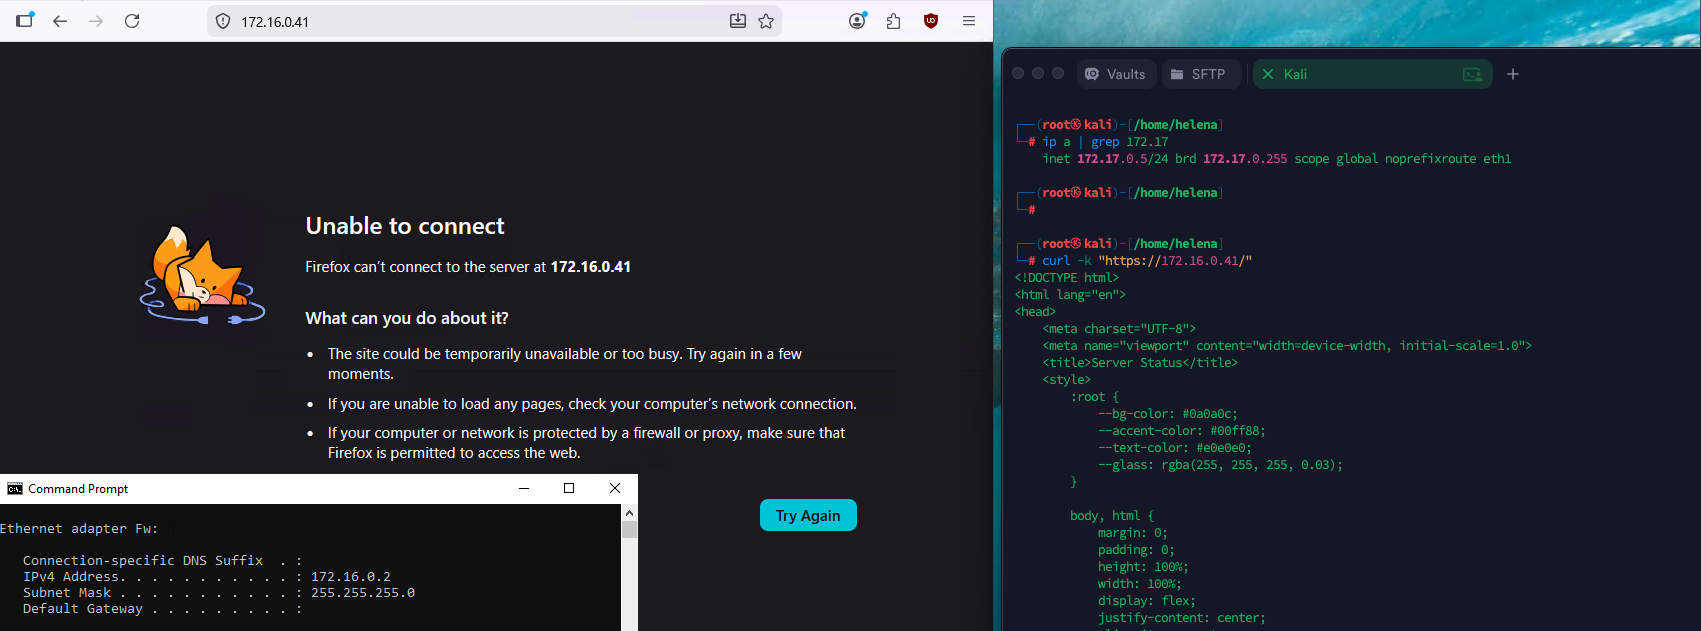
To verify the AFM policy boundary, we attempt to access the Virtual Server VIP (172.16.0.41) from an unauthorized client on the network (172.16.0.2).
- The unauthorized Firefox client times out with an Unable to connect error.
- Meanwhile, our permitted Kali admin host (
172.17.0.5) runscurl -k "https://172.16.0.41/"and successfully connects and loads our application HTML.
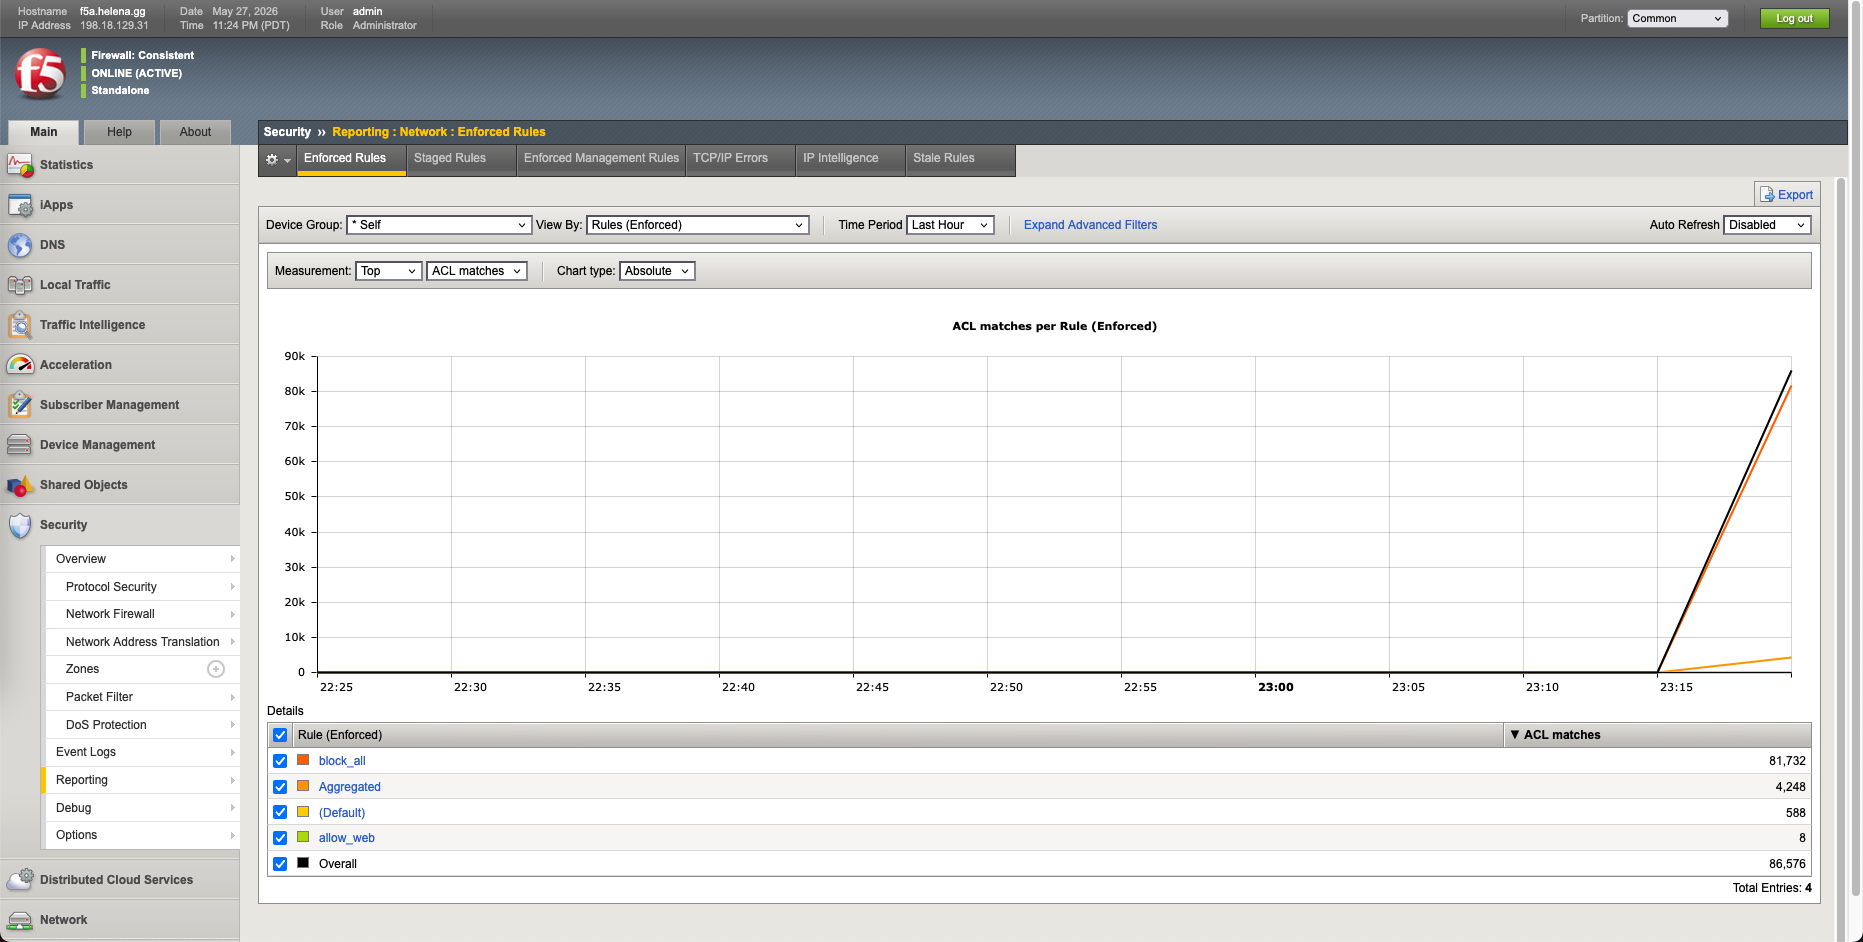
We navigate to AFM Reporting to inspect our network rules matches. We can see complete logging: our catch-all block_all rule successfully blocked 81,732 packets, while our secure allow_web rule permitted 4,248 packets from the admin Kali host.
Deploying F5 Bot Defense
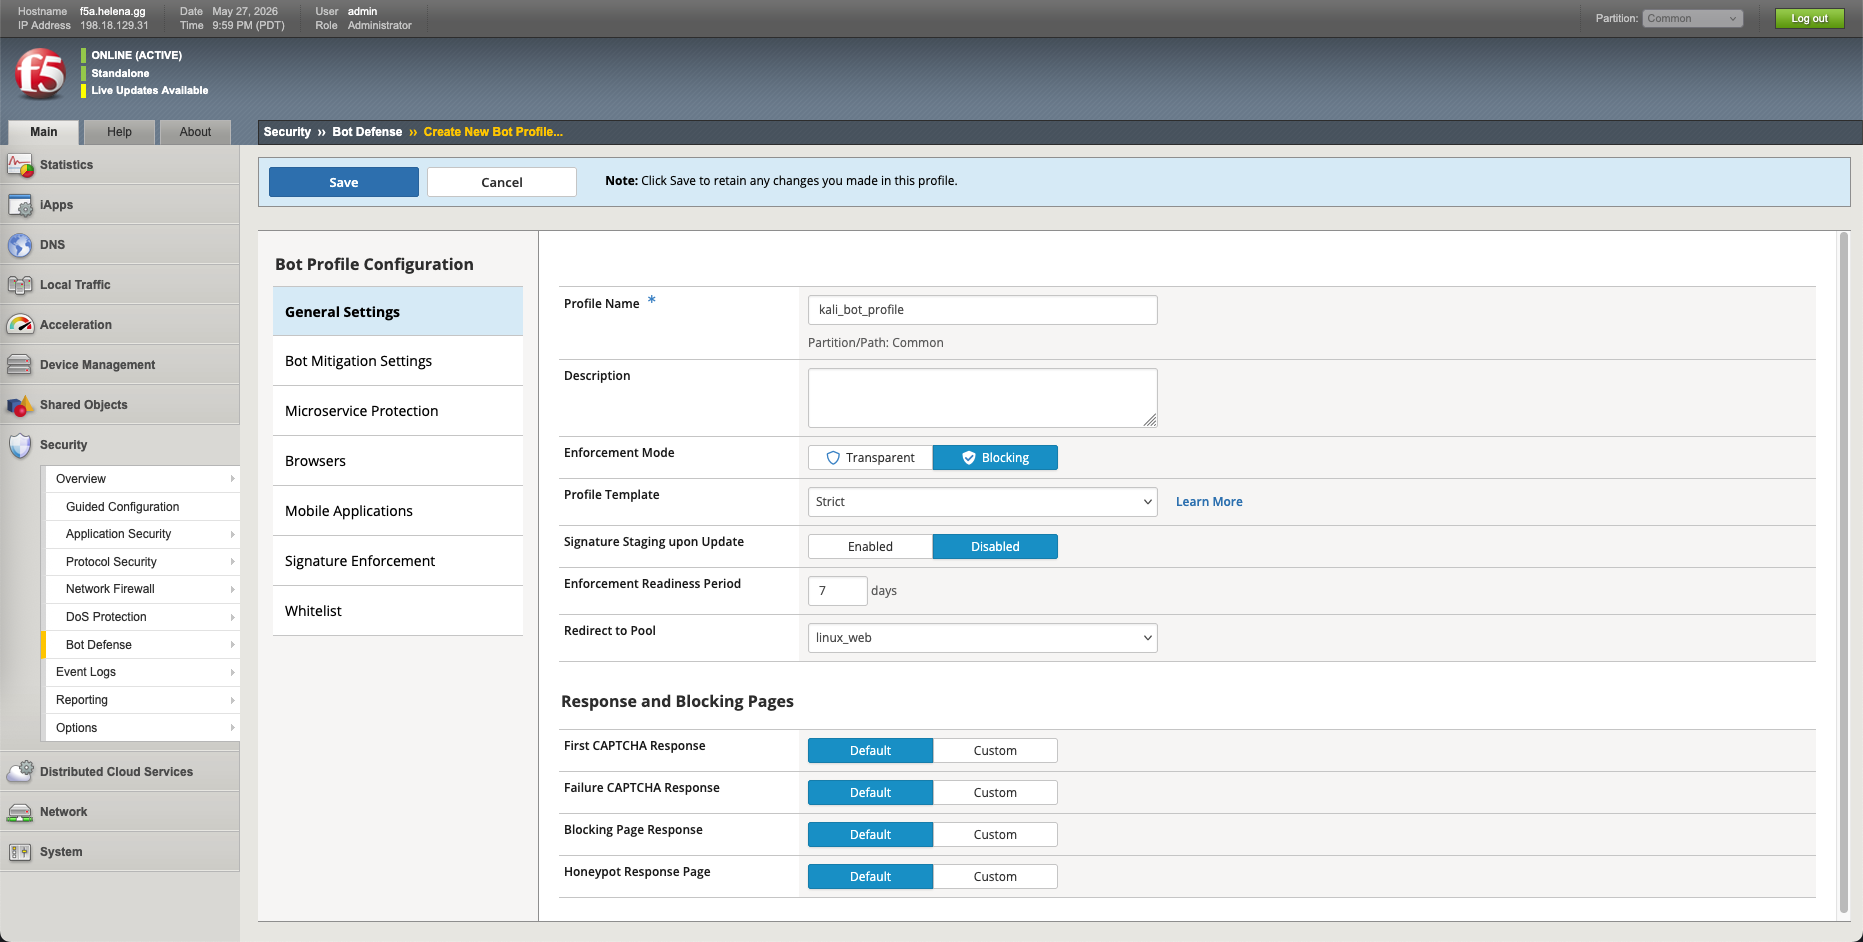
Finally, we configure an F5 Bot Defense profile to block automated script scanners. Under Security » Bot Defense, we create a new bot defense profile named kali_bot_profile in Blocking mode.
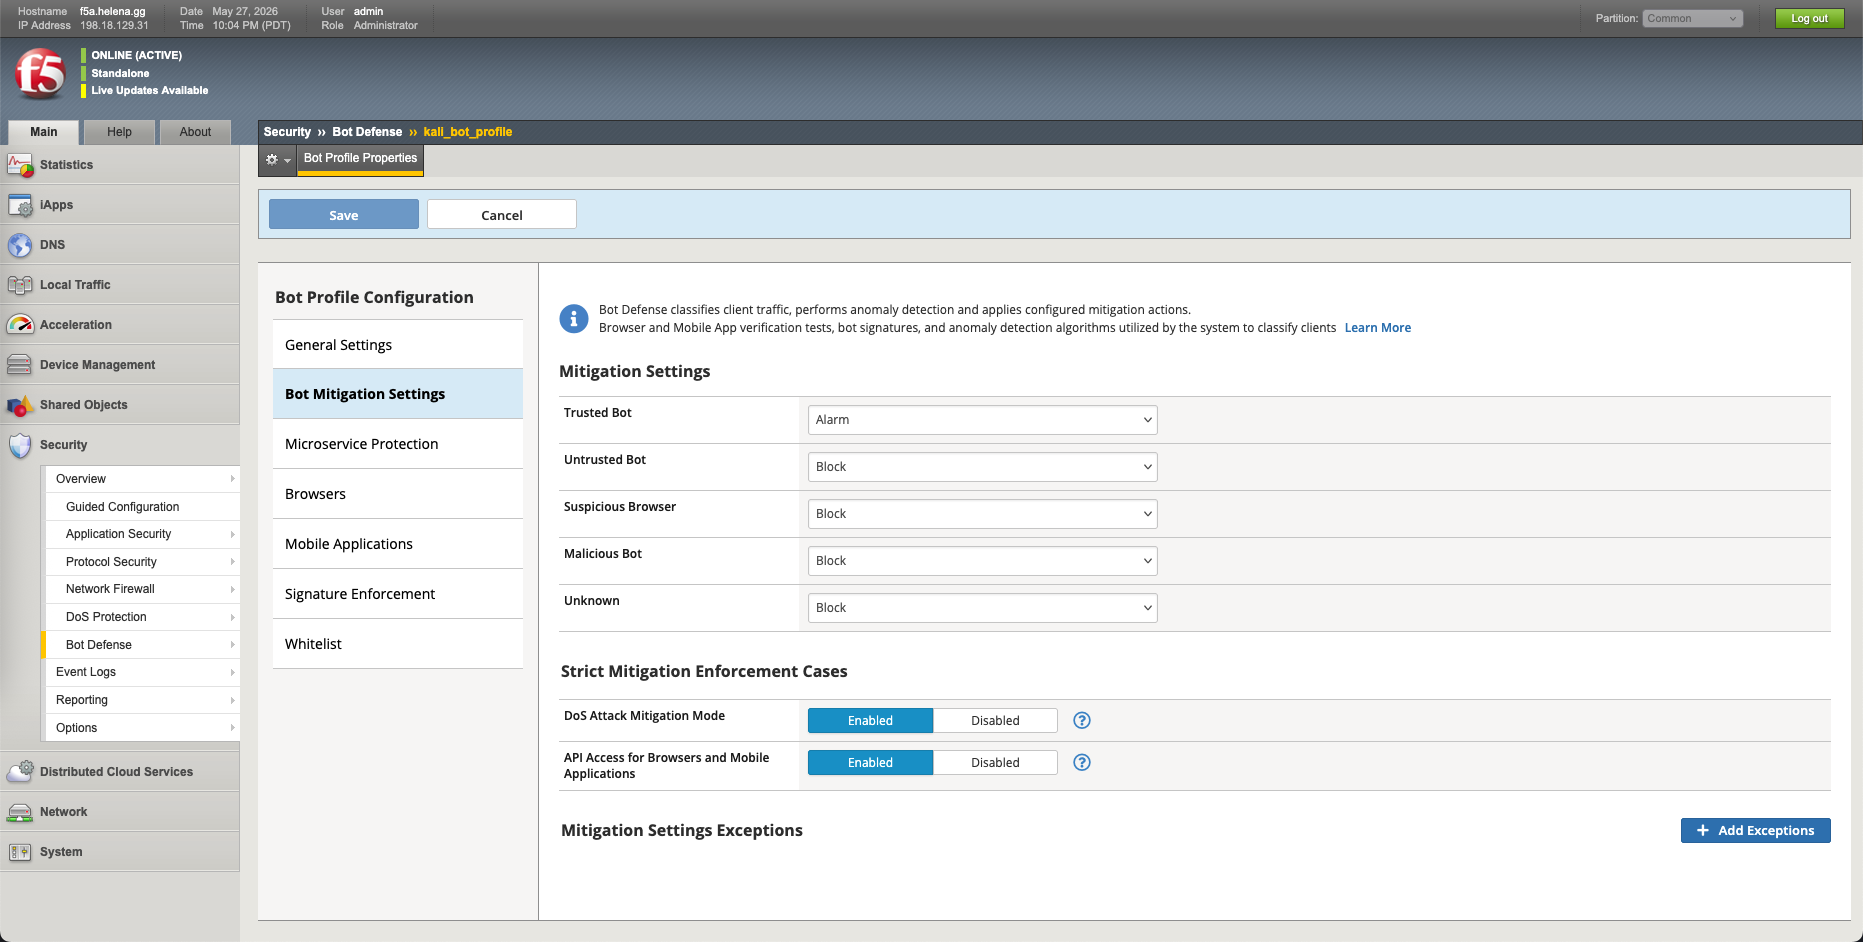
Under Mitigation Settings, we define enforcement actions for discovered bot categories, setting untrusted libraries and malicious scrapers to Block.
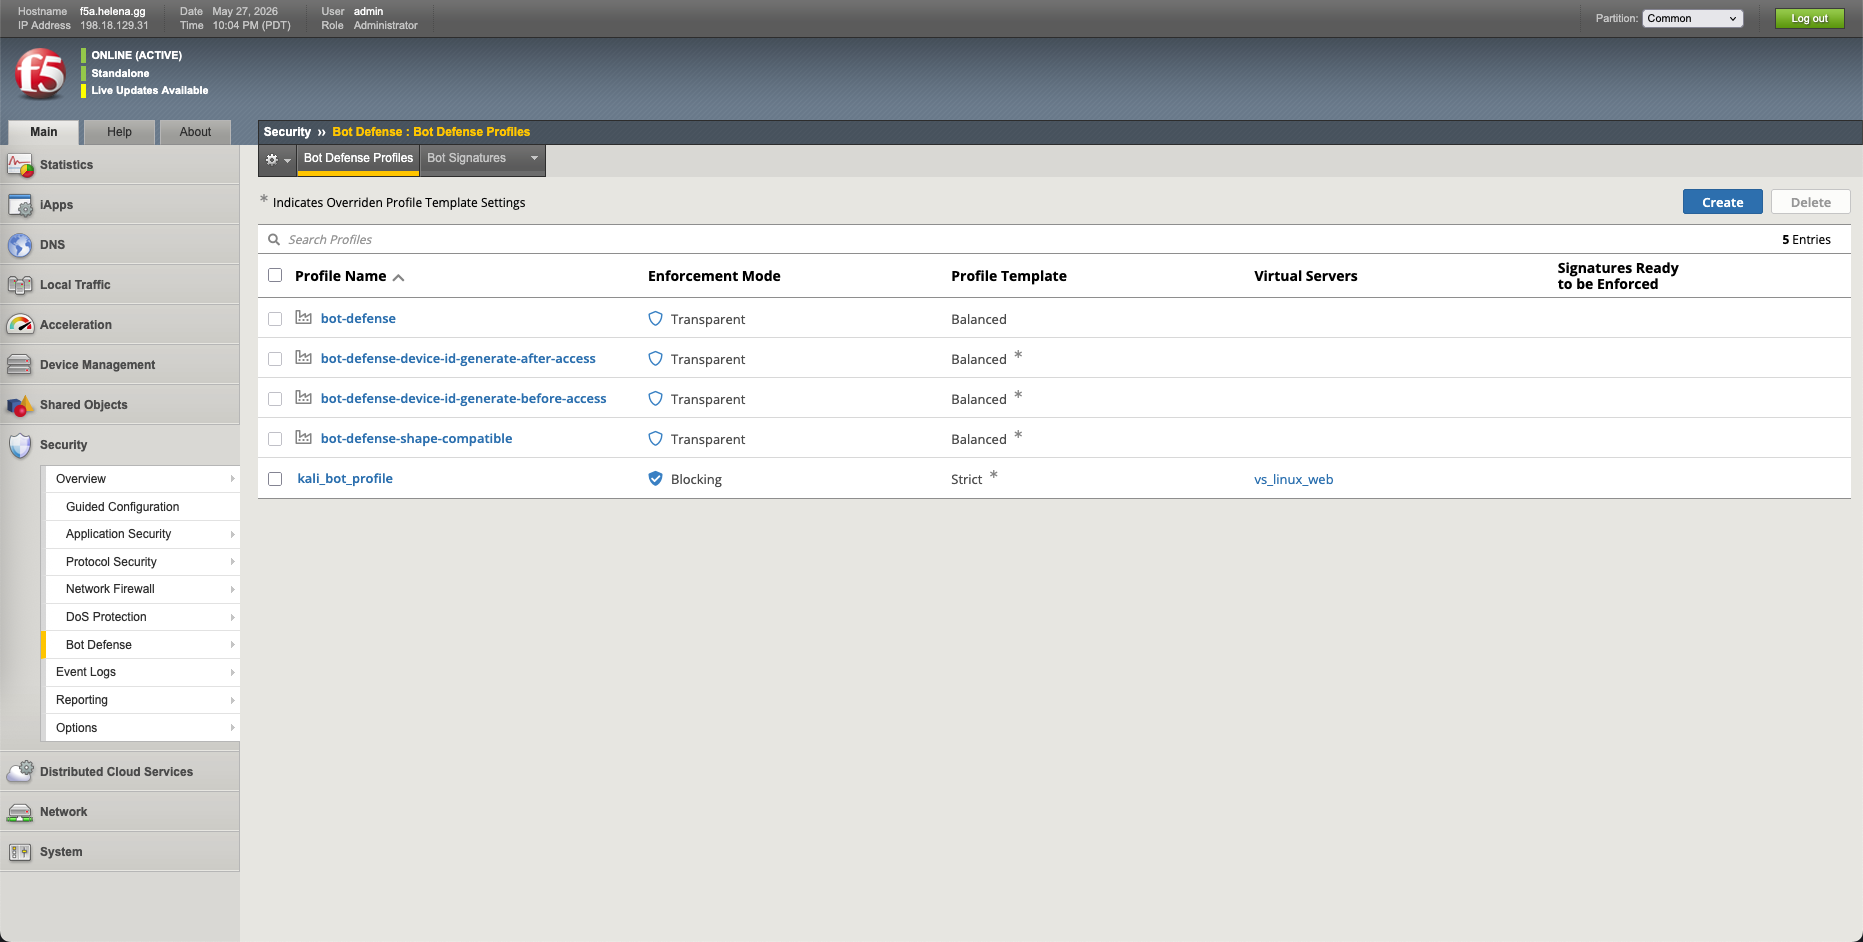
We verify that our kali_bot_profile is successfully configured in the active profile list.
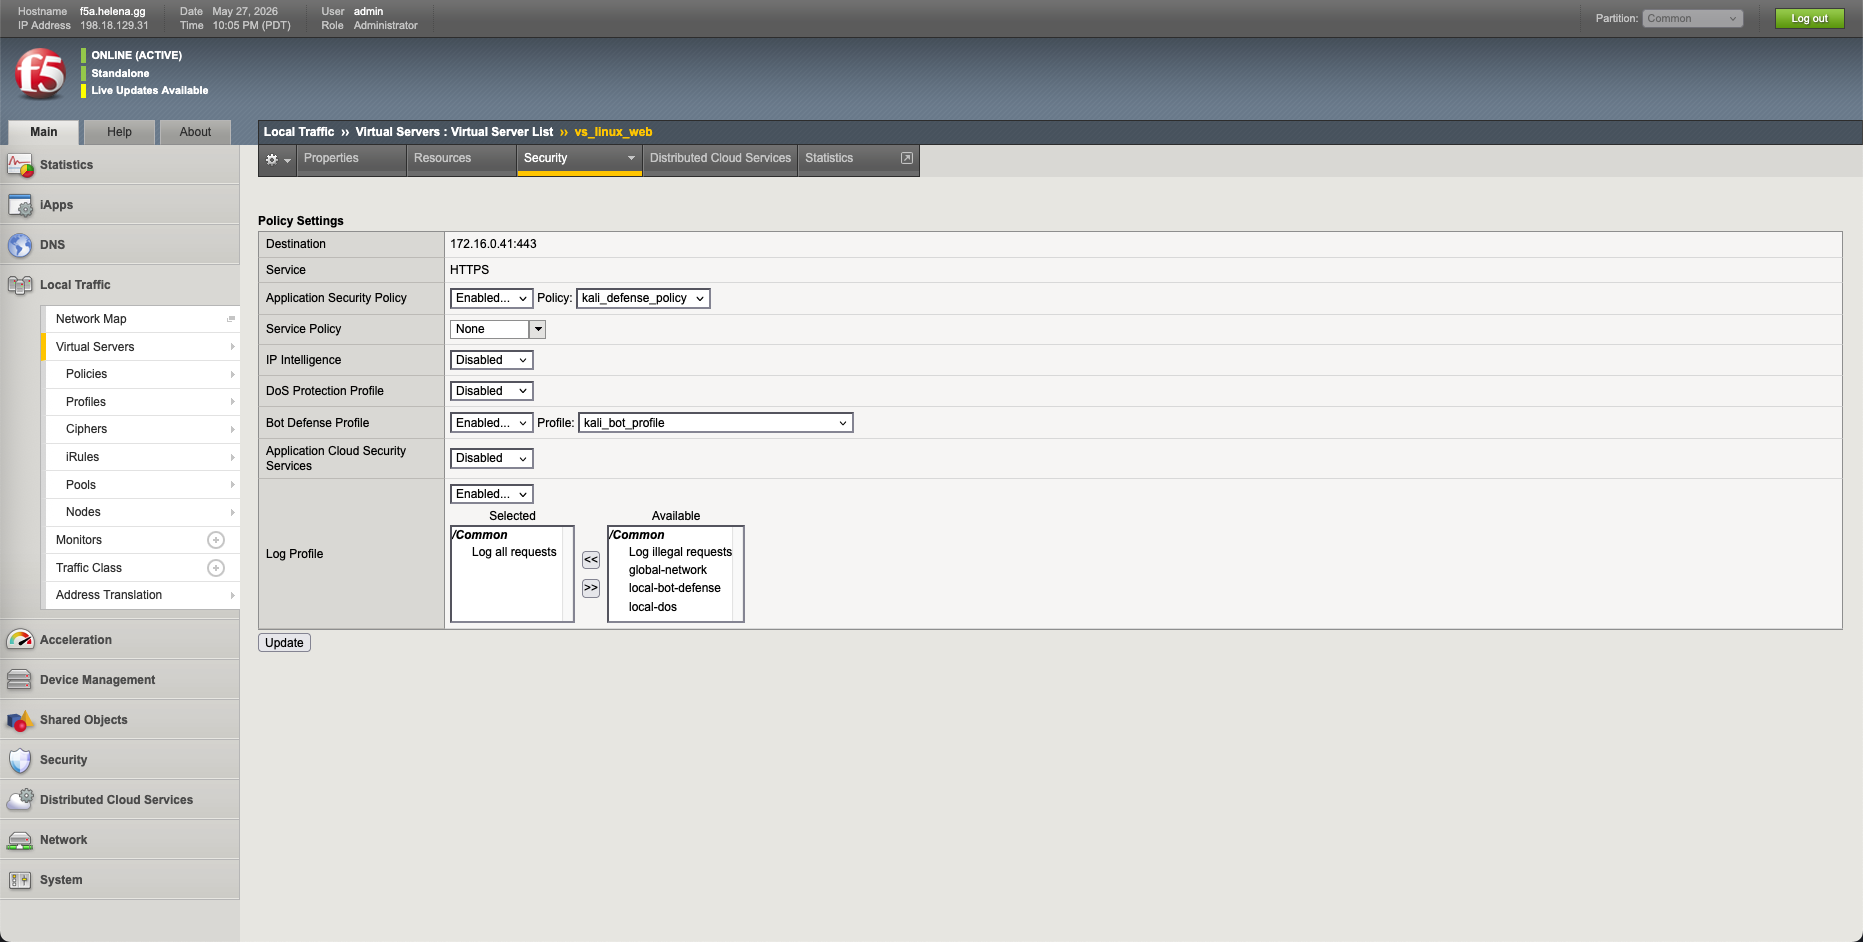
Next, we navigate to our virtual server settings and bind the new Bot Defense Profile to our active vs_linux_web instance.
Bot Defense Verification
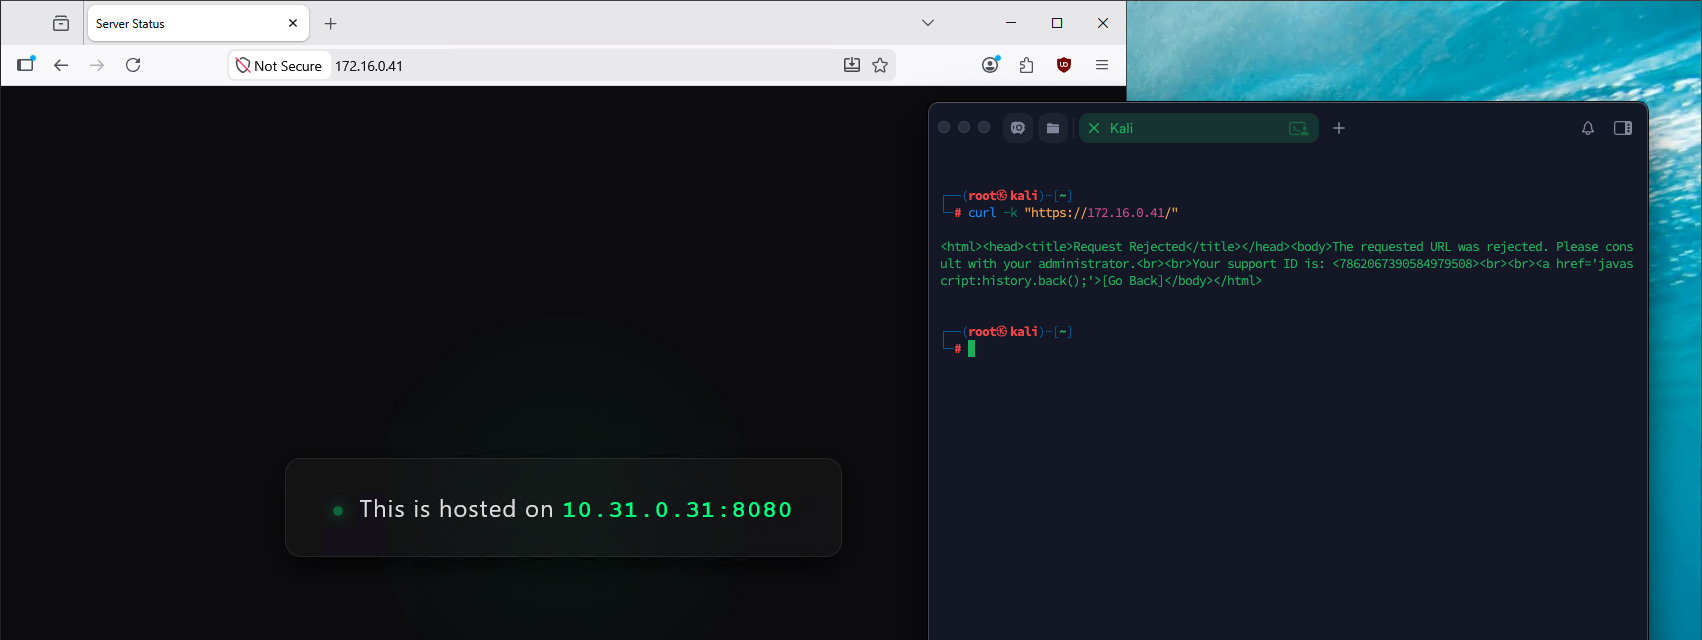
From our Kali machine, we run a basic curl command to check if our connection is permitted:
1
curl -k "https://172.16.0.41/"
Because curl is identified by F5 as an untrusted automated HTTP library, F5 Bot Defense instantly intercepts the connection, blocks the request, and returns our request rejection page.
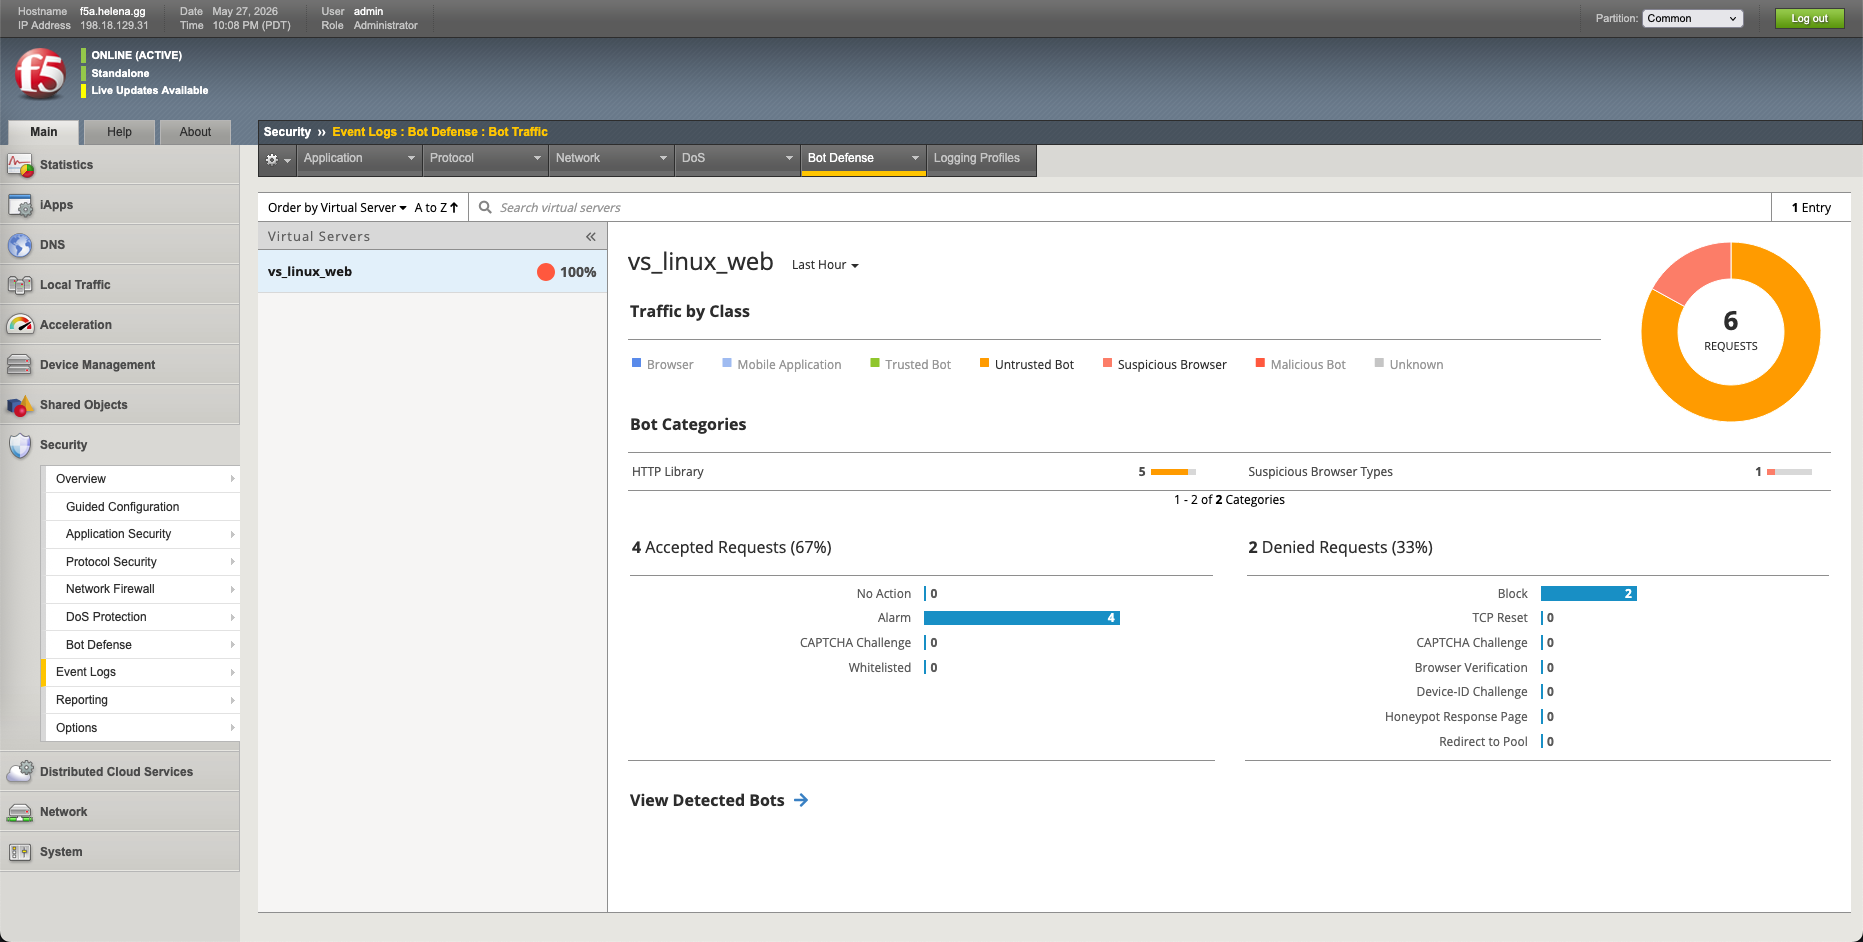
Under Security » Event Logs » Bot Defense » Bot Traffic, we review the logged event, showing that our connection was successfully blocked and classified under the untrusted HTTP library category.