Zimbra Collaboration Suite (ZCS) is a robust, enterprise-grade messaging and collaboration platform offering email services, contact management, calendar sharing, and tasks. To secure on-premises email infrastructure, a hybrid deployment pattern is often implemented: a public-facing SMTP gateway acts as a front-end mail relay, passing incoming mail through an encrypted VPN tunnel to an internal private mail server. In this lab, we build this secure topology by setting up an encrypted WireGuard tunnel between a public Ubuntu VPS and an on-premises Ubuntu VM, configuring a Postfix inbound relay, installing Zimbra Collaboration Network Edition, setting up DNS/rDNS records, securing connection pathways with Let’s Encrypt certificates, and verifying external mail routing and TLS integrity.
Hybrid Mail Architecture Overview
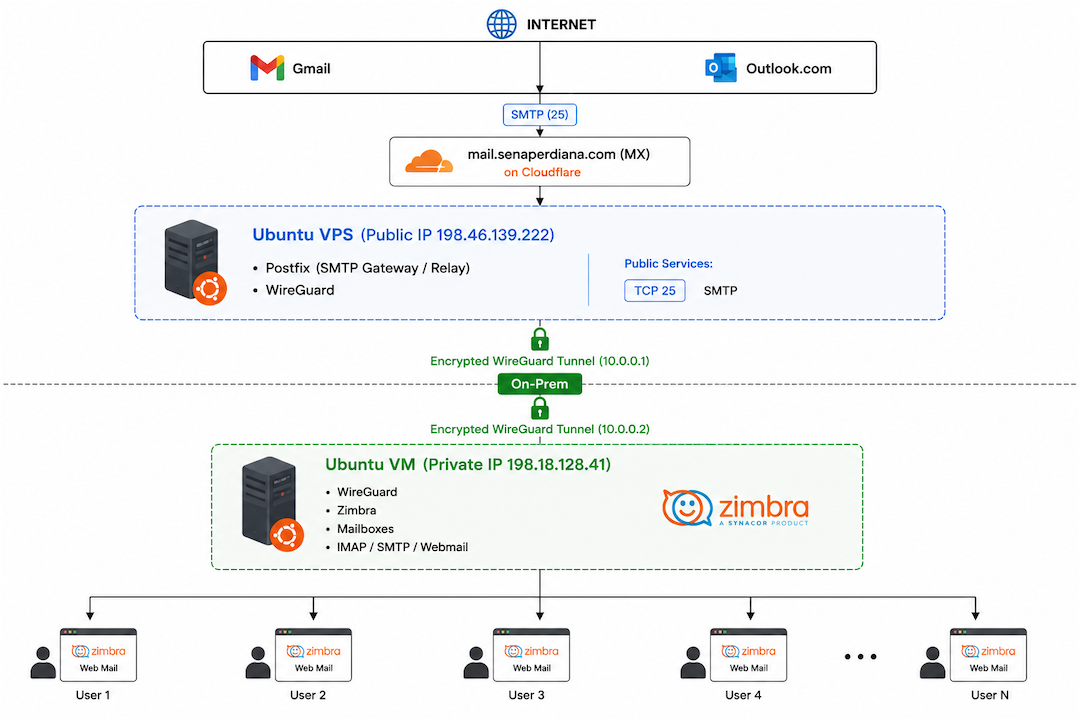
The following architectural diagram illustrates the network flow for our secure hybrid mail architecture. Inbound mail from external providers (e.g. Gmail, Outlook) target mail.senaperdiana.com over SMTP Port 25. This record resolves to the public VPS (198.46.139.222), which hosts a Postfix SMTP proxy. The public VPS acts as a gateway, forwarding emails securely through a dedicated, encrypted WireGuard VPN tunnel (10.10.10.0/24) to the on-premise Zimbra VM (198.18.128.41 / 10.10.10.2). All internal mailboxes, IMAP, and SMTP services reside on the private VM, isolating the corporate mail server from direct public exposure.
WireGuard Tunnel Configuration
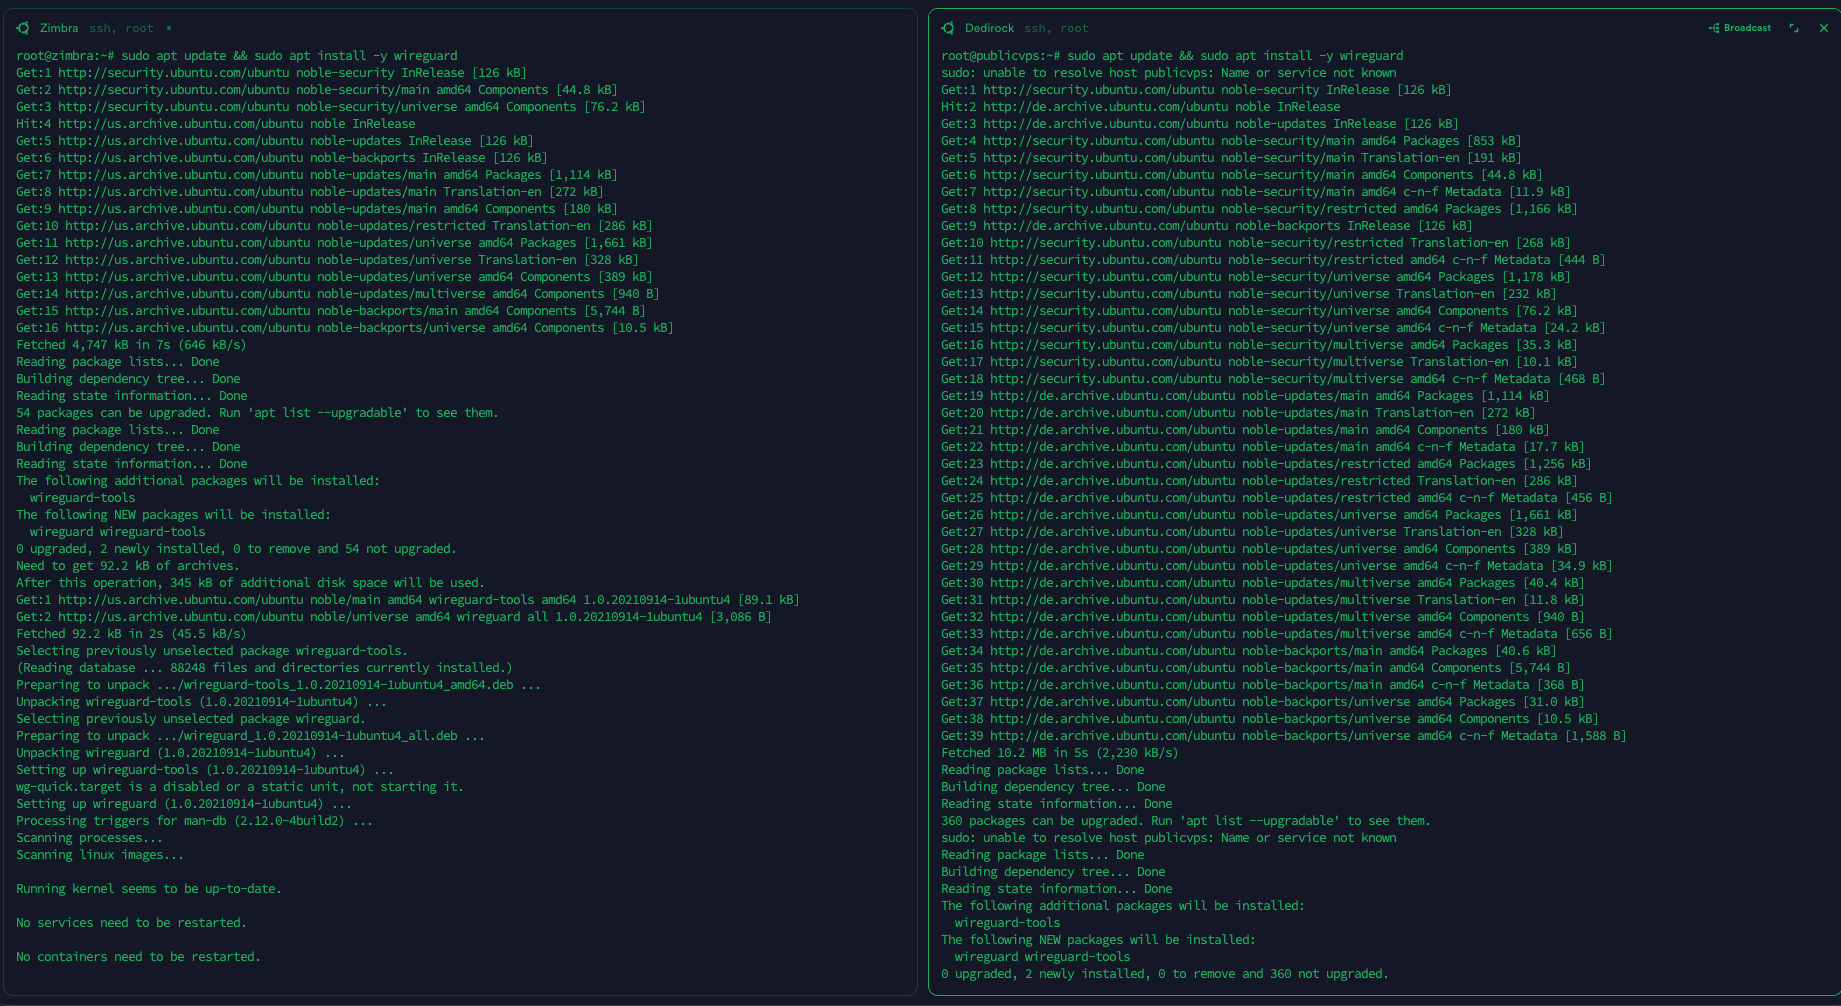
To establish our private link, we begin by installing the WireGuard kernel module and userland utility packages on both the on-premises Zimbra VM and the public VPS.
Next, we generate the private and public key pairs on both servers to authenticate the tunnel endpoints.

We edit /etc/wireguard/wg0.conf on both ends to define the tunnel parameters:
- On the Zimbra VM, we map its address to
10.10.10.2/24and specify the public VPS’s IP address and peer public key as its endpoint, settingPersistentKeepalive = 25to keep the firewall state active. - On the Public VPS, we configure
Address = 10.10.10.1/24, bind to port51820, and declare the Zimbra server as a peer allowing traffic to its individual/32IP address.

We start the WireGuard interface on the Zimbra VM by running systemctl start wg-quick@wg0 and confirm that the peer registration is successful using the wg command.
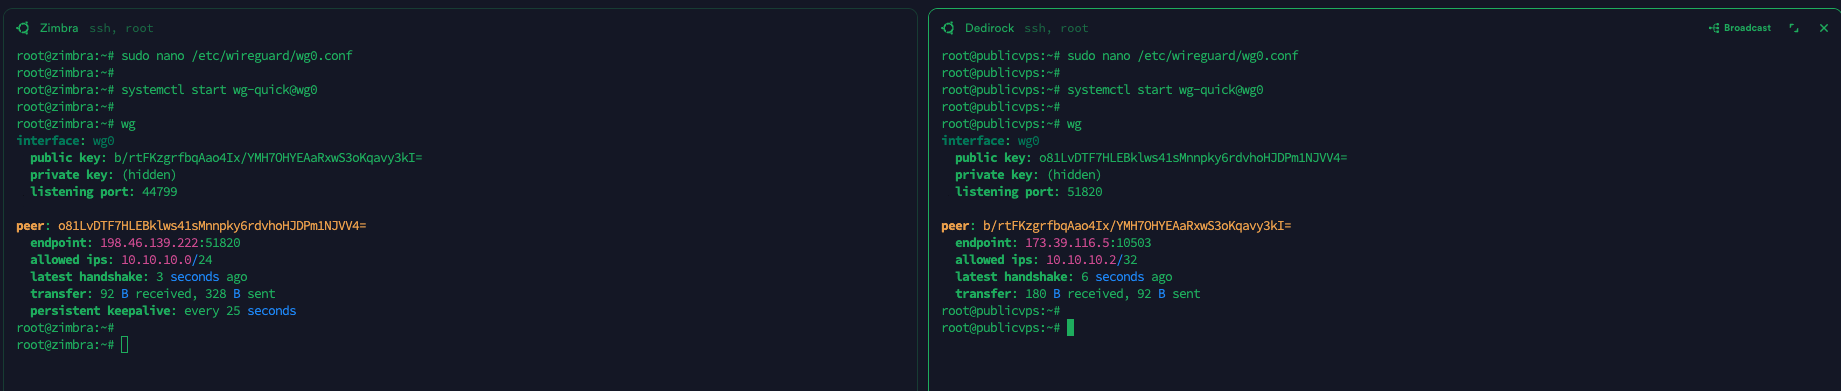
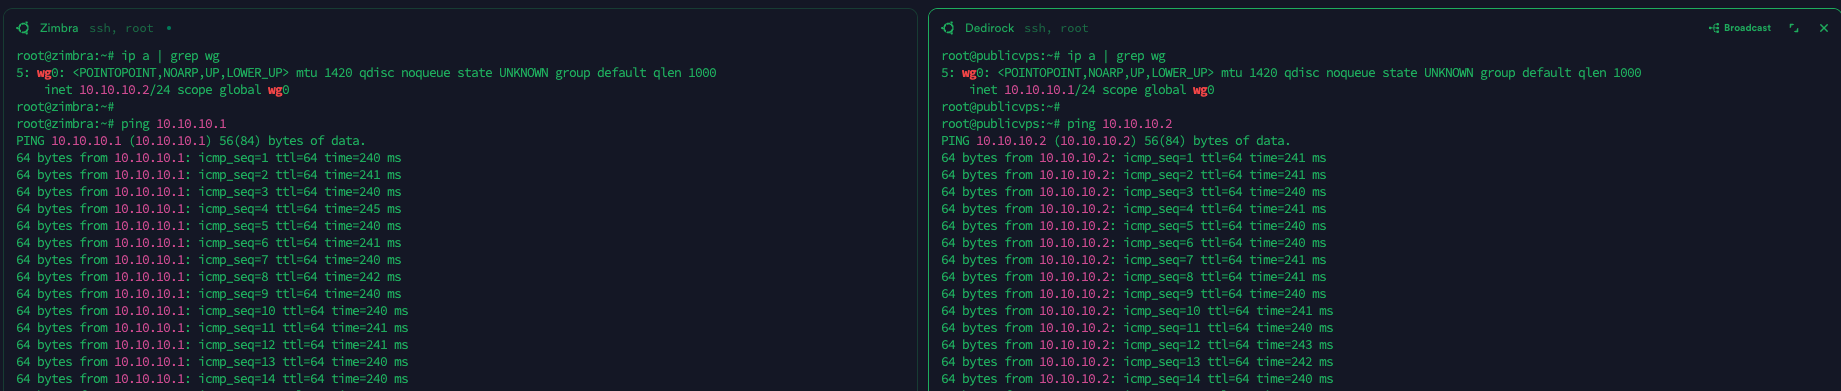
We verify that both interfaces are correctly assigned their tunnel IPs (10.10.10.2 and 10.10.10.1) and test end-to-end connectivity using ping to ensure low-latency packet transit.
Postfix SMTP Gateway Configuration
With the VPN established, we install the Postfix mail transfer agent on the public VPS to act as our front-end mail gateway.

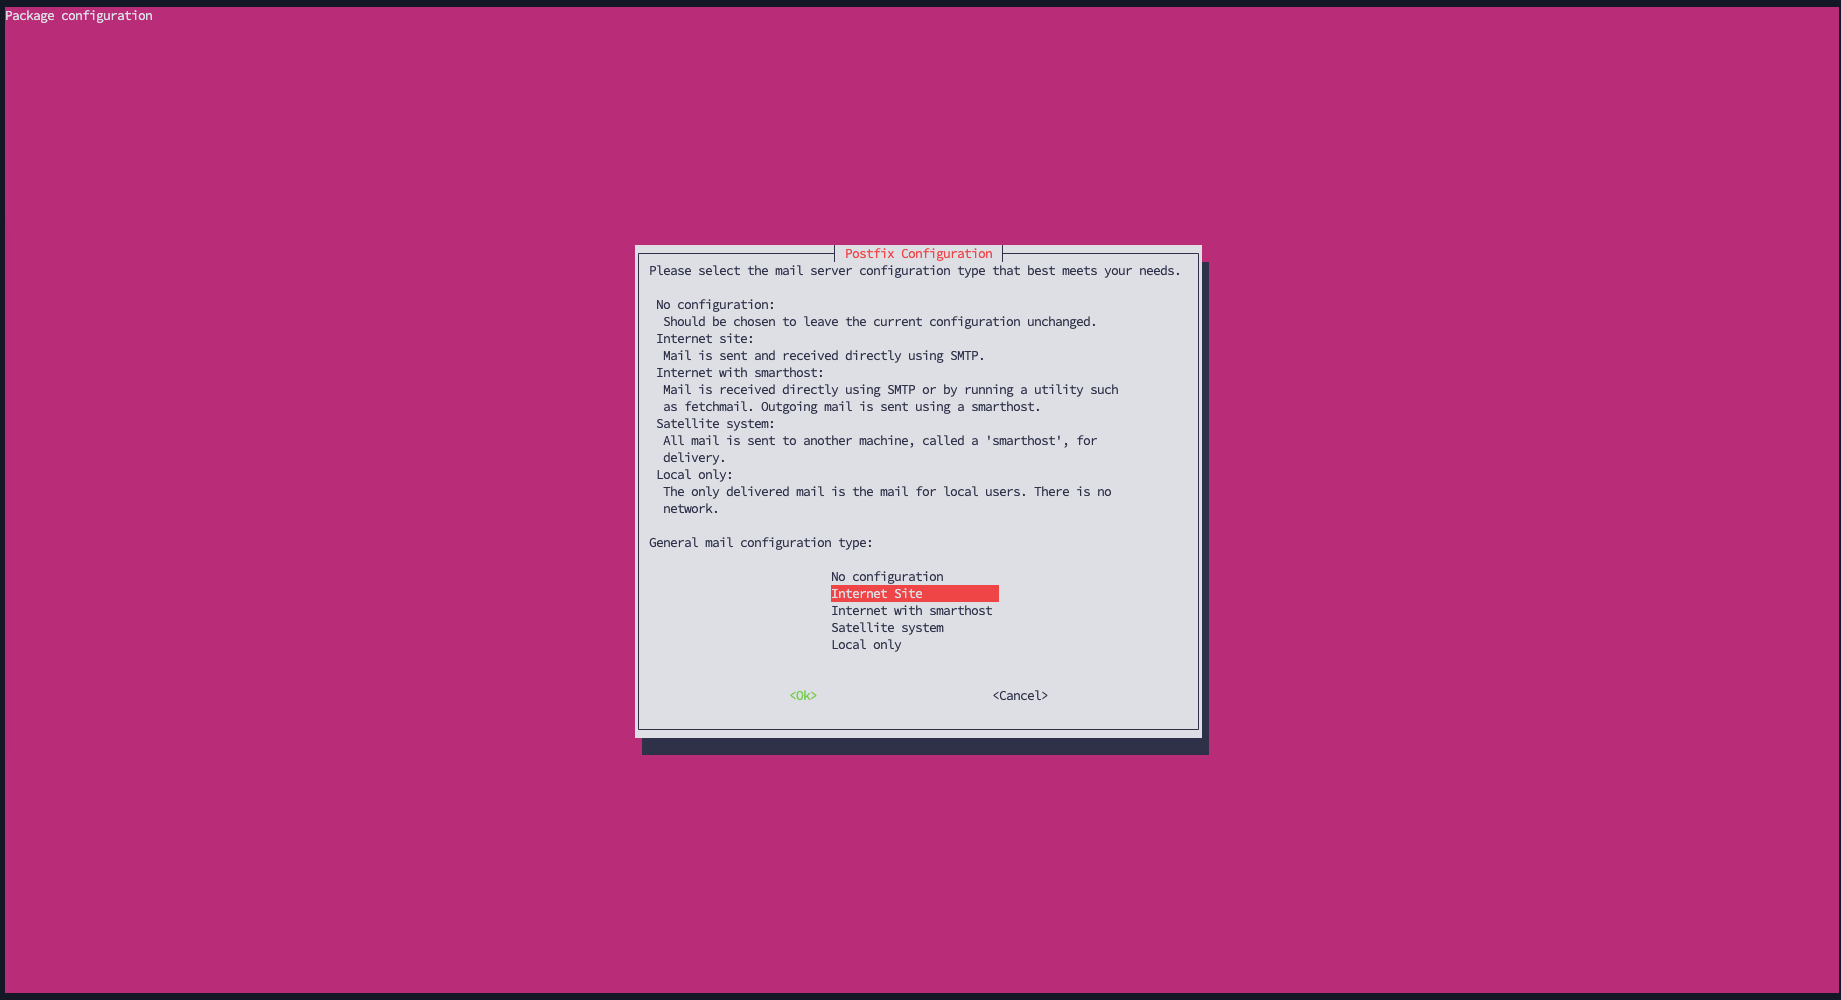
During the Postfix configuration prompt, we select Internet Site to permit the server to send and receive email directly using SMTP.
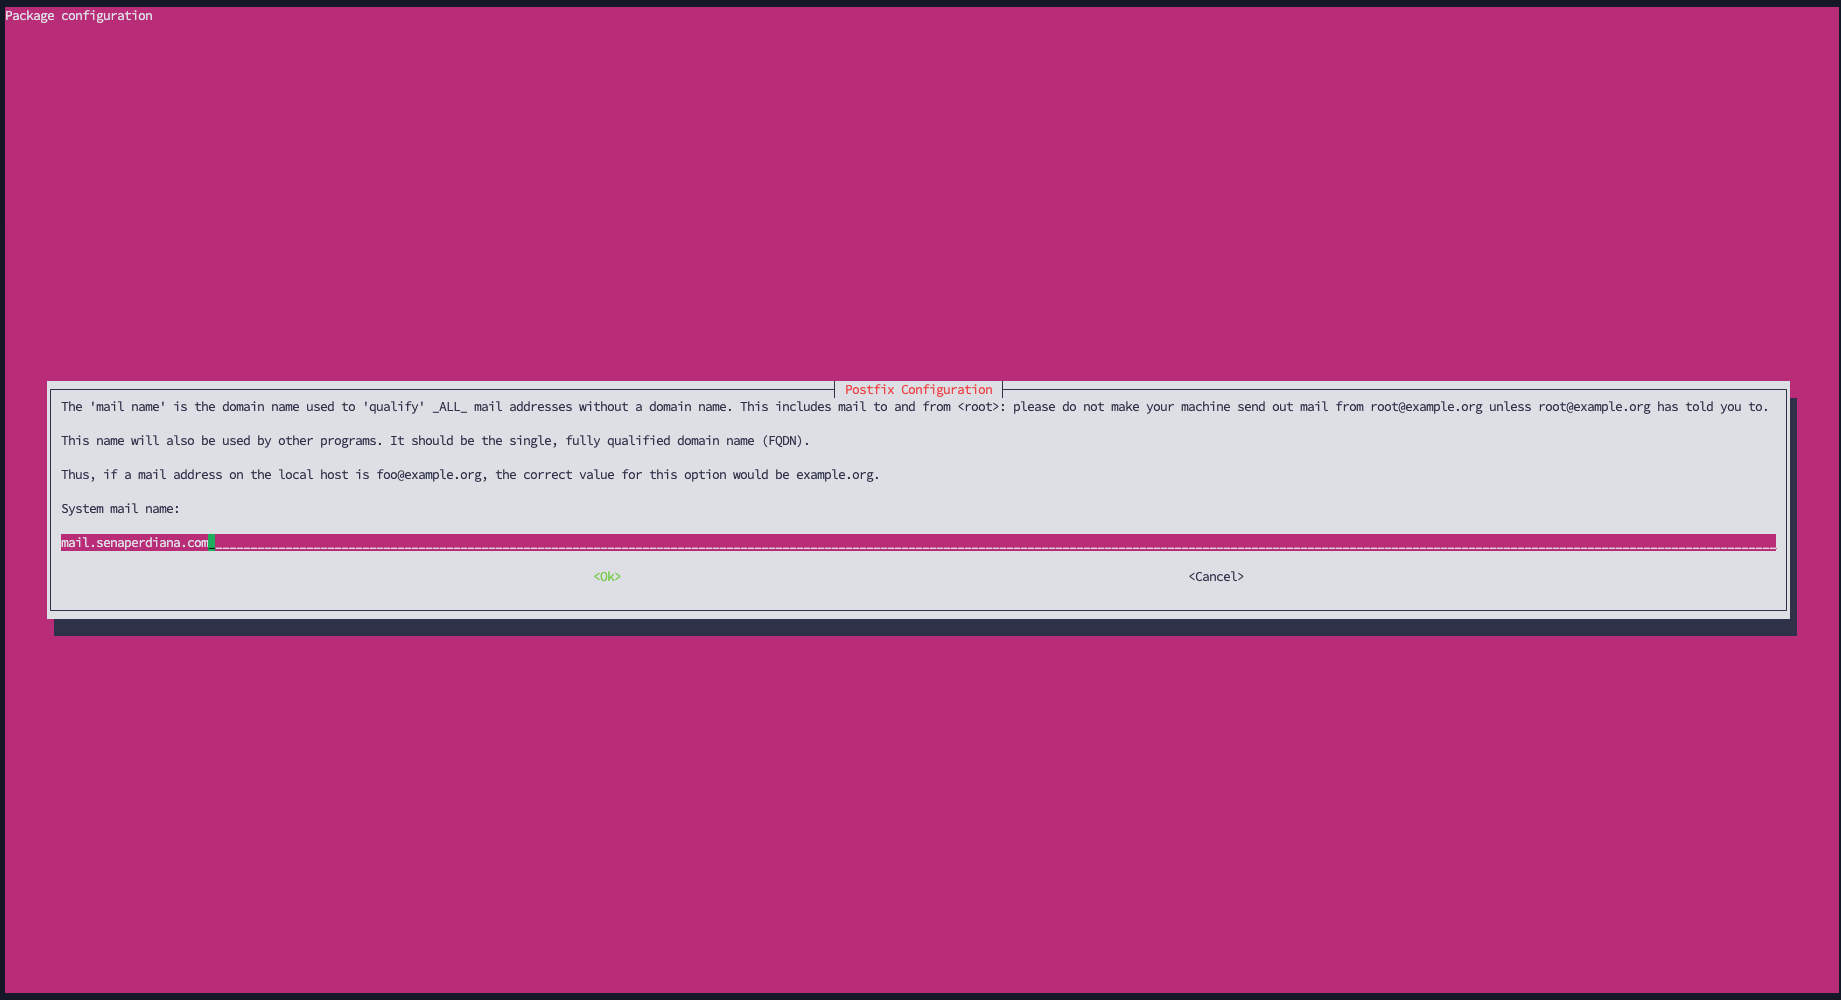
We declare the system mail name as mail.senaperdiana.com.
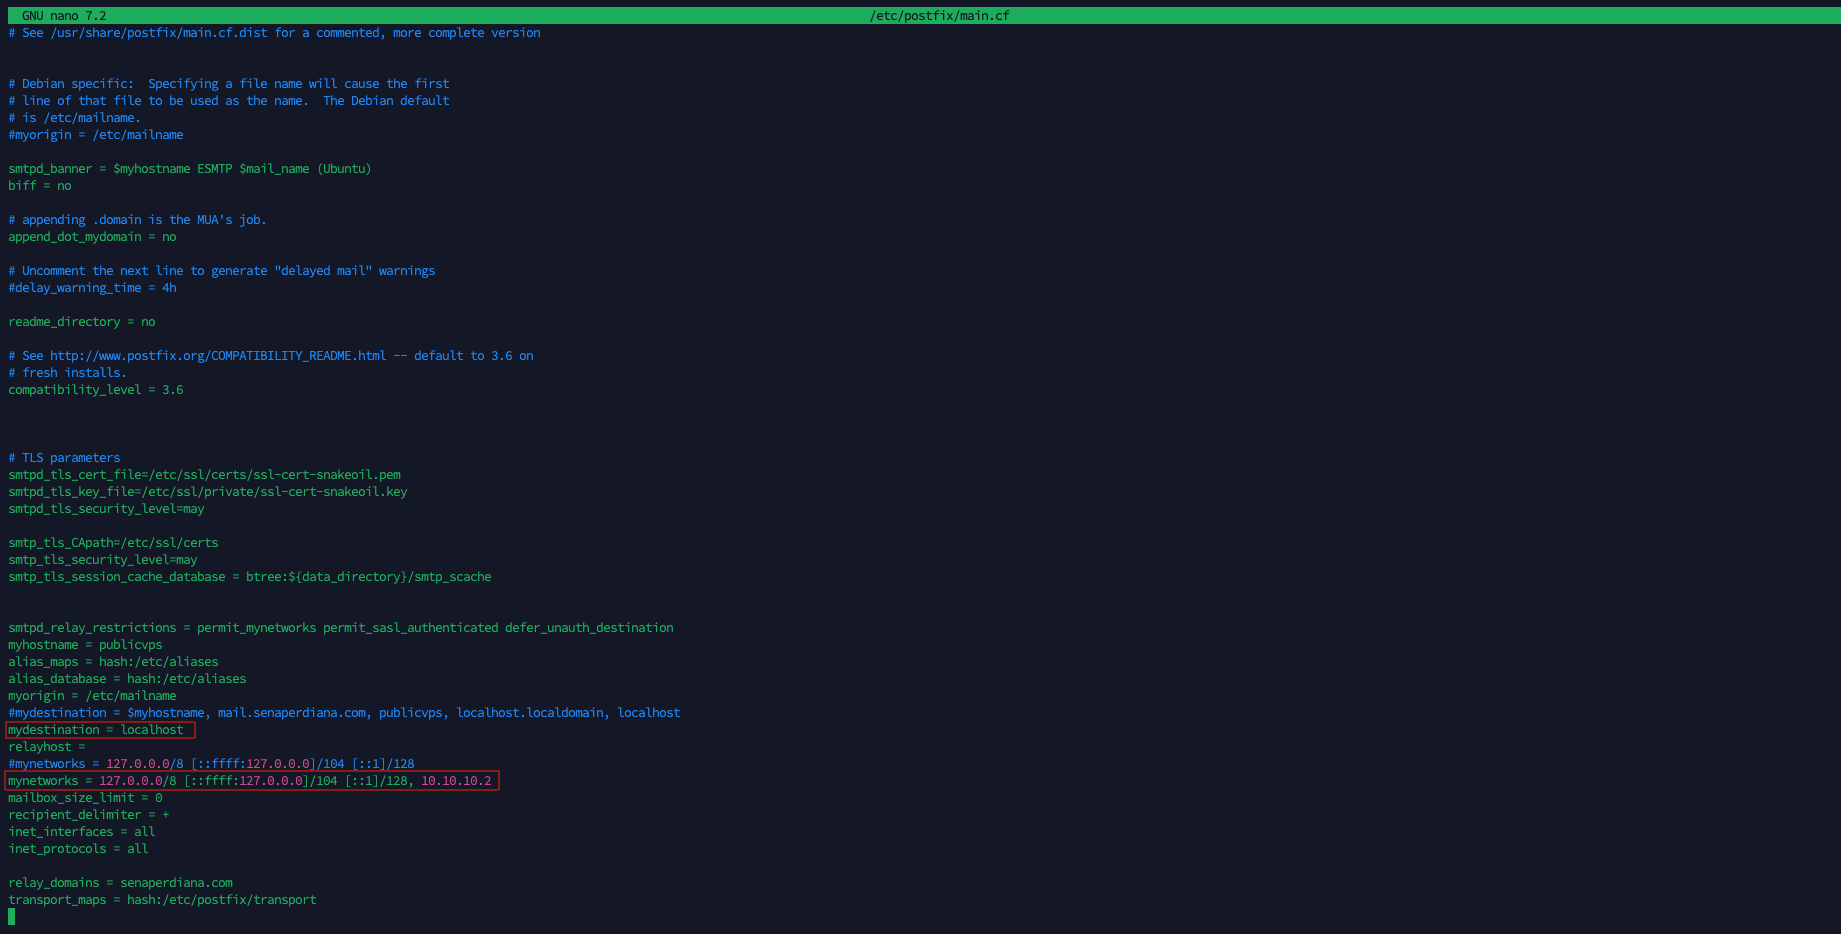
We modify /etc/postfix/main.cf on the public VPS to define relay parameters:
- Set
mydestination = localhostto ensure it does not attempt local delivery. - Add our Zimbra tunnel IP (
10.10.10.2) tomynetworksto trust outbound relays. - Add
senaperdiana.comtorelay_domainsto tell Postfix to accept inbound mail for the domain. - Enable
transport_maps = hash:/etc/postfix/transportto control destination routing.
We configure the /etc/postfix/transport file, routing all email destined for senaperdiana.com to the Zimbra server over SMTP at [10.10.10.2]:25.

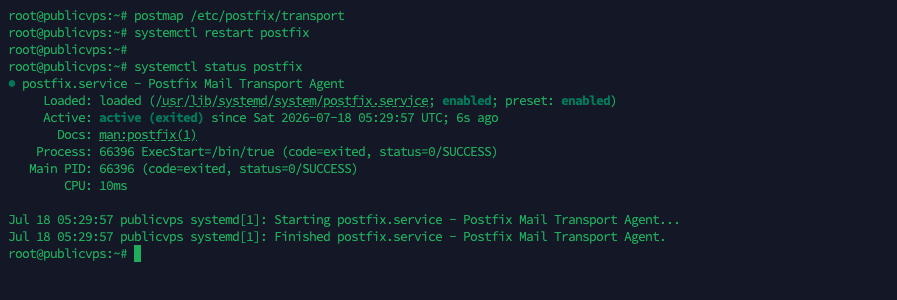
We compile the transport lookup database by running postmap /etc/postfix/transport, restart the Postfix daemon, and verify that the service is running normally.
Zimbra Collaboration Installation
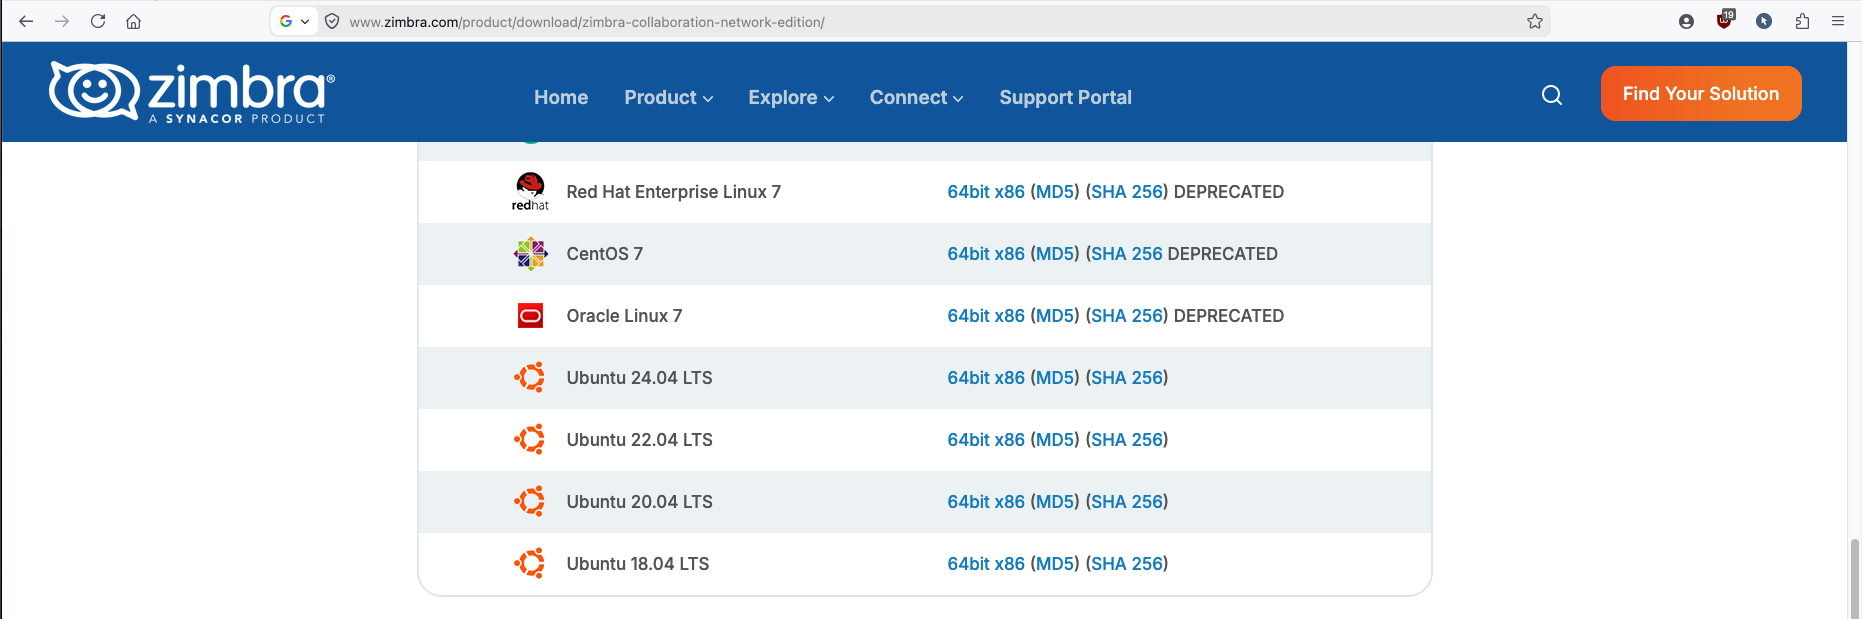
We download the Zimbra Collaboration Network Edition installation package for Ubuntu 24.04 LTS from the official download repository.
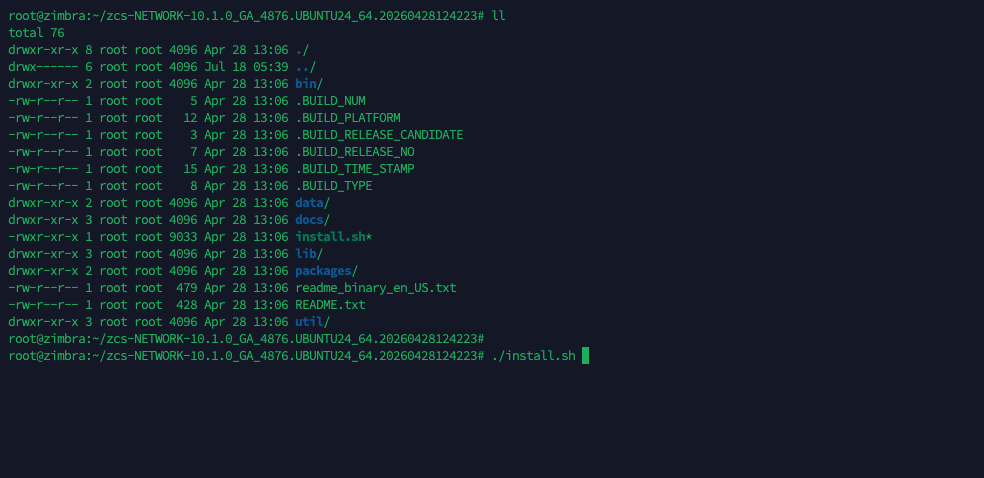
We extract the downloaded ZCS tarball (zcs-NETWORK-10.1.0_GA_4876.UBUNTU24_64.20260428124223) and start the installation script by running ./install.sh.
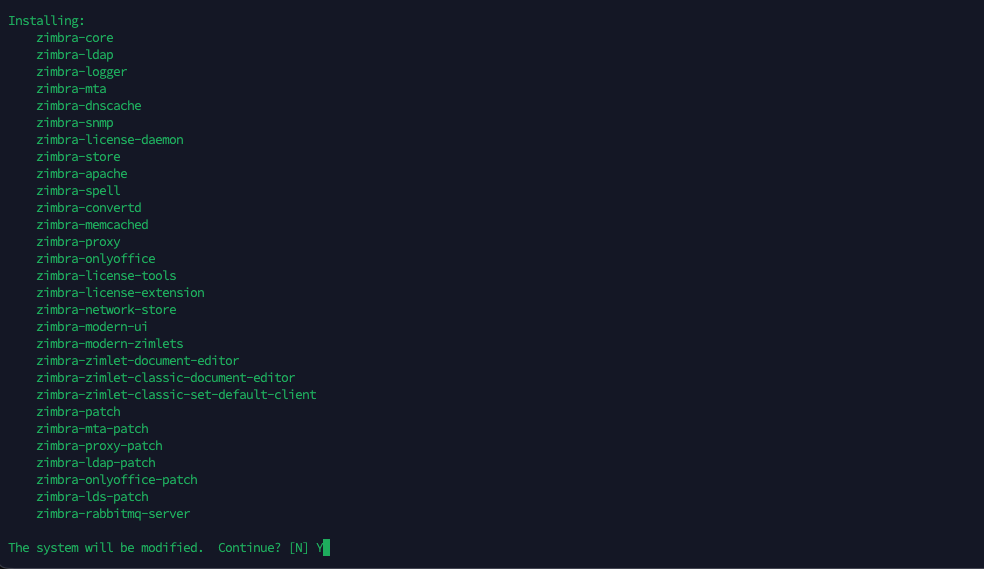
We agree to the software license terms and select all required packages, including zimbra-core, zimbra-ldap, zimbra-mta, zimbra-store, and zimbra-proxy, to proceed with the system modifications.
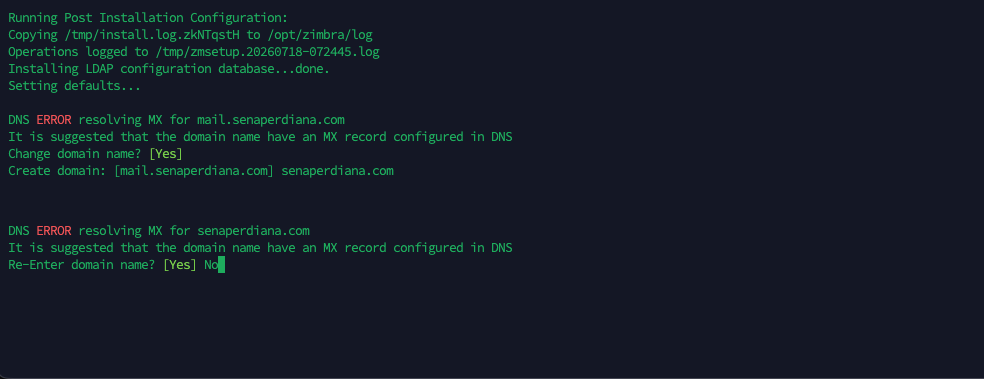
The post-installation wizard attempts to run a DNS lookup to resolve the MX record. Since our public DNS records are not yet live, it triggers an MX resolution error. We override this warning and specify the primary domain name as senaperdiana.com.
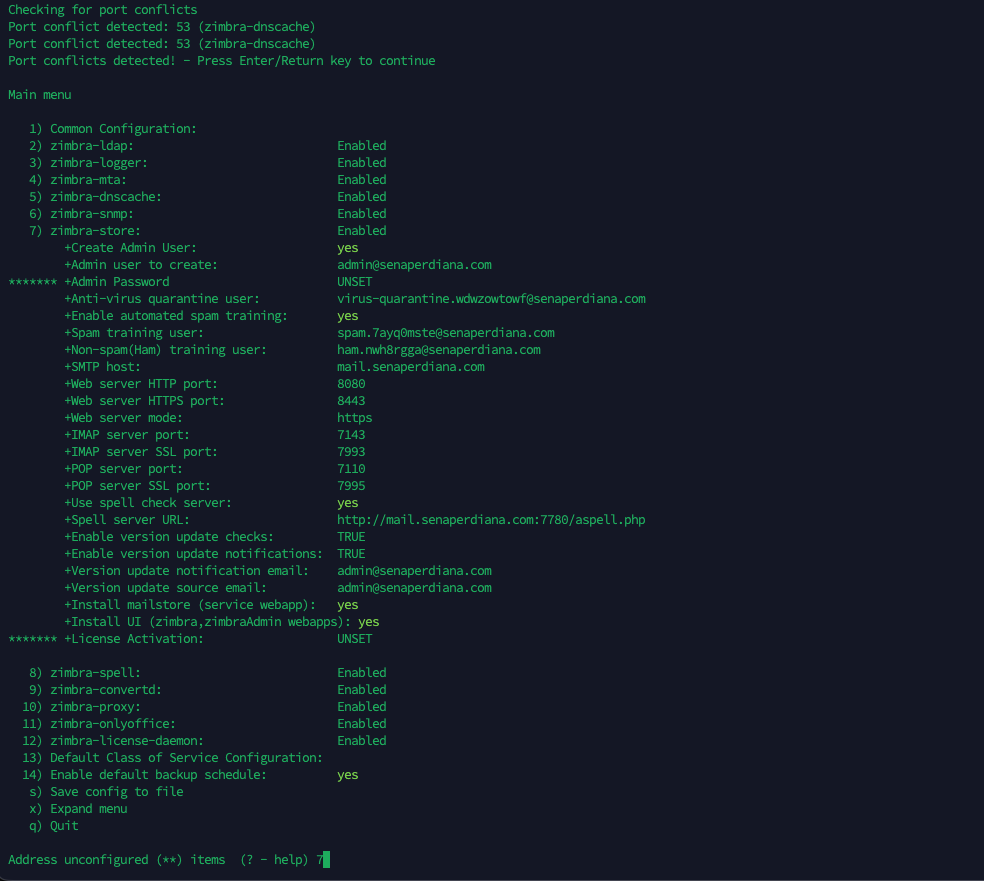
The setup logs port conflicts on port 53 because Ubuntu’s system resolver (systemd-resolved) binds to it by default. We acknowledge the conflict to open the Zimbra main configuration menu.
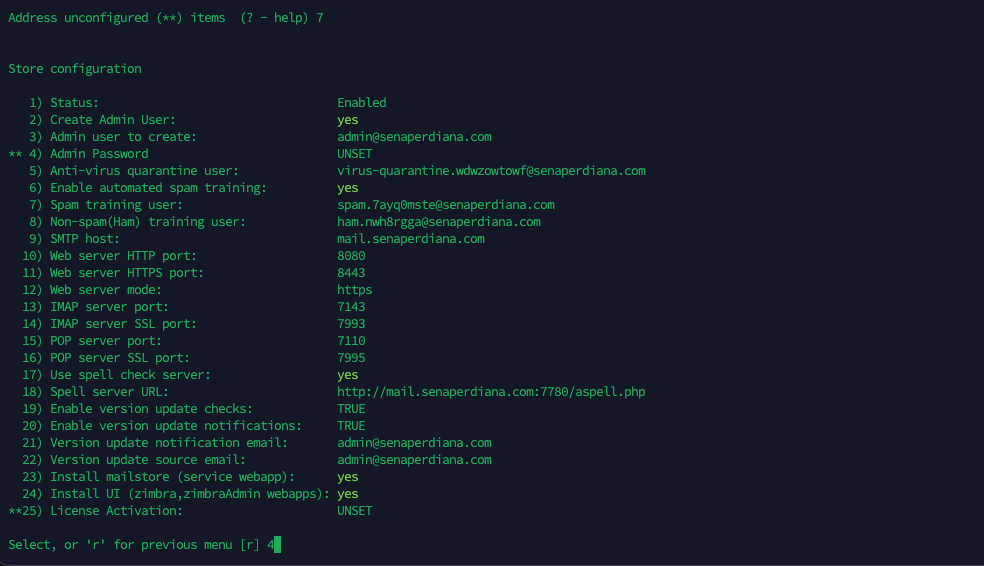
Under the Store configuration sub-menu, the unconfigured administrative password (marked with **) must be configured. We select option 4 to set the password.
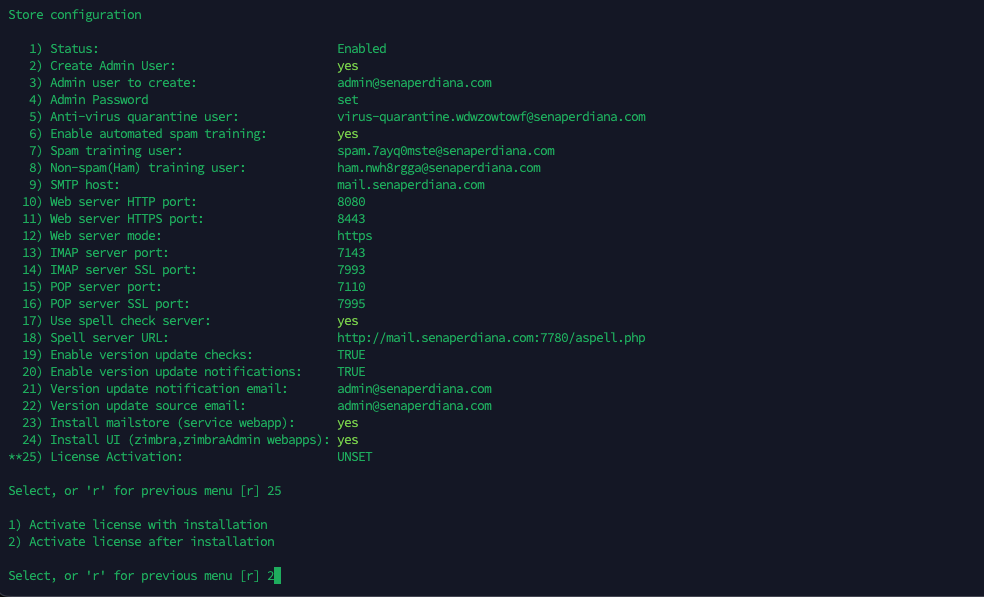
We select option 25 (License Activation) and choose 2 to activate the license after the installation completes.
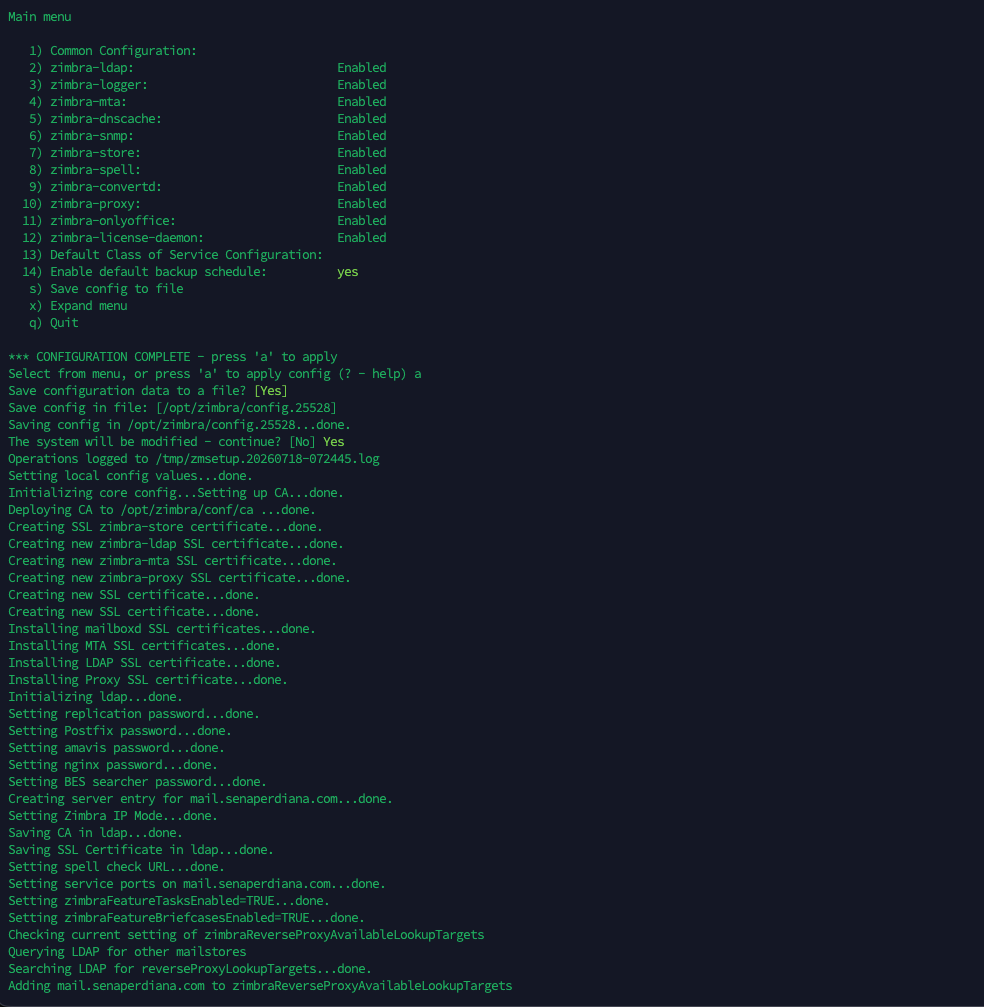
We press a to apply the configuration, saving the changes to /opt/zimbra/config.25528 and confirming the system modification prompt to generate certificates, initialize LDAP, and establish mail databases.
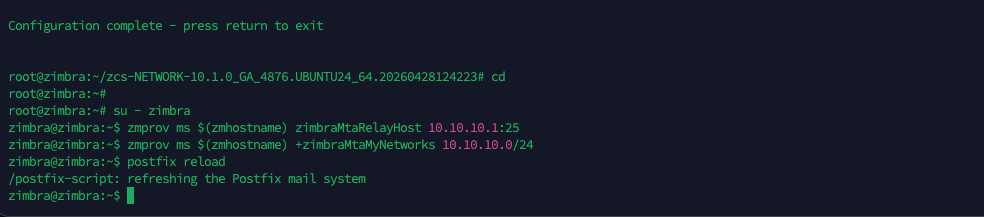
Once the installation is complete, we switch to the zimbra user account and configure our outbound relay settings. We configure the mail server to route all outbound mail through the public VPS gateway (10.10.10.1:25) and add our VPN subnet to the postfix allowed network definitions.
1
2
3
4
su - zimbra
zmprov ms $(zmhostname) zimbraMtaRelayHost 10.10.10.1:25
zmprov ms $(zmhostname) +zimbraMtaMyNetworks 10.10.10.0/24
postfix reload
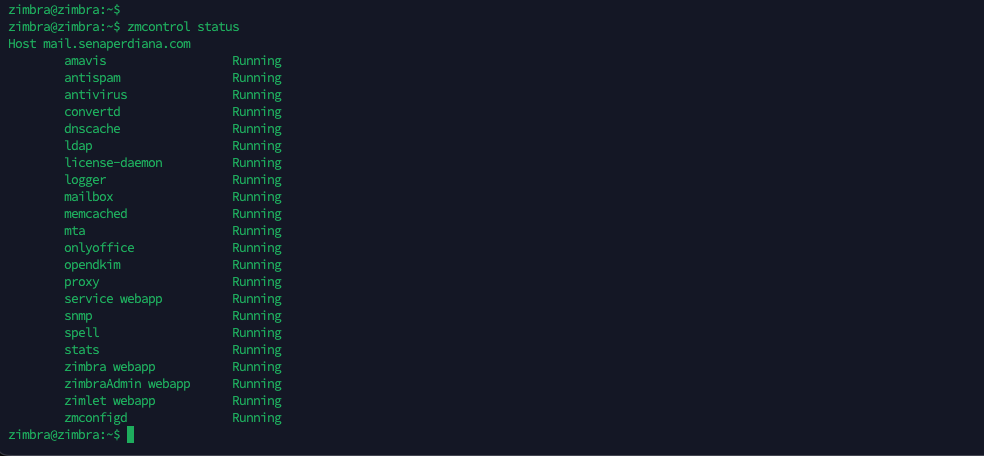
We run zmcontrol status to verify that all critical Zimbra services (ldap, mailbox, mta, proxy, convertd, and webapps) are running successfully.
Public DNS and Security Setup
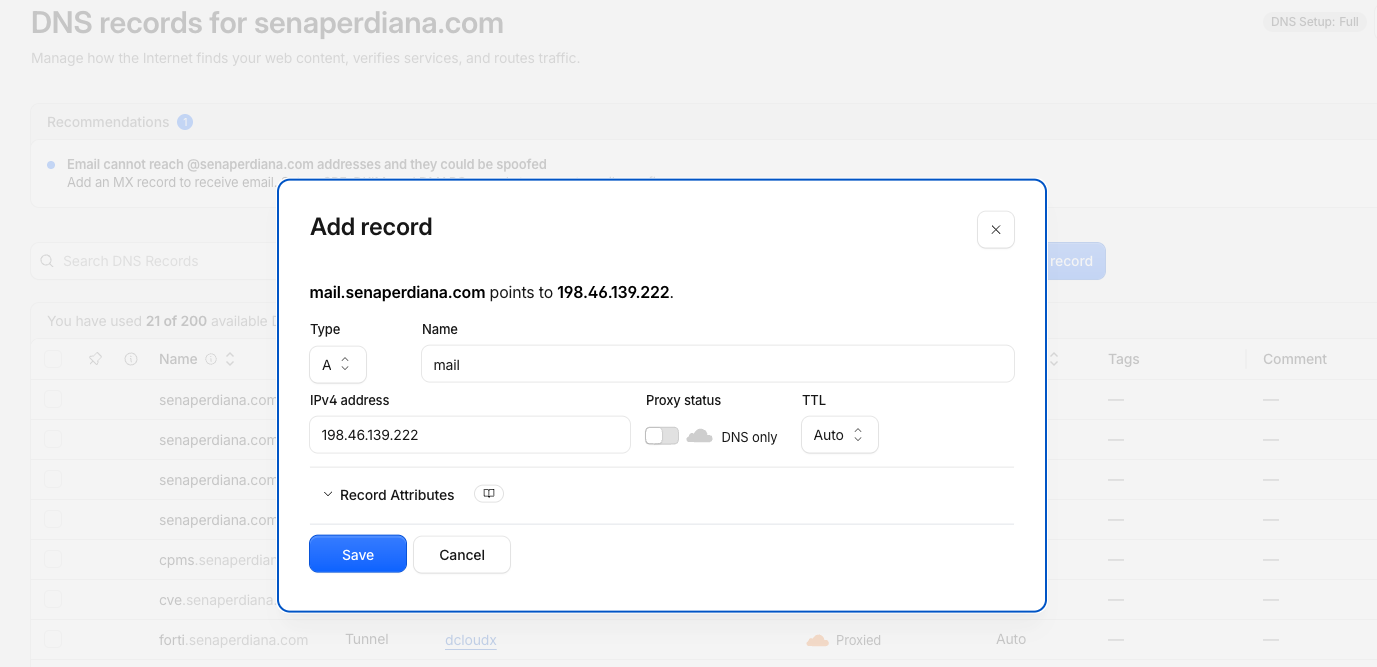
We configure our public DNS records in the Cloudflare management panel. We add an A record for mail.senaperdiana.com pointing to the public VPS IP address (198.46.139.222), setting the proxy status to DNS only to allow direct SMTP traffic.
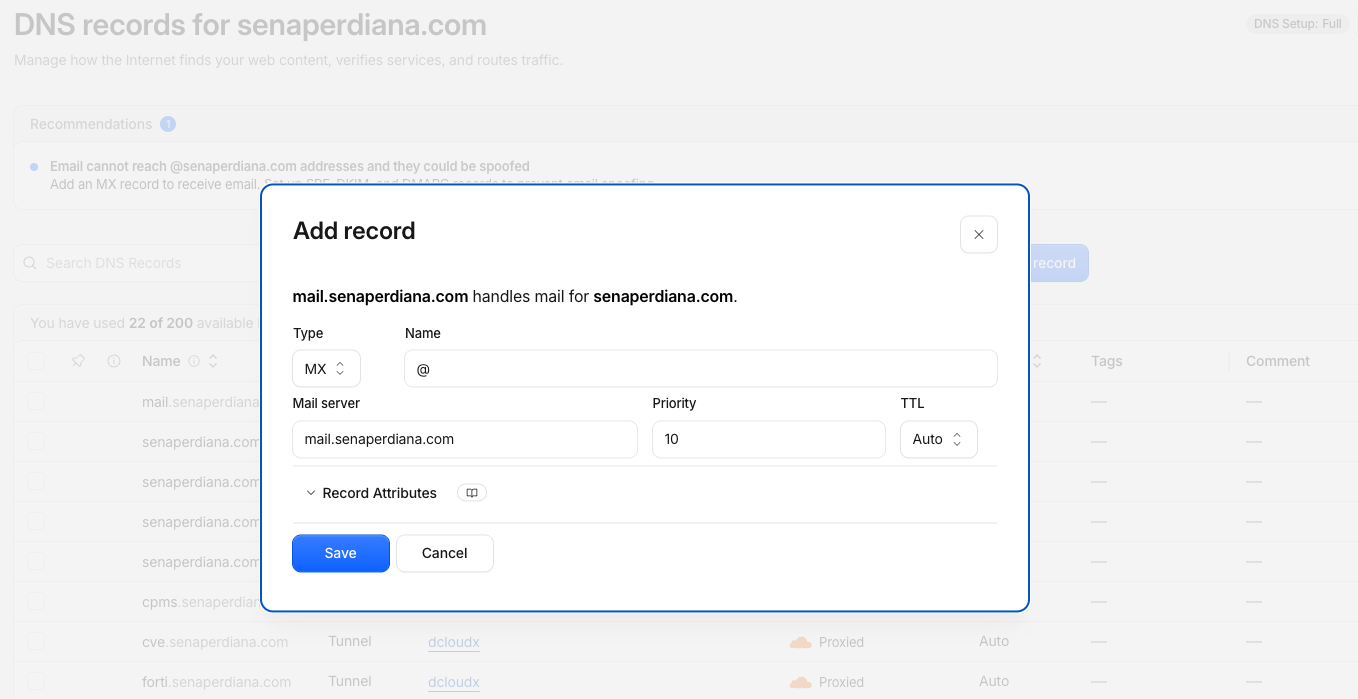
We add an MX record for the root domain senaperdiana.com pointing to mail.senaperdiana.com with a priority of 10.
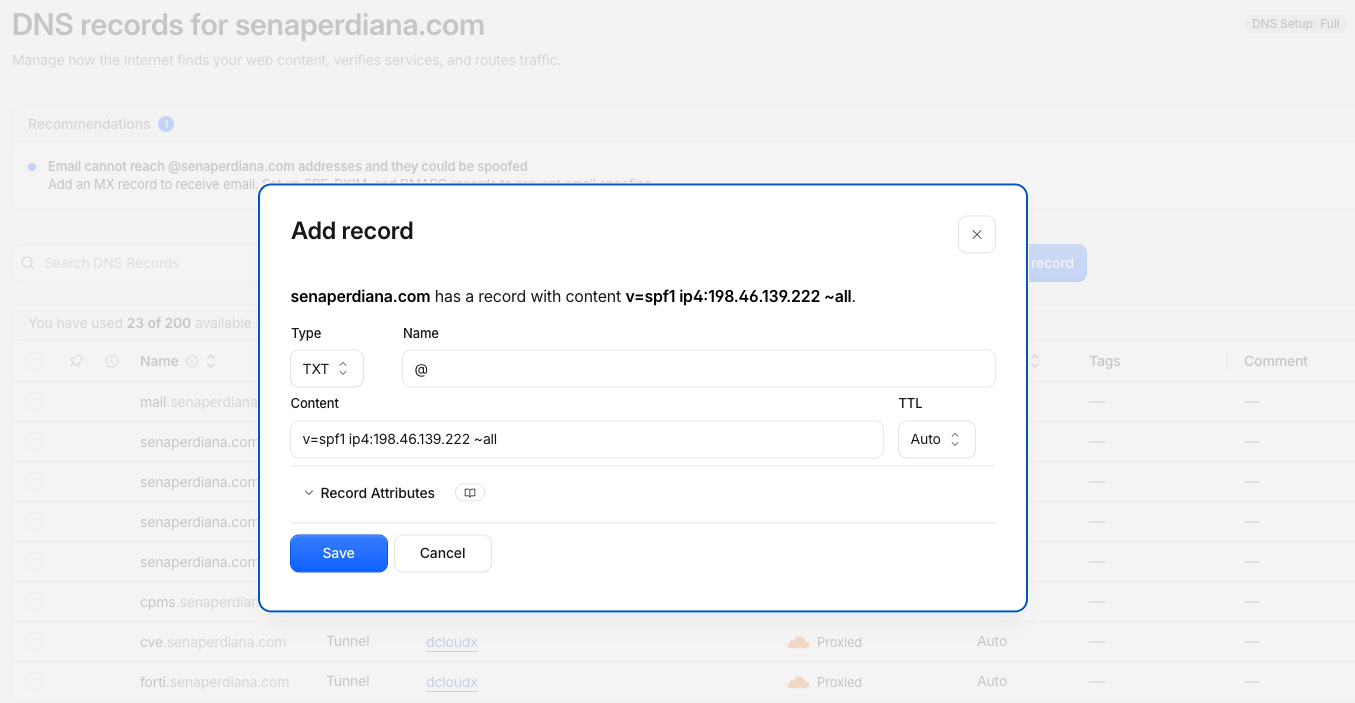
To prevent spoofing and ensure our sent emails pass spam validation, we add a TXT record defining our SPF policy: v=spf1 ip4:198.46.139.222 ~all
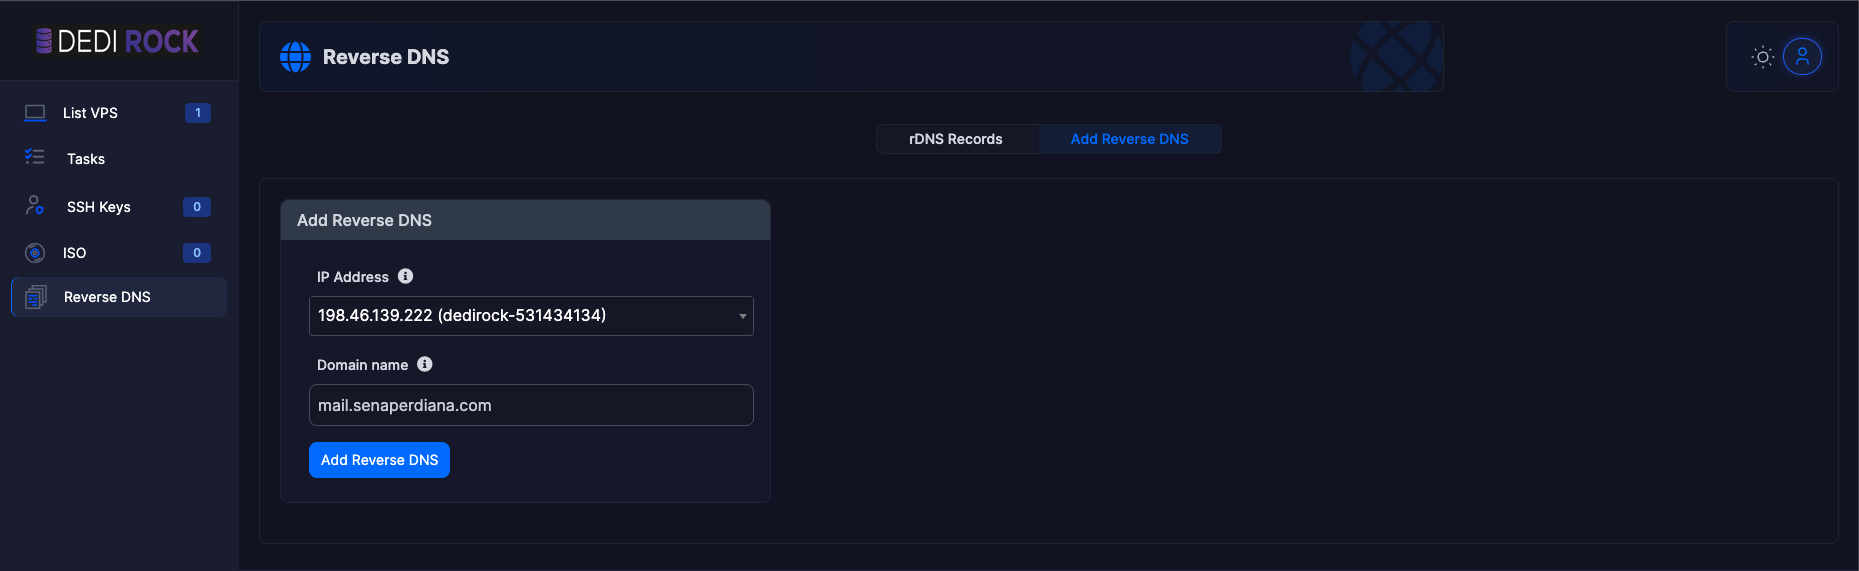
We log in to our VPS hosting provider (Dedi Rock) control panel and set up a Reverse DNS (rDNS) pointer record mapping 198.46.139.222 back to mail.senaperdiana.com.
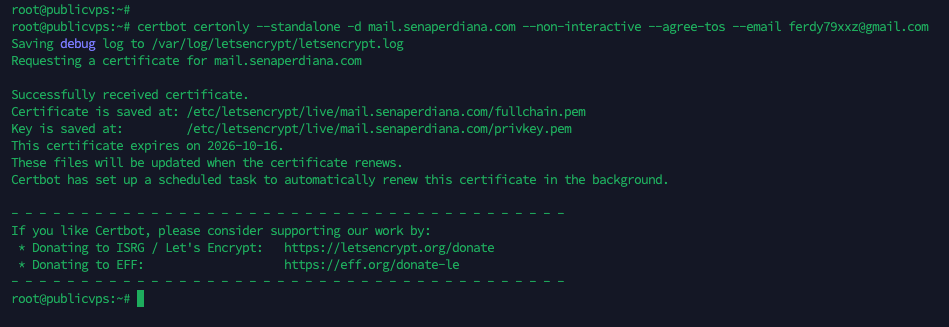
Next, we run Certbot on the public VPS in standalone mode to request a Let’s Encrypt TLS certificate for mail.senaperdiana.com.
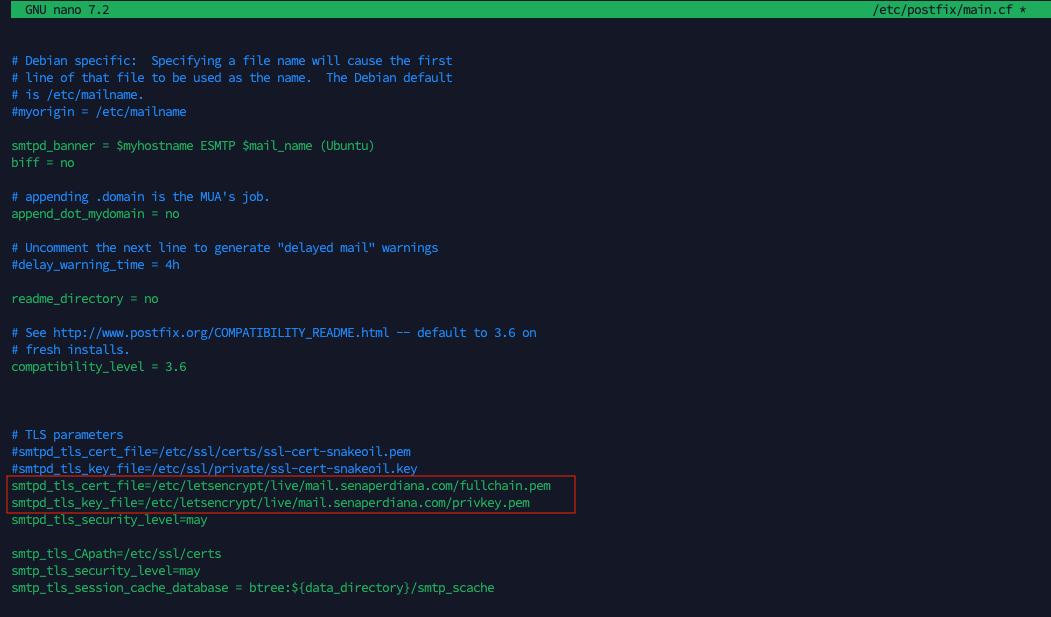
We update /etc/postfix/main.cf on the public VPS to reference the certificate paths:
smtpd_tls_cert_file=/etc/letsencrypt/live/mail.senaperdiana.com/fullchain.pem
smtpd_tls_key_file=/etc/letsencrypt/live/mail.senaperdiana.com/privkey.pem
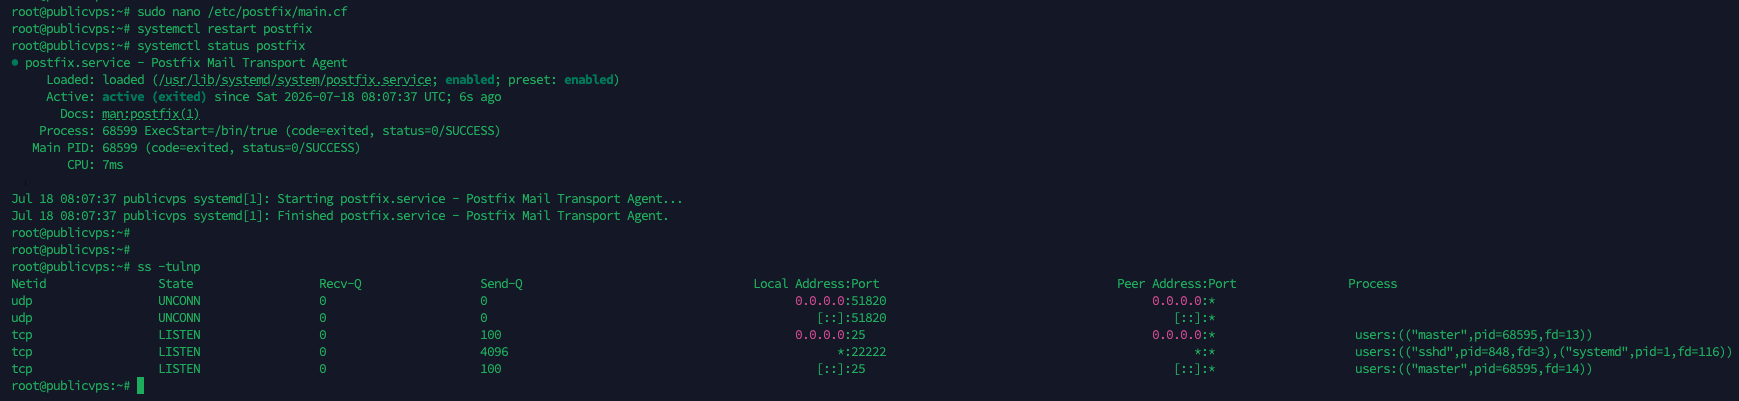
We restart the Postfix service and verify port bindings by running ss -tulnp, confirming that Postfix is listening on port 25 and WireGuard is listening on port 51820.
Architecture Verification
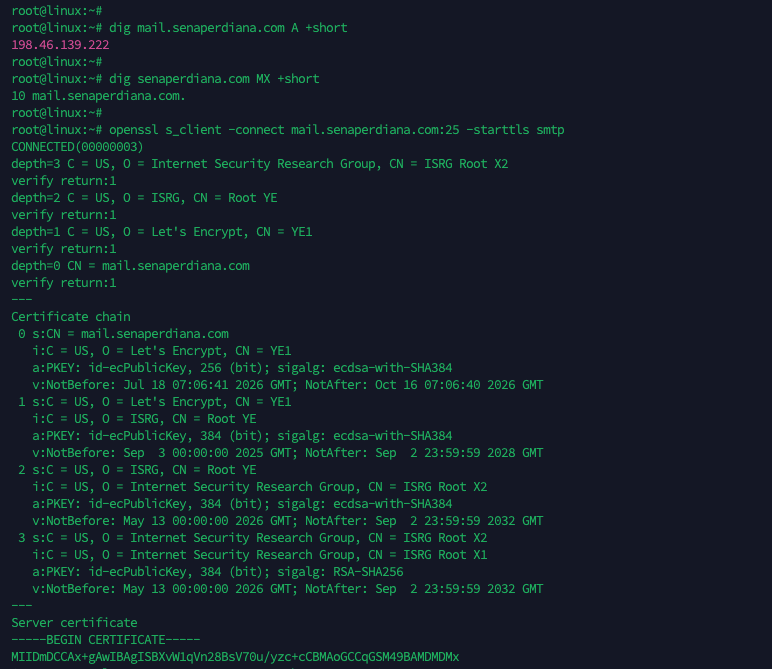
From an external client system, we run query checks and verification commands. We resolve the A and MX records to verify DNS propagation, and establish a TLS connection to our relay using openssl to verify that the Let’s Encrypt certificate chain validates correctly.
1
2
3
dig mail.senaperdiana.com A +short
dig senaperdiana.com MX +short
openssl s_client -connect mail.senaperdiana.com:25 -starttls smtp
Zimbra Admin Console
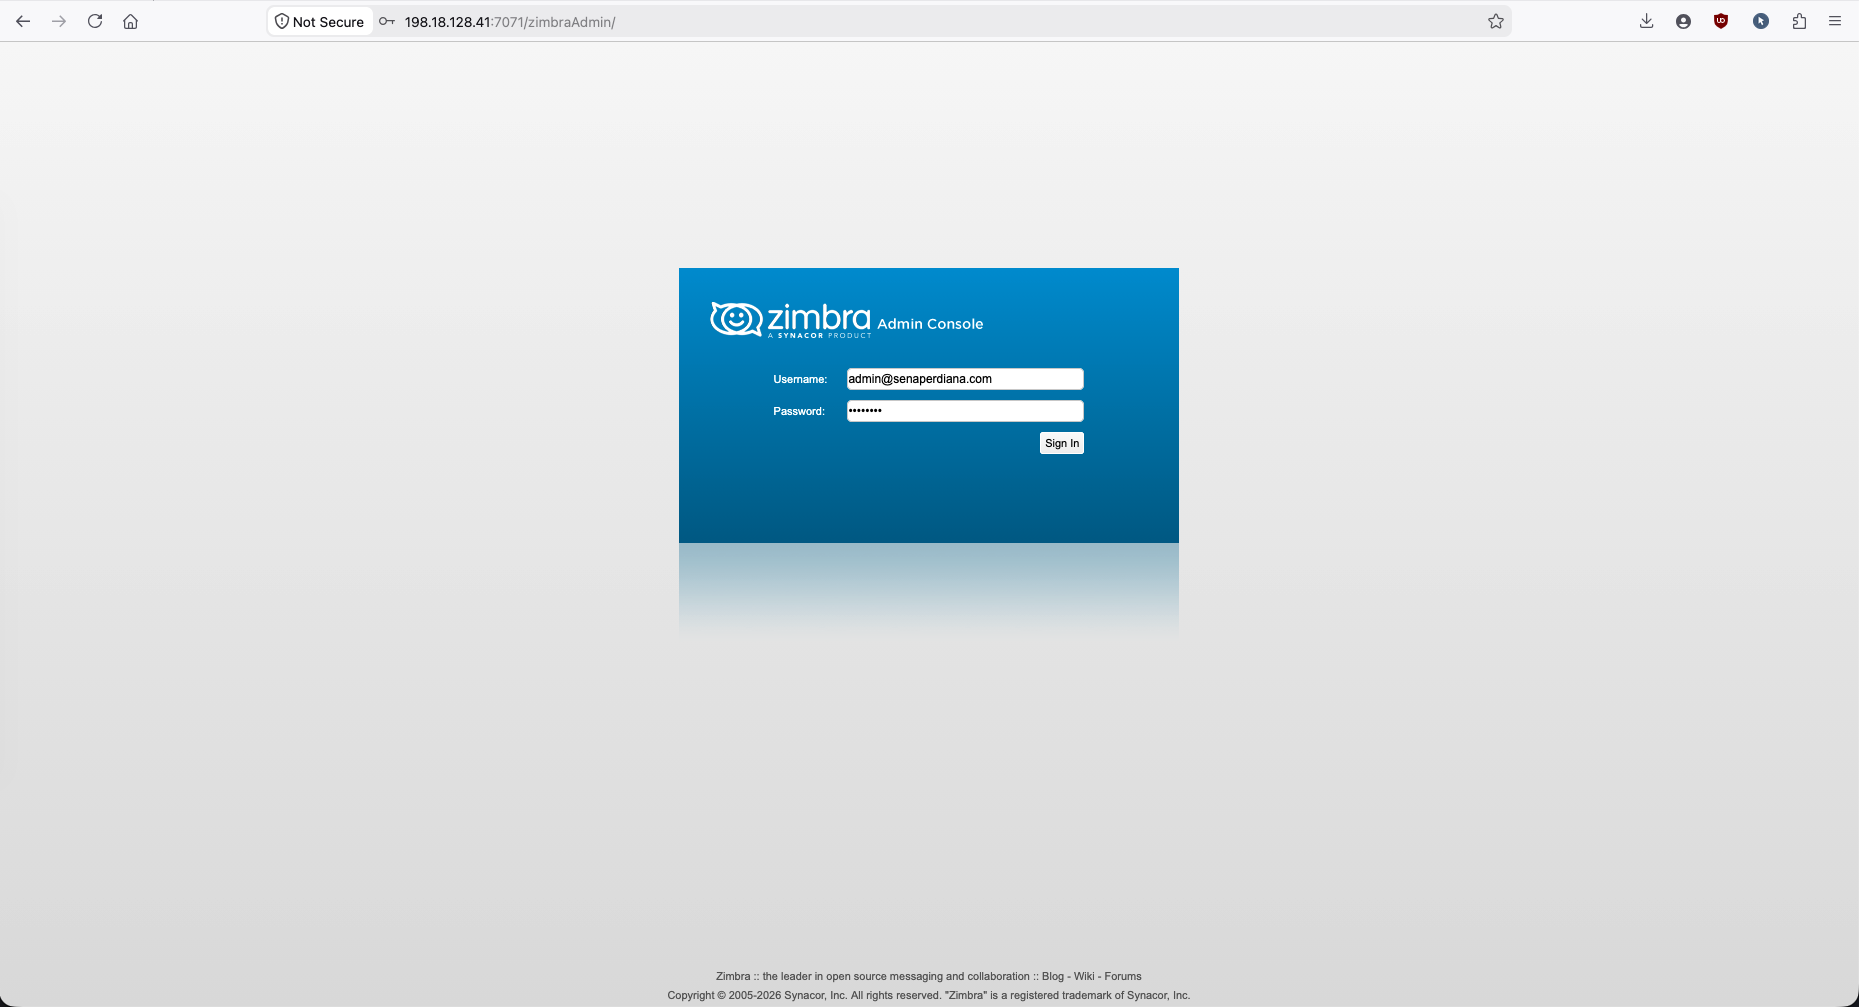
With the infrastructure verified, we access the Zimbra Administration Console via a browser at http://198.18.128.41:7071/zimbraAdmin/ and log in using the admin account credentials configured during installation.
License Activation
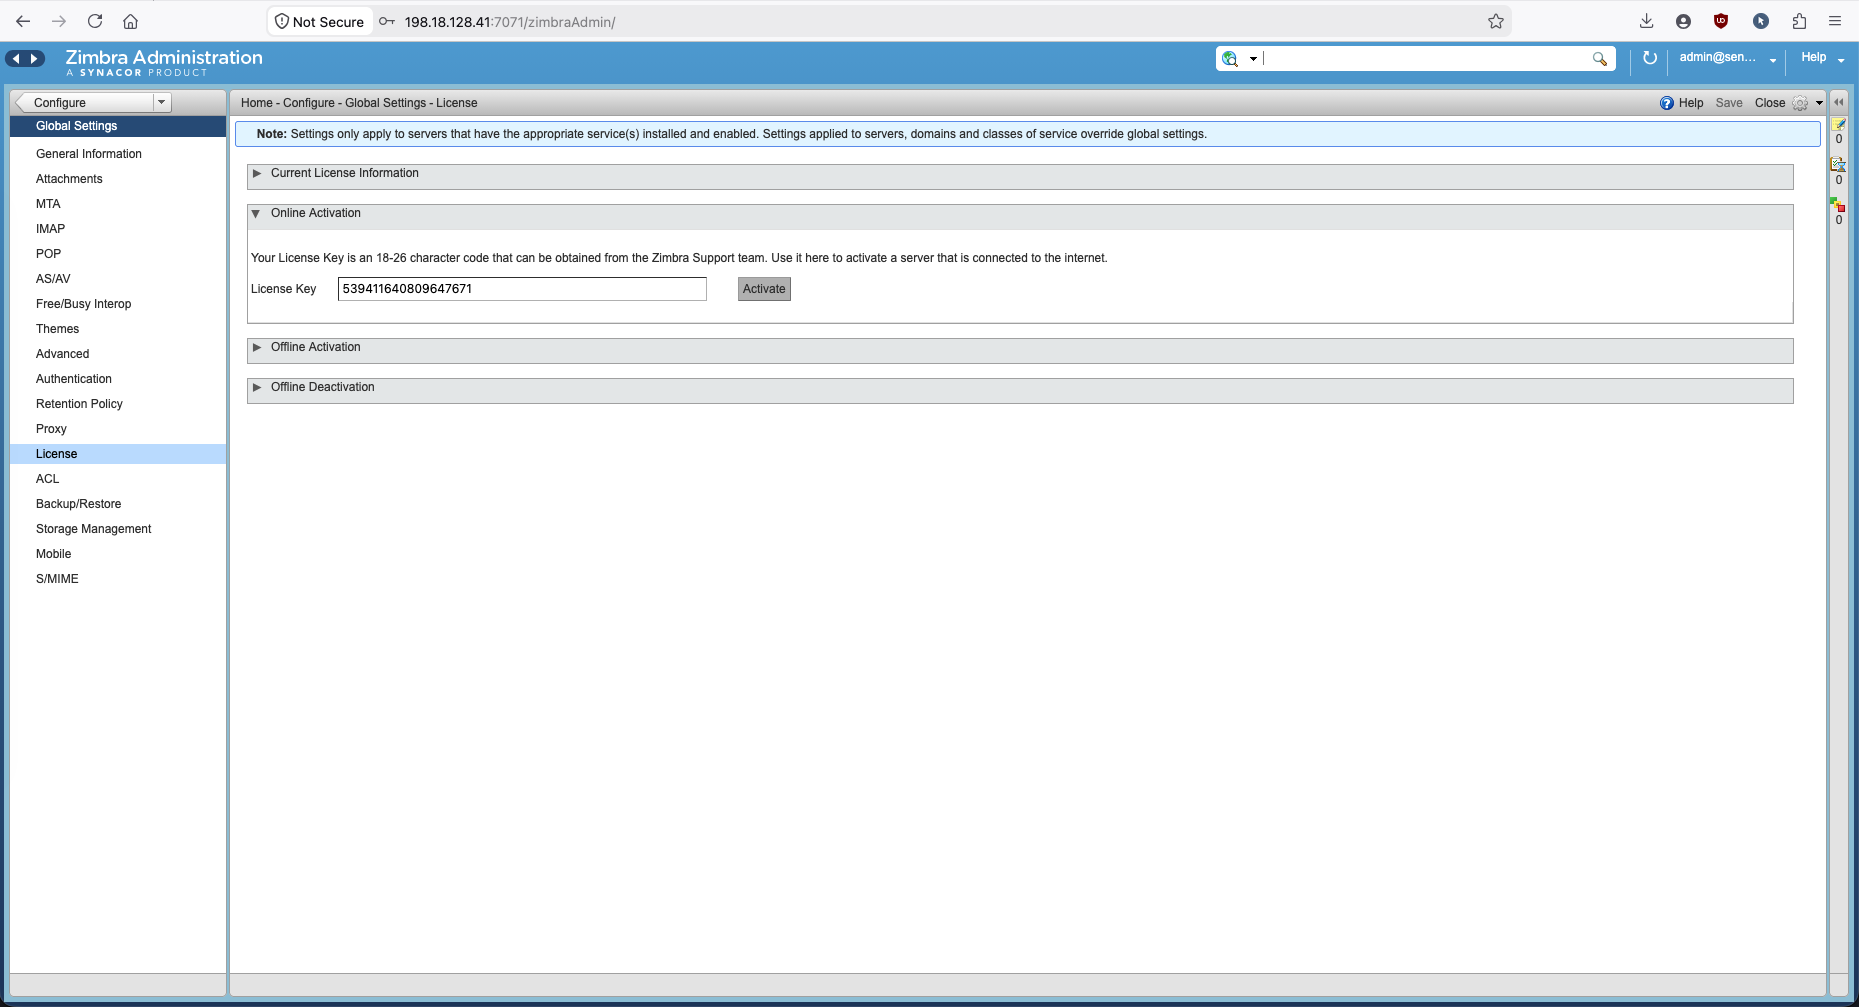
We navigate to Configure → Global Settings → License and enter the 18-character license key to activate Zimbra Network Edition.
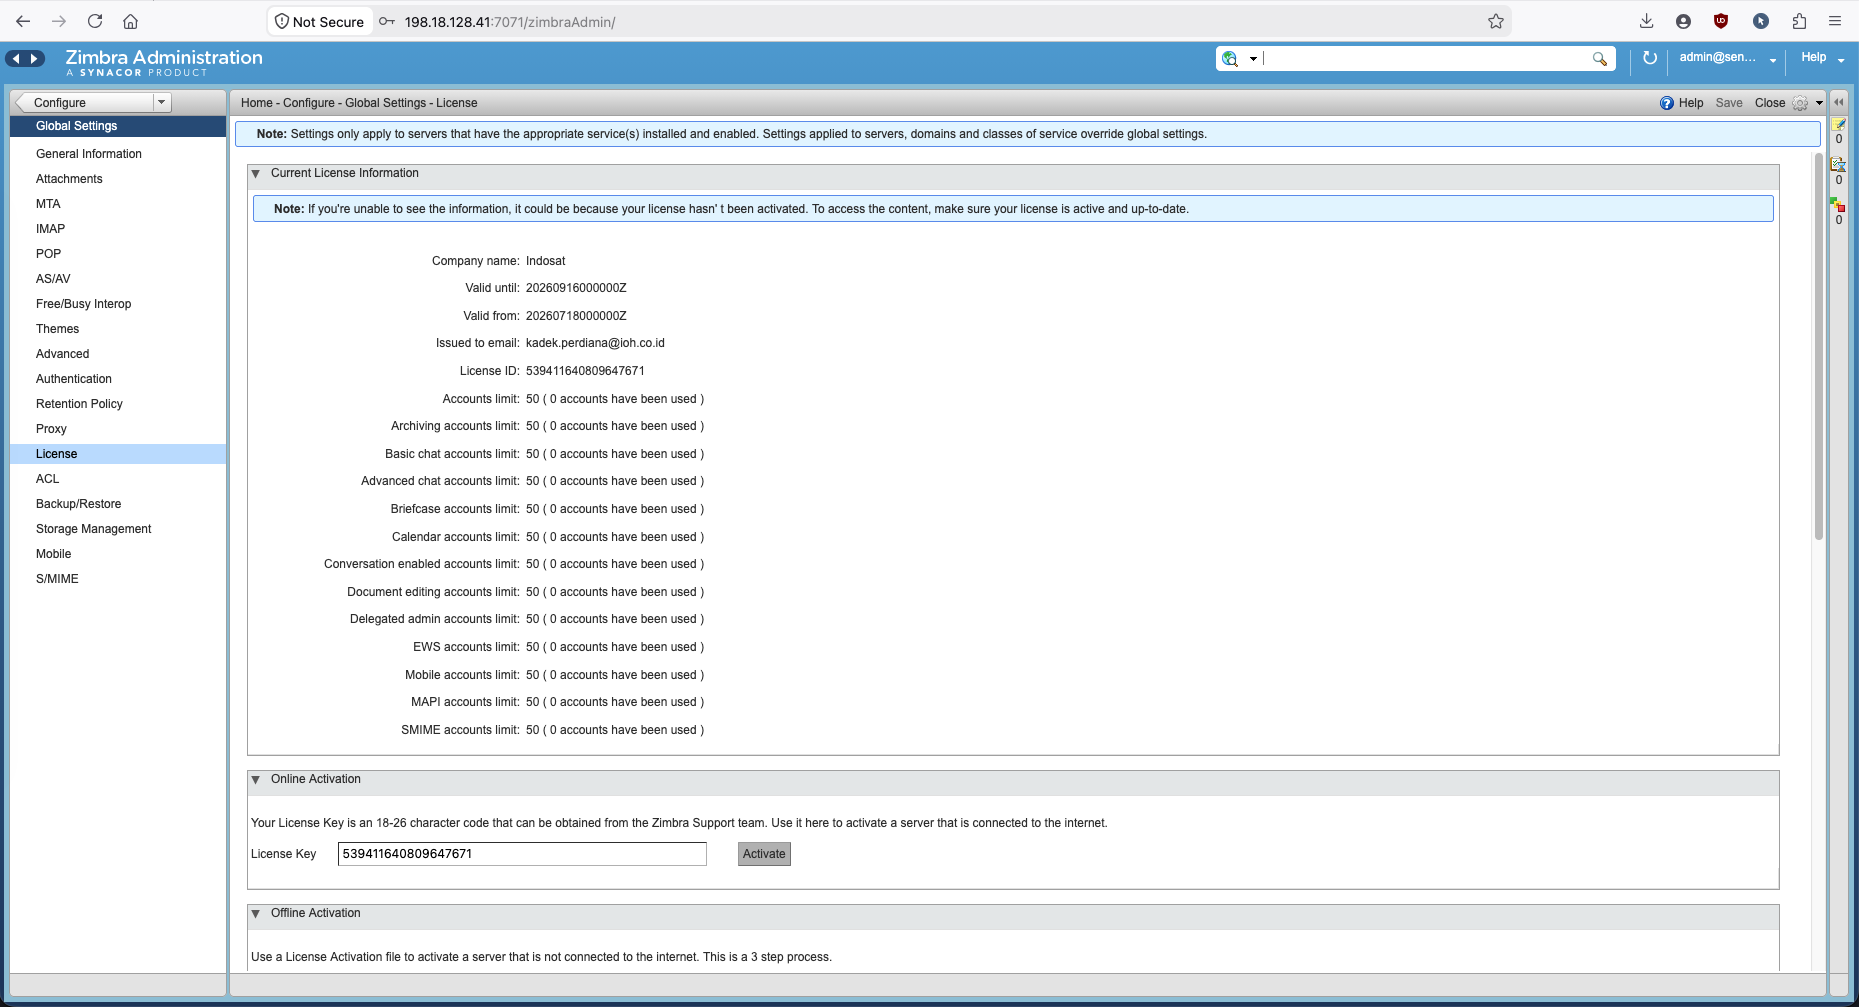
After clicking Activate, the Current License Information section populates with full license details — company name, validity period, issued email, License ID, and per-feature account limits (50 accounts for mailboxes, archiving, chat, calendaring, mobile, MAPI, S/MIME, and document editing).
Server Status Dashboard
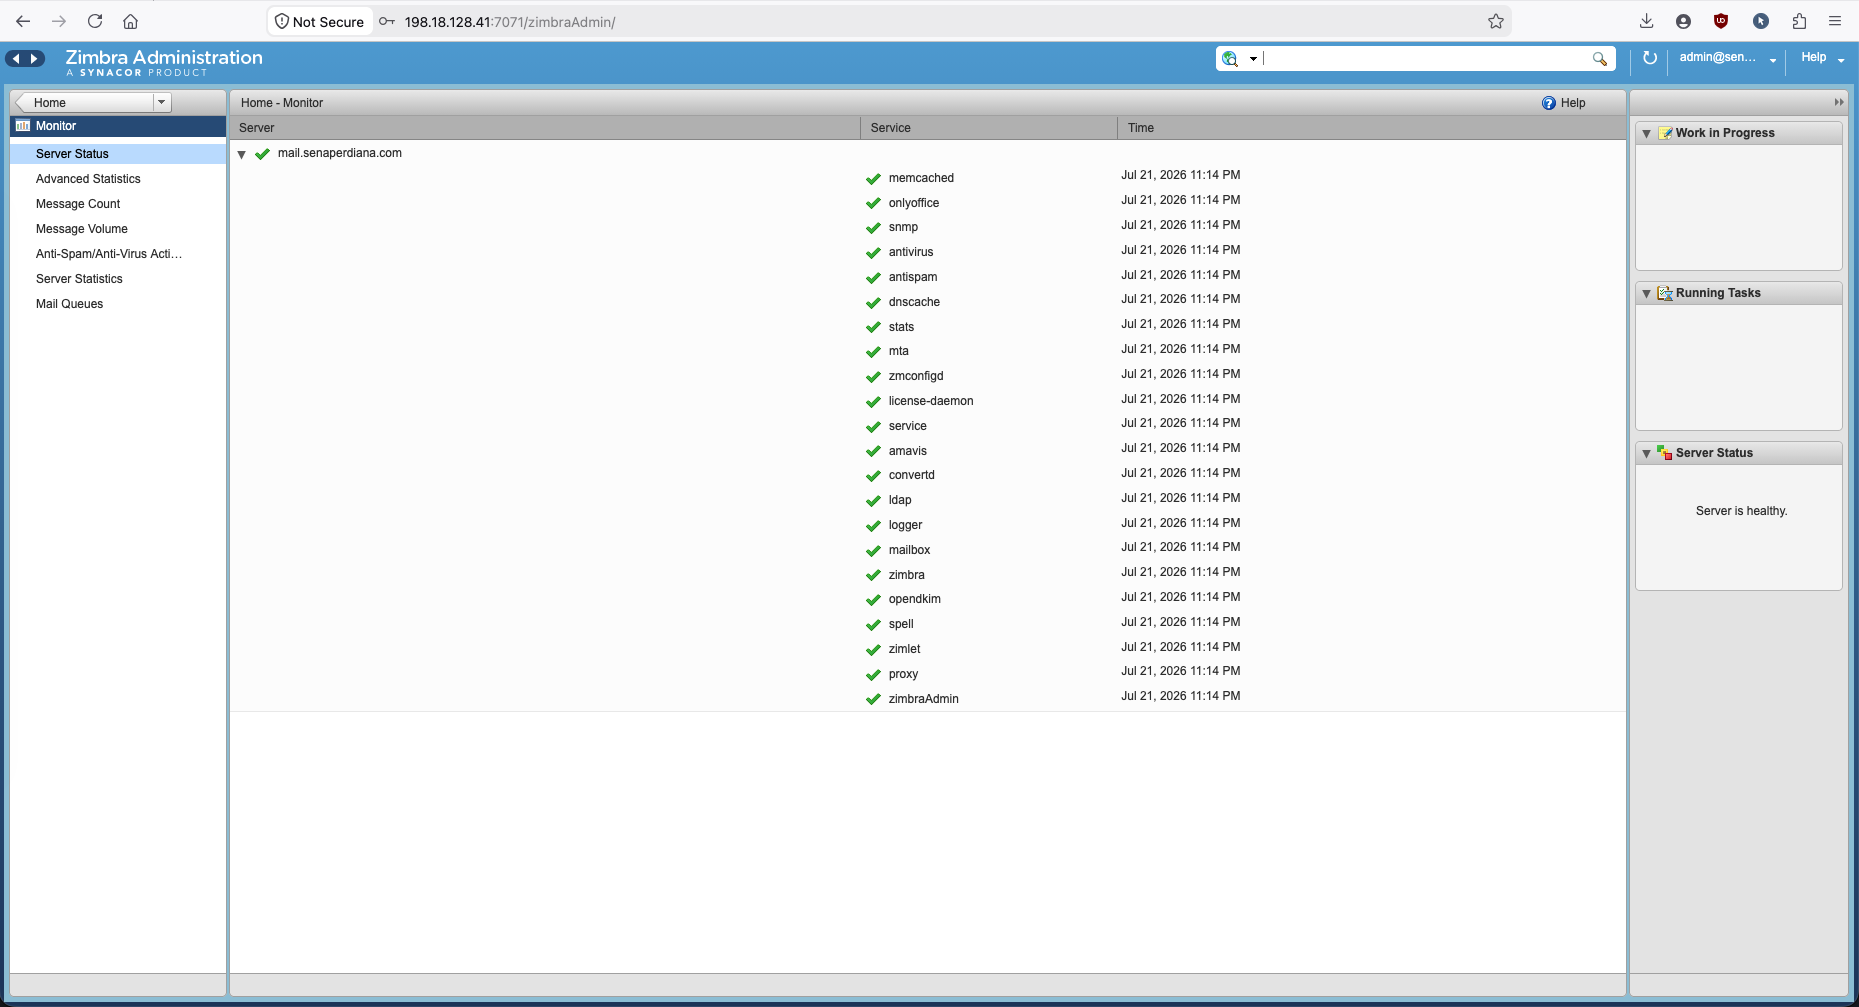
We navigate to Monitor → Server Status in the Admin Console to get a real-time GUI view of all Zimbra services running on mail.senaperdiana.com. All critical services — including ldap, mailbox, mta, proxy, amavis, antivirus, antispam, convertd, onlyoffice, opendkim, spell, zmconfigd, logger, and the web application services — show a green checkmark and a healthy timestamp.
User Account Provisioning
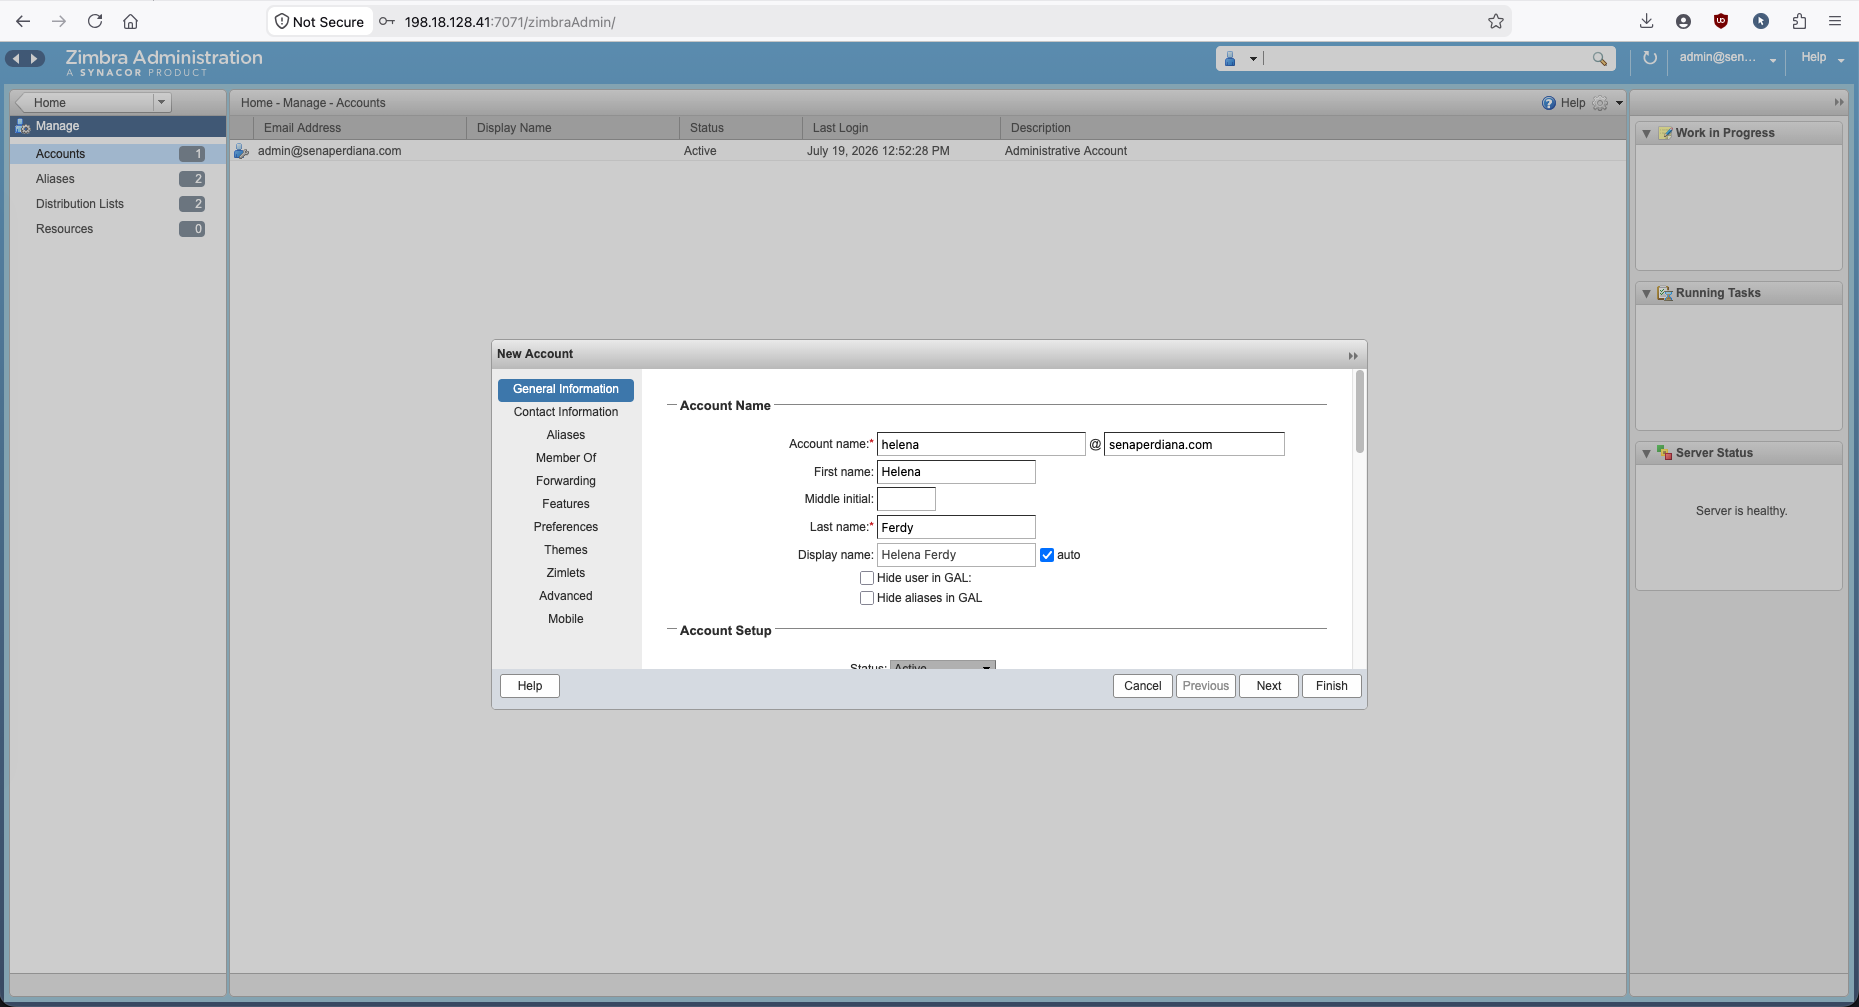
We navigate to Manage → Accounts and create a new mailbox account. In the New Account wizard, we fill in the account name as [email protected] with display name Helena Ferdy and set the account status to Active.
Webmail Access
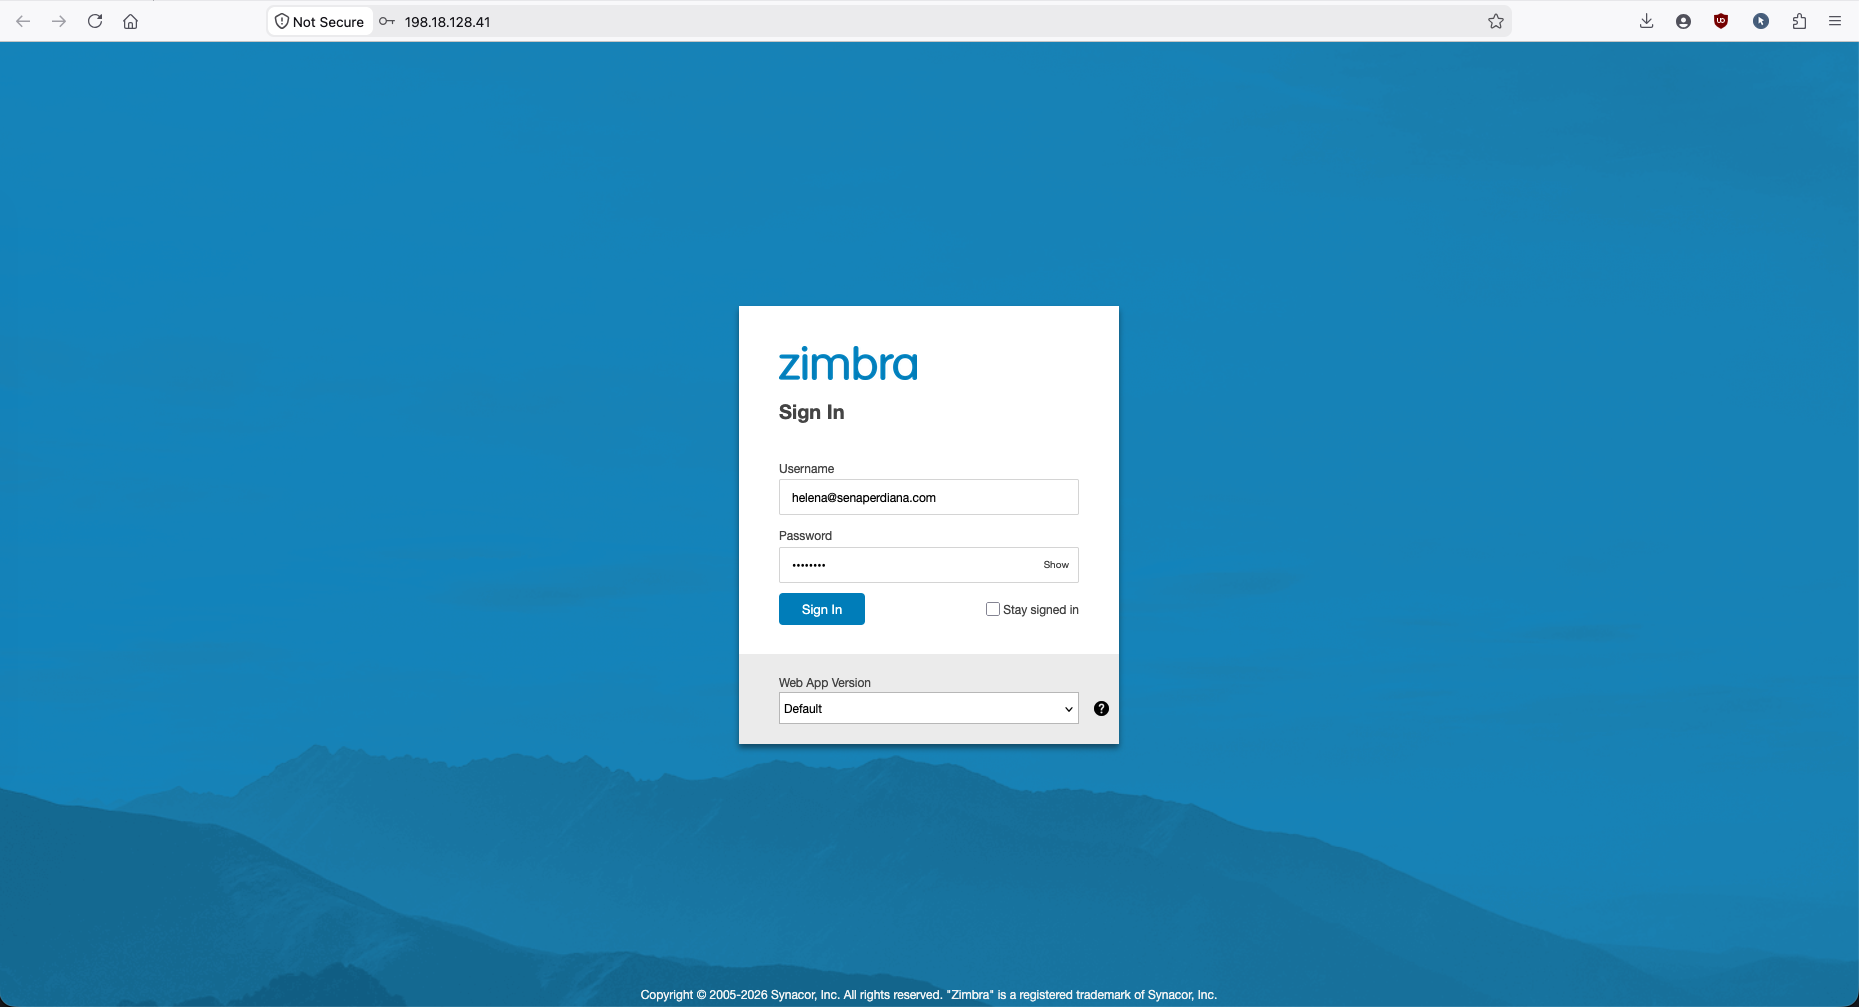
With the account provisioned, we test end-user access by navigating to the Zimbra Modern Web Client at http://198.18.128.41 and signing in as [email protected].
End-to-End Email Flow Testing
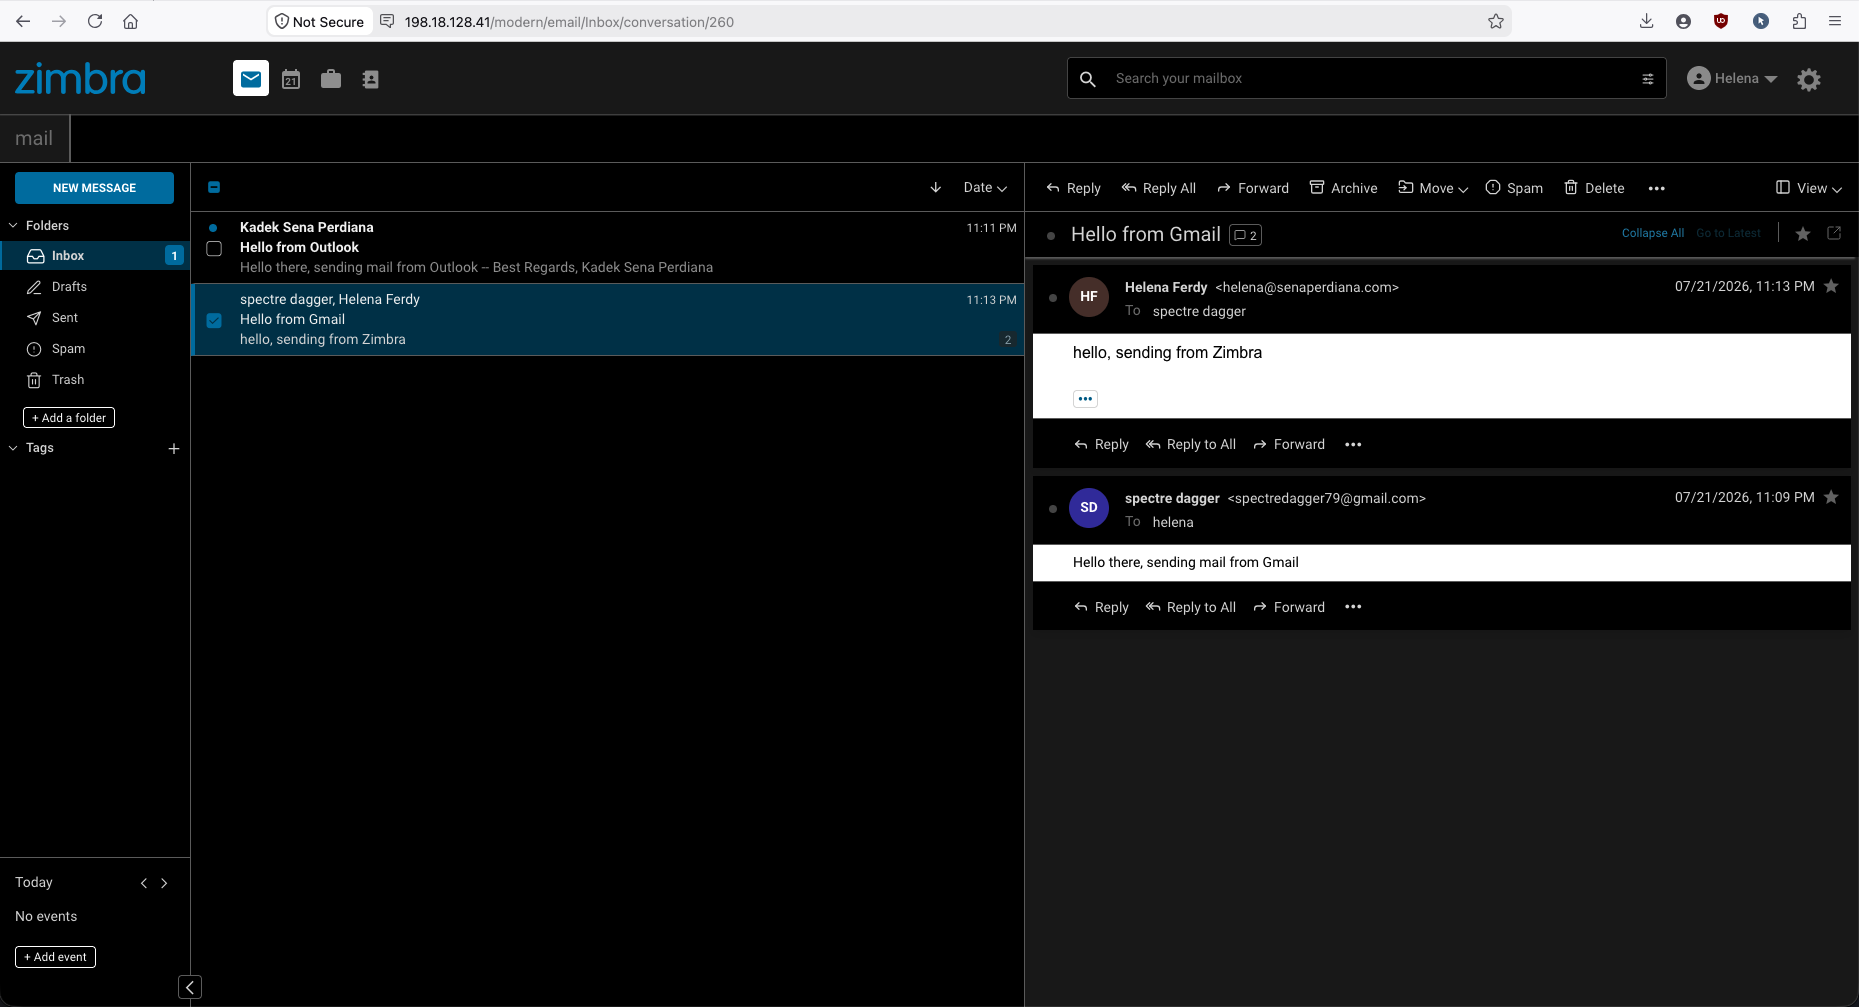
To validate the complete mail delivery chain, we send test emails from an external Gmail account to [email protected] (subject: “Hello from Gmail”) and from [email protected] back to the Gmail account (body: “hello, sending from Zimbra”). Both the inbound and outbound messages appear correctly in the Zimbra Modern UI webmail inbox — confirming that inbound relay via Postfix and the WireGuard tunnel, and outbound relay back through the public VPS gateway, are both functioning correctly.
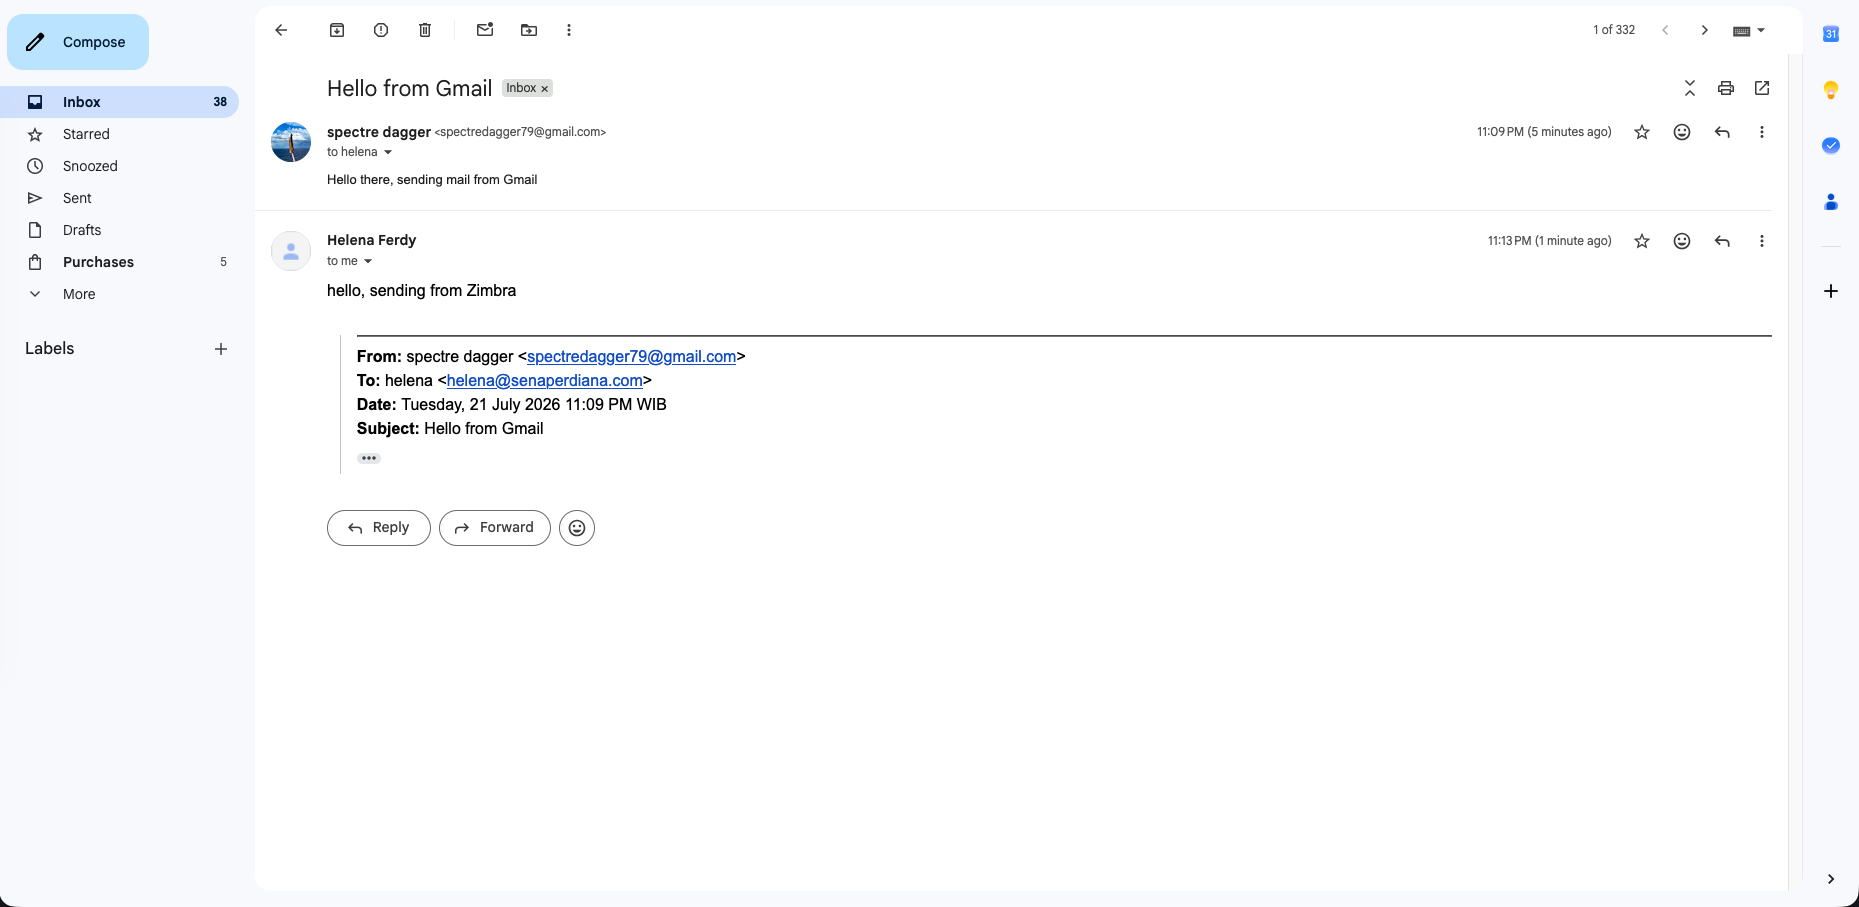
On the Gmail side, we can see the reply from [email protected] successfully delivered, with the email thread showing both messages — the original sent from Gmail and the reply originating from Zimbra.
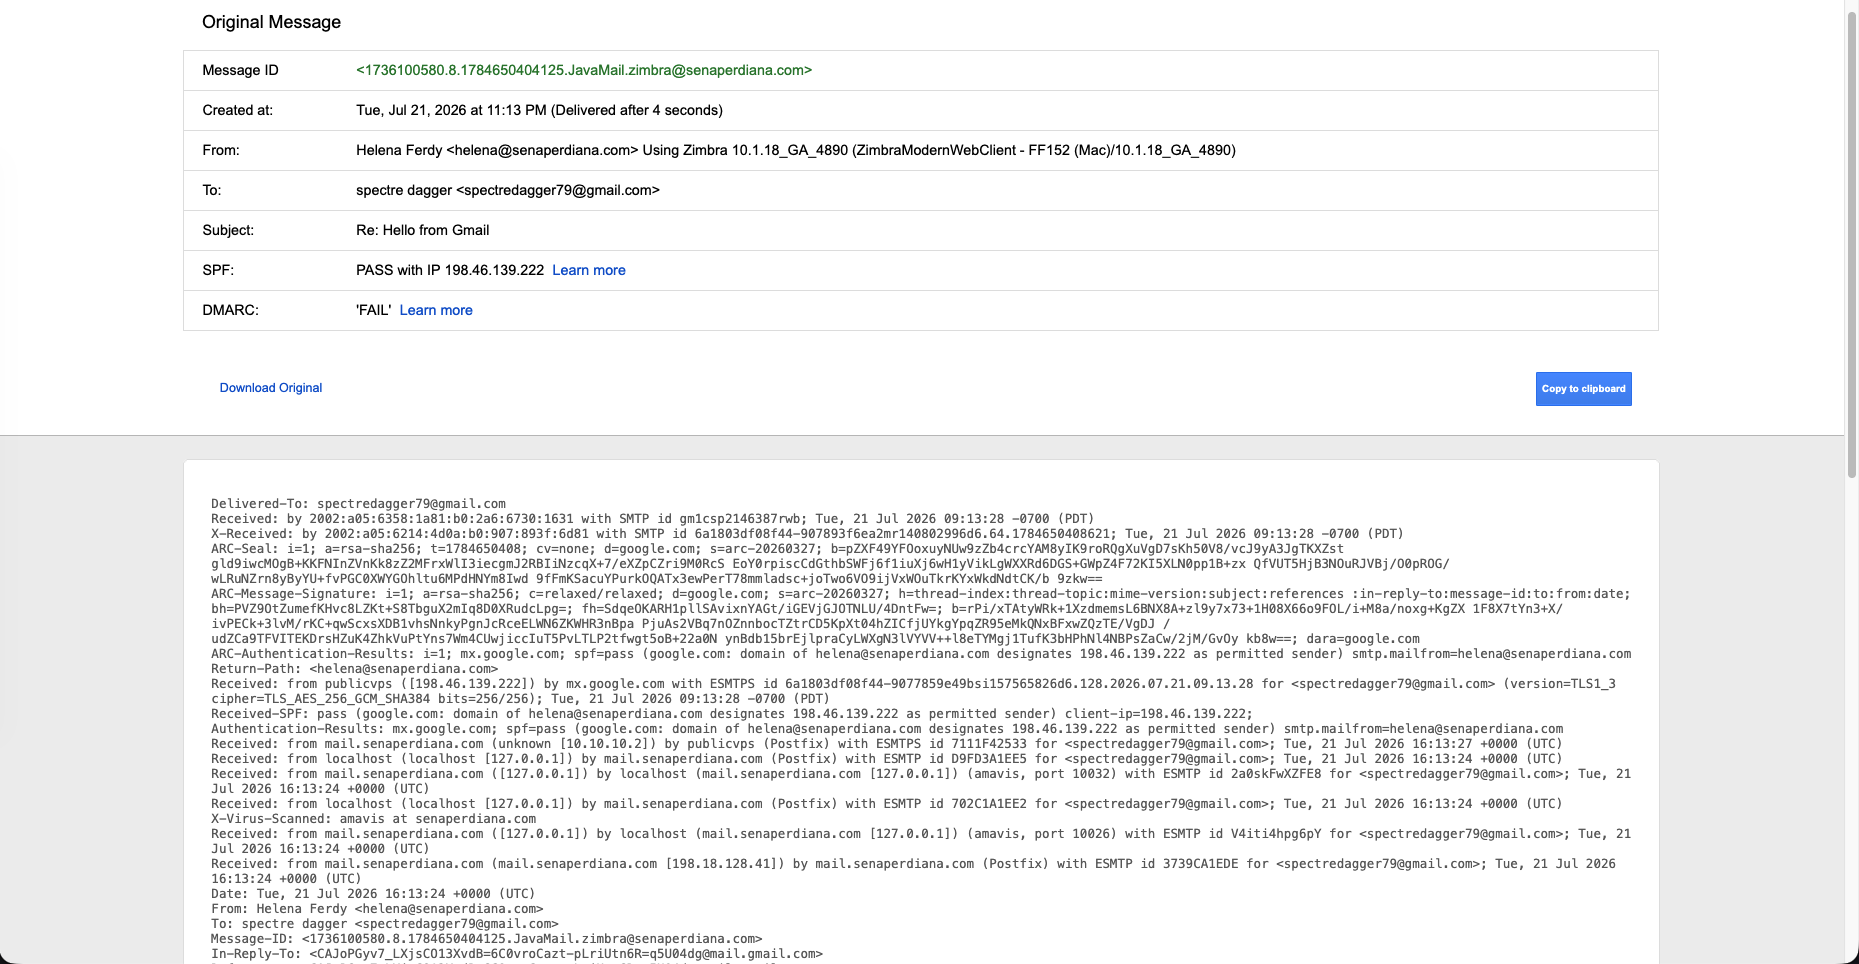
Inspecting the full message headers of the Zimbra reply in Gmail confirms the complete relay chain and authentication results:
- SPF: PASS —
198.46.139.222is an authorized sender forsenaperdiana.comper the SPF TXT record. - The
Received:headers trace the path: Zimbra MTA onmail.senaperdiana.com (198.18.128.41)→ Amavis content filter → Postfix relay onpublicvps (198.46.139.222)→mx.google.com. - The message was sent using TLS 1.3 (
TLS_AES_256_GCM_SHA384) between the public Postfix relay and Google’s mail servers, confirming that the Let’s Encrypt certificate is being correctly served.