Cisco Security Cloud Control (SCC), formerly Cisco Defense Orchestrator (CDO) is a centralized, cloud-based SaaS platform designed to unify the policy management and monitoring of various Cisco security devices across hybrid network environments.
- FTD: SCC provisions a Cloud-Delivered FMC (cdFMC) instance, allowing us to manage advanced threat policies using the familiar FMC graphical interface hosted entirely in the cloud..
- ASA: SCC manages ASA directly from its native web dashboard, reading the existing configuration and translating our GUI policy changes into precise CLI commands, which are then pushed to the appliance through a secure internal tunnel using an SDC.
Deploying SCC
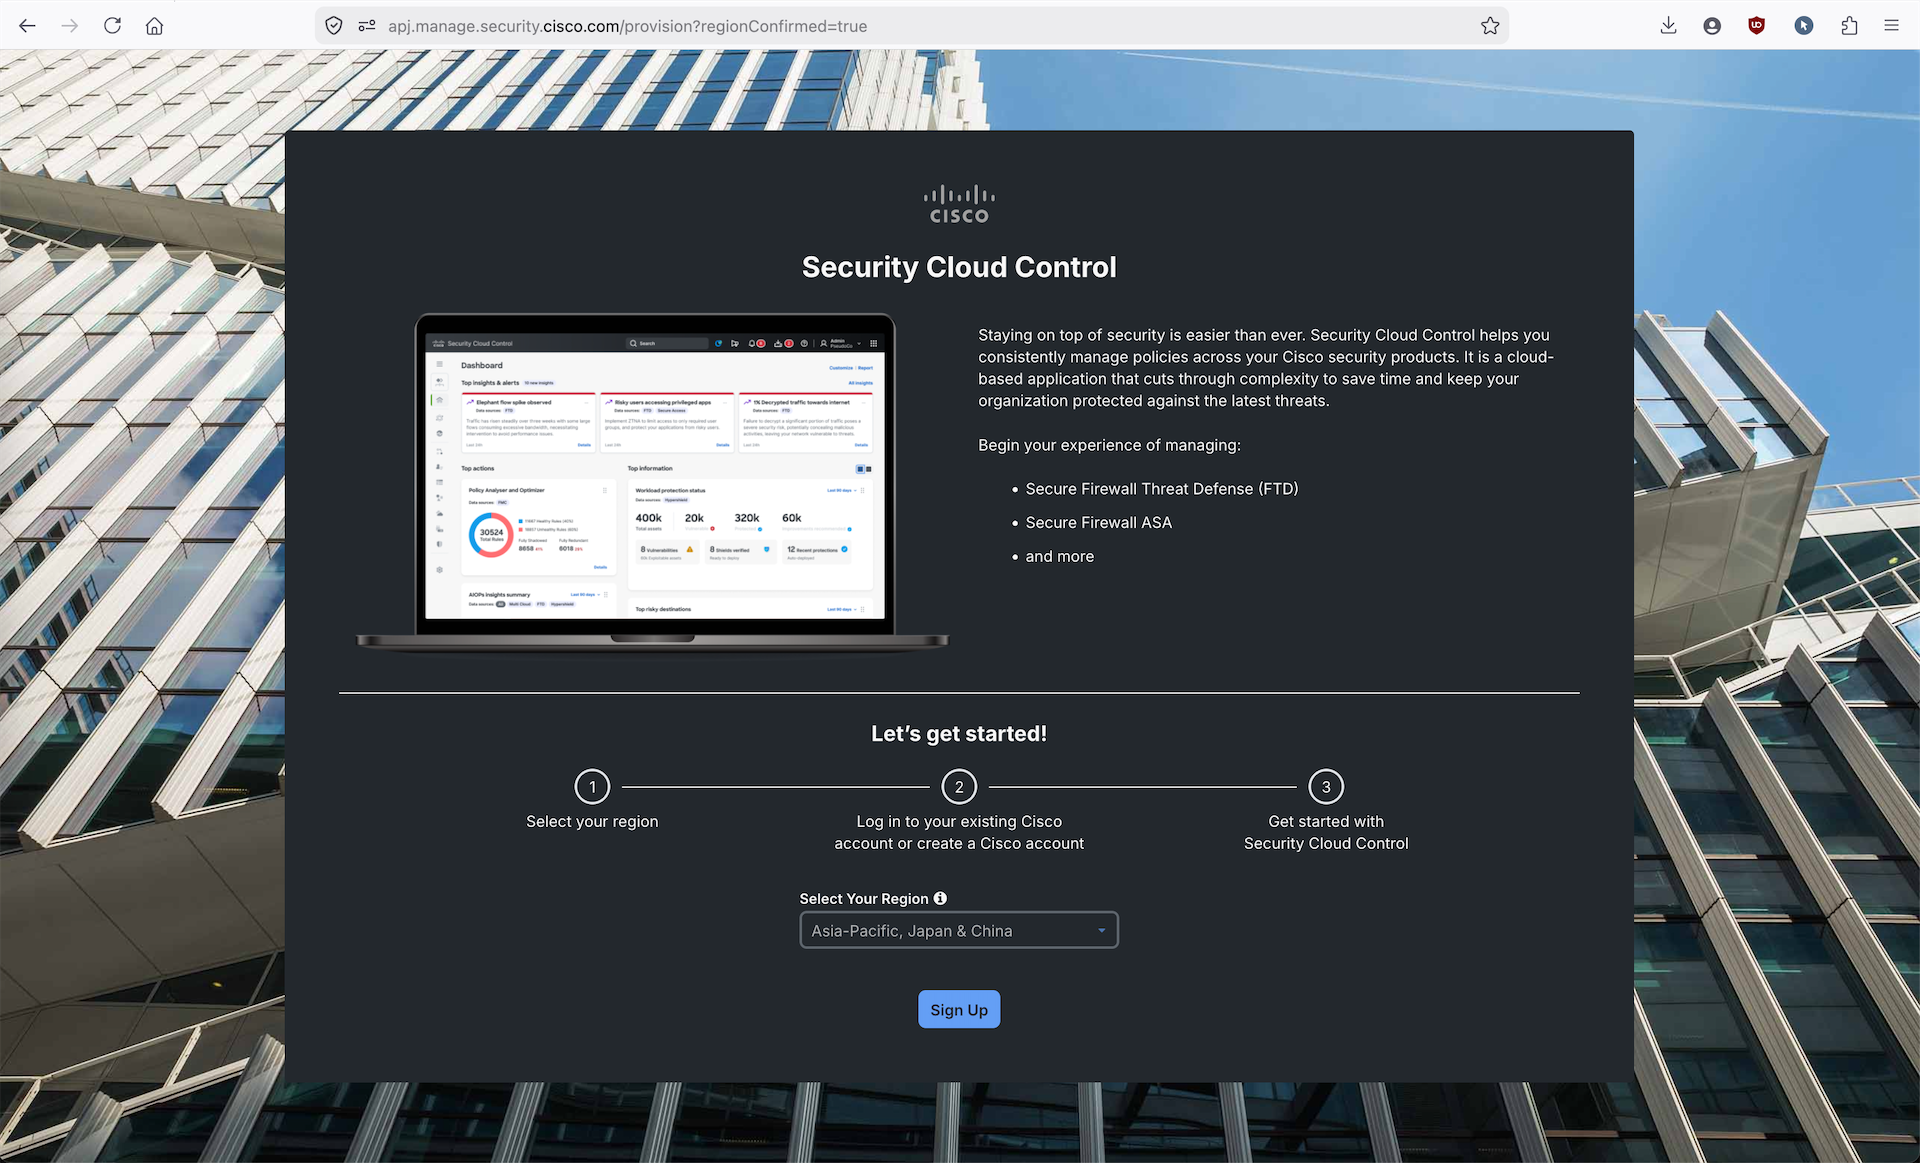
Cisco allows us to deploy SCC using a corporate account, giving us trial access for 30 days to play around with
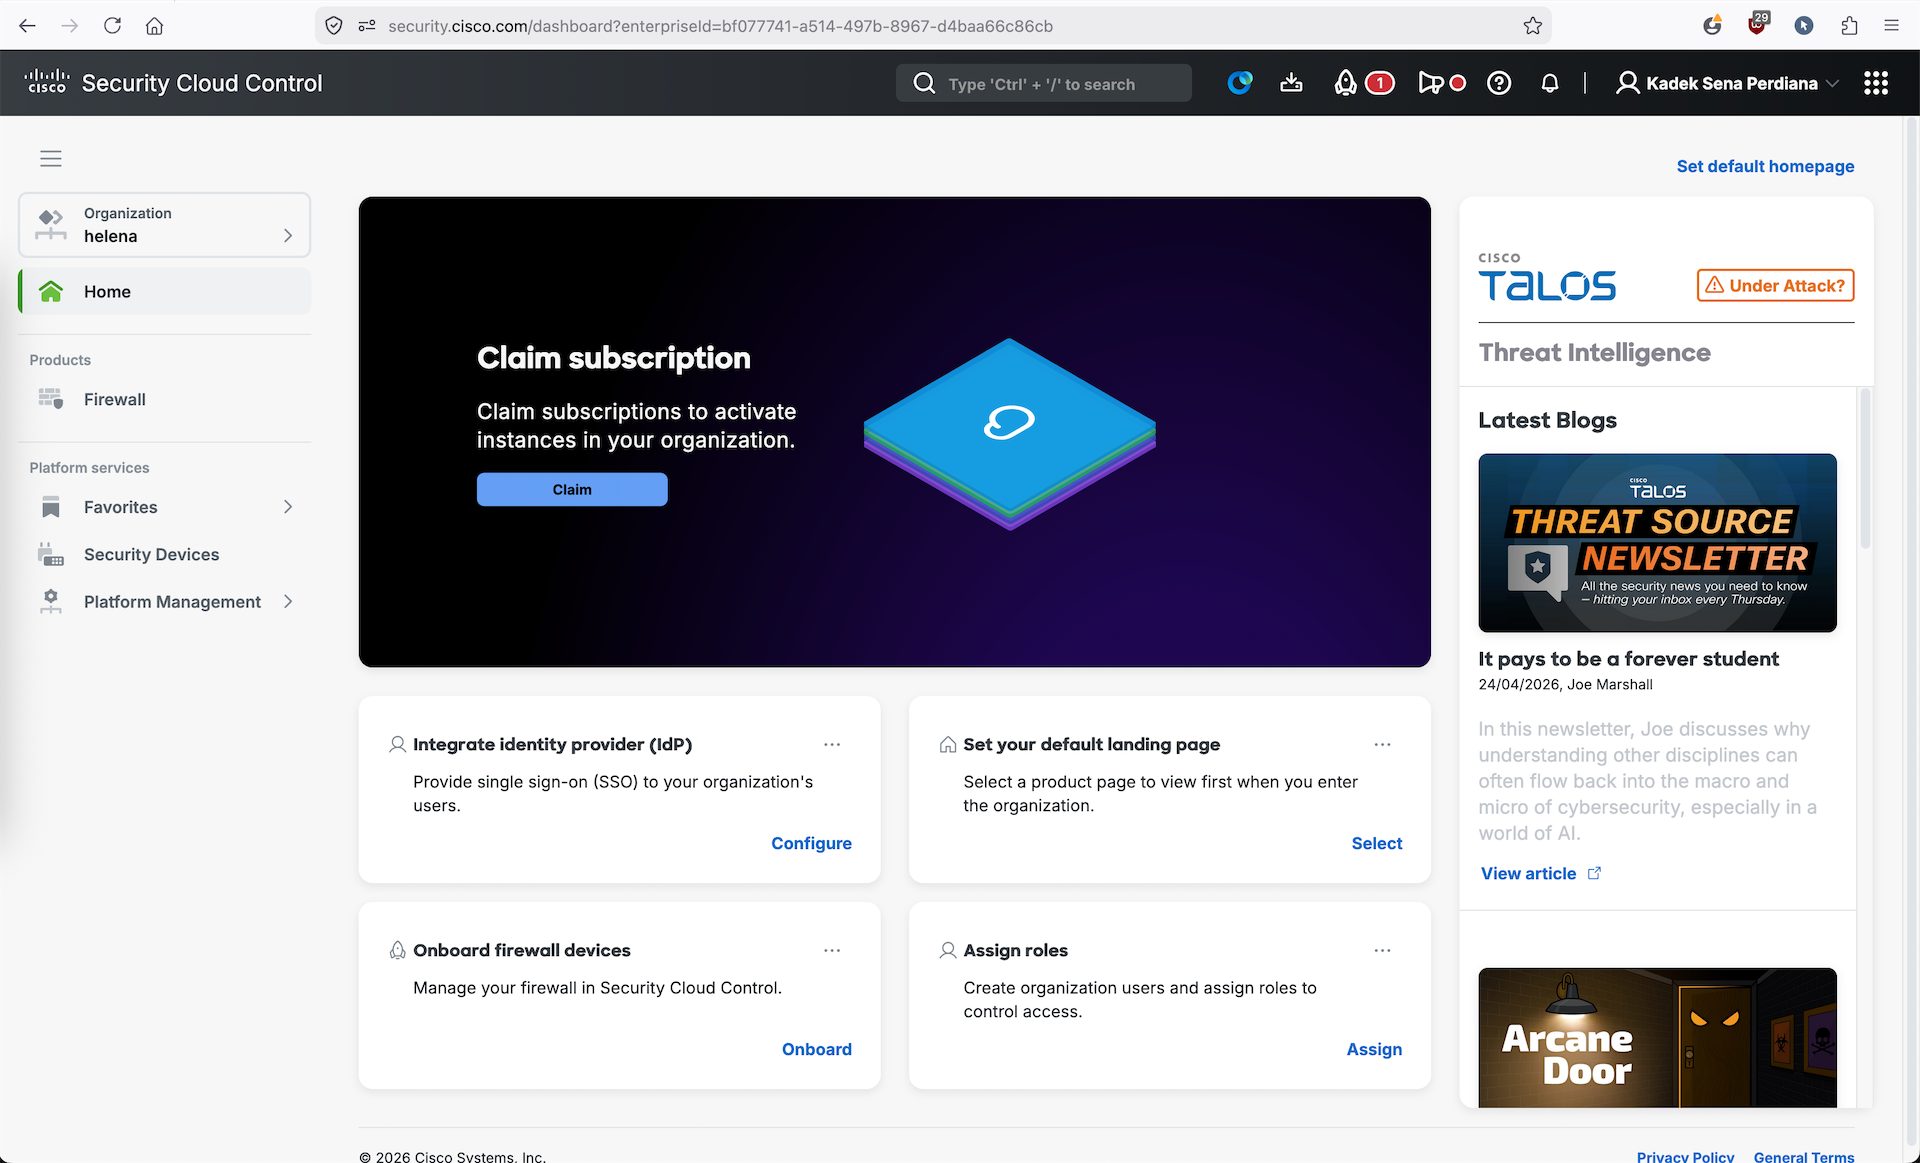
Once provisioned, now we can access the SCC Dashboard
FTD
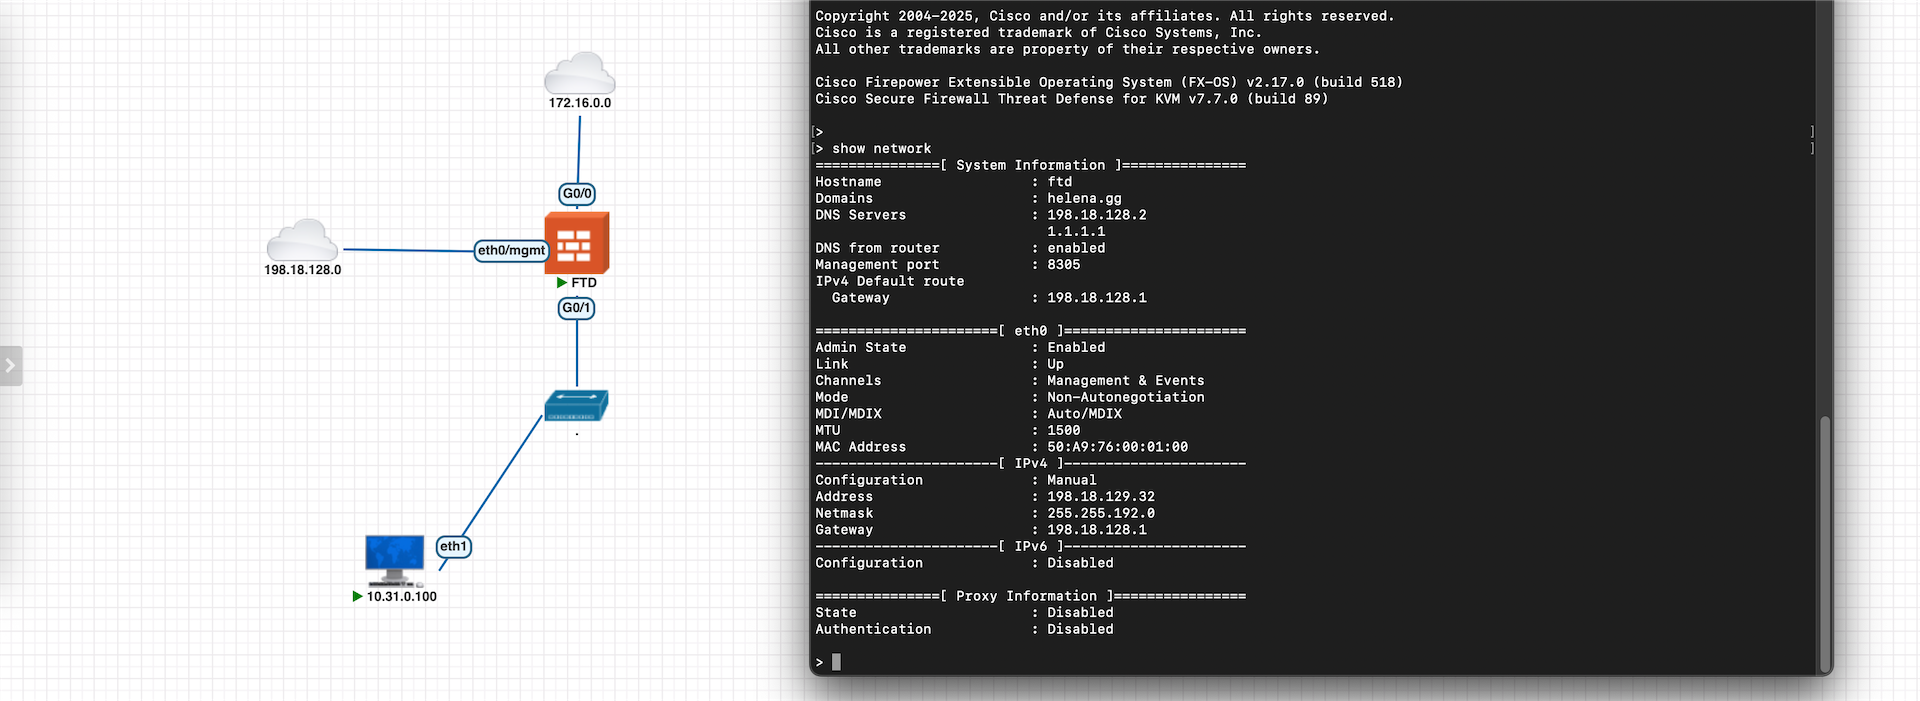
Next we will onboard this On-premise FTD to our SCC, this FTD sits behind NAT and not directly accesisble over the Internet
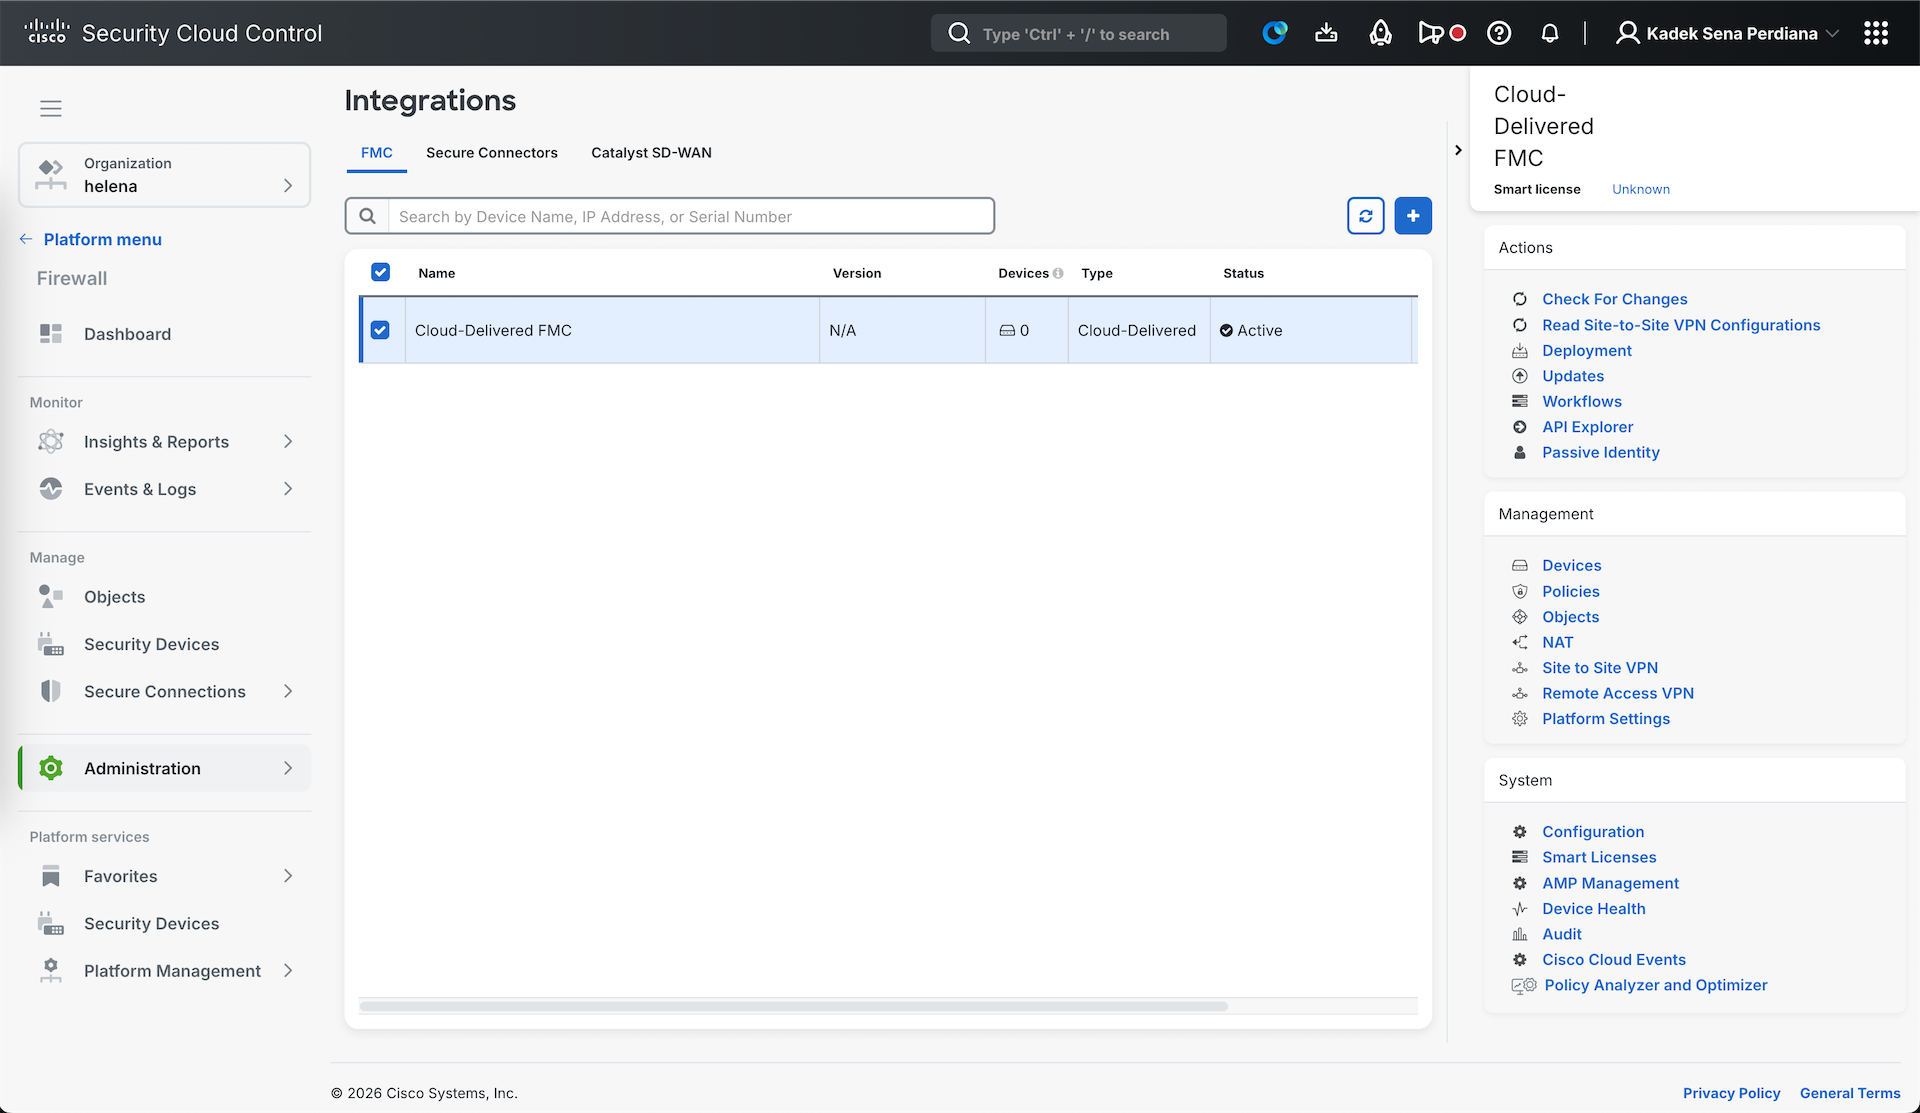
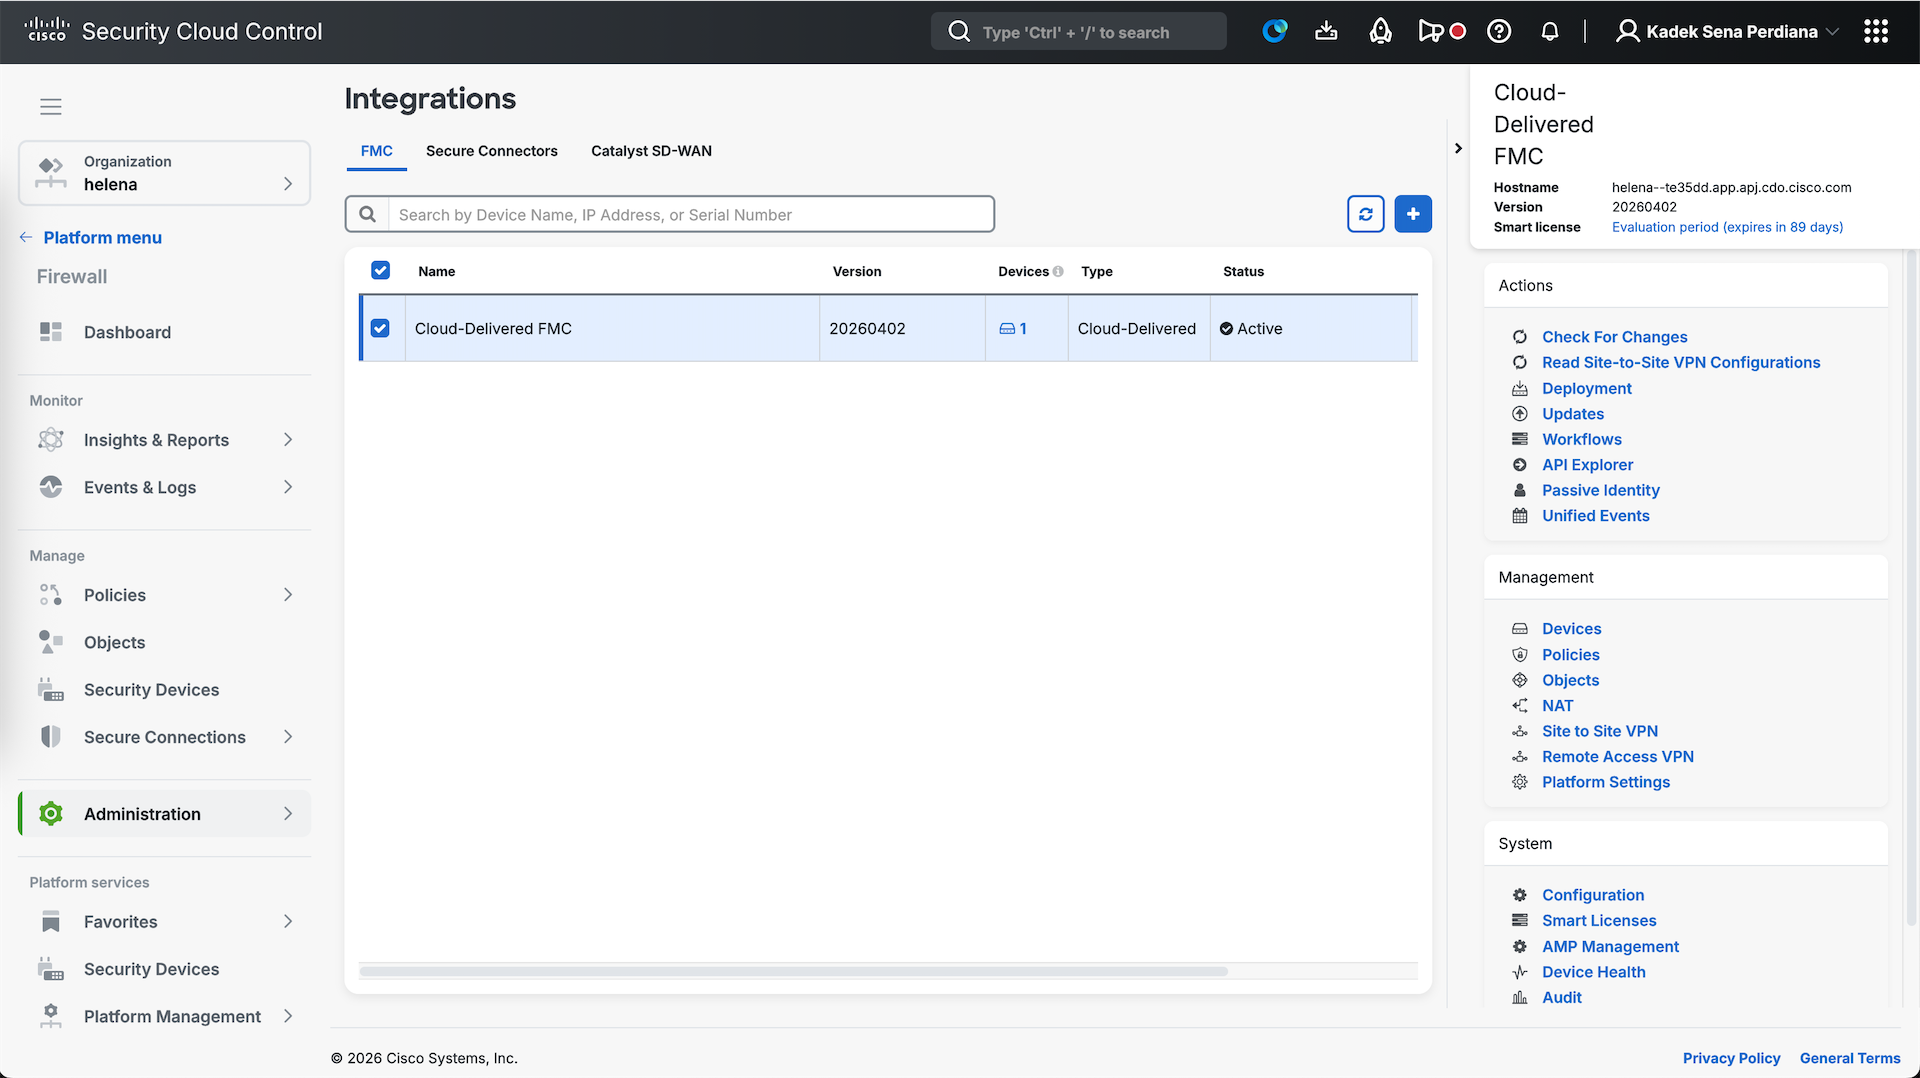
Before onboarding the FTD, we need to activate the Cloud-Delivered FMC on the Integration menu
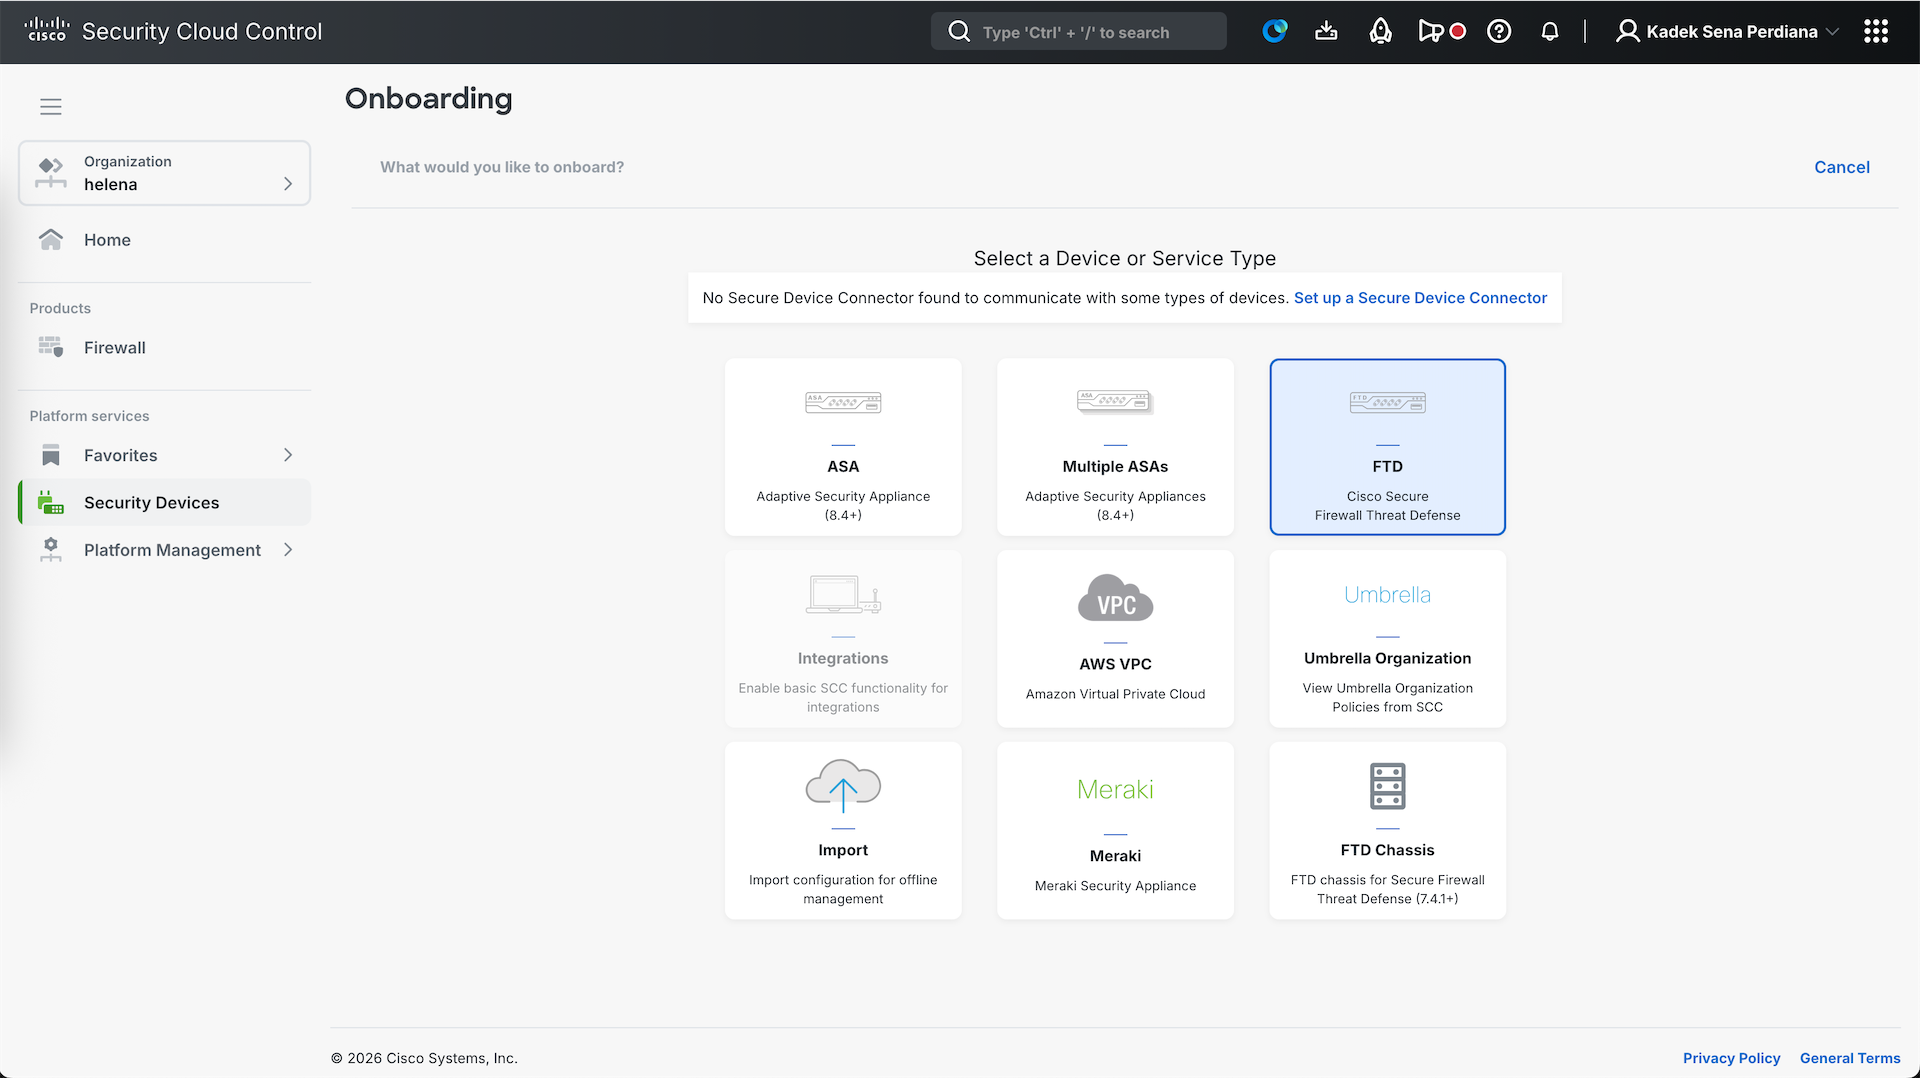
Next on Security Devices, we select Add to initiate the onboard process

After that select FTD
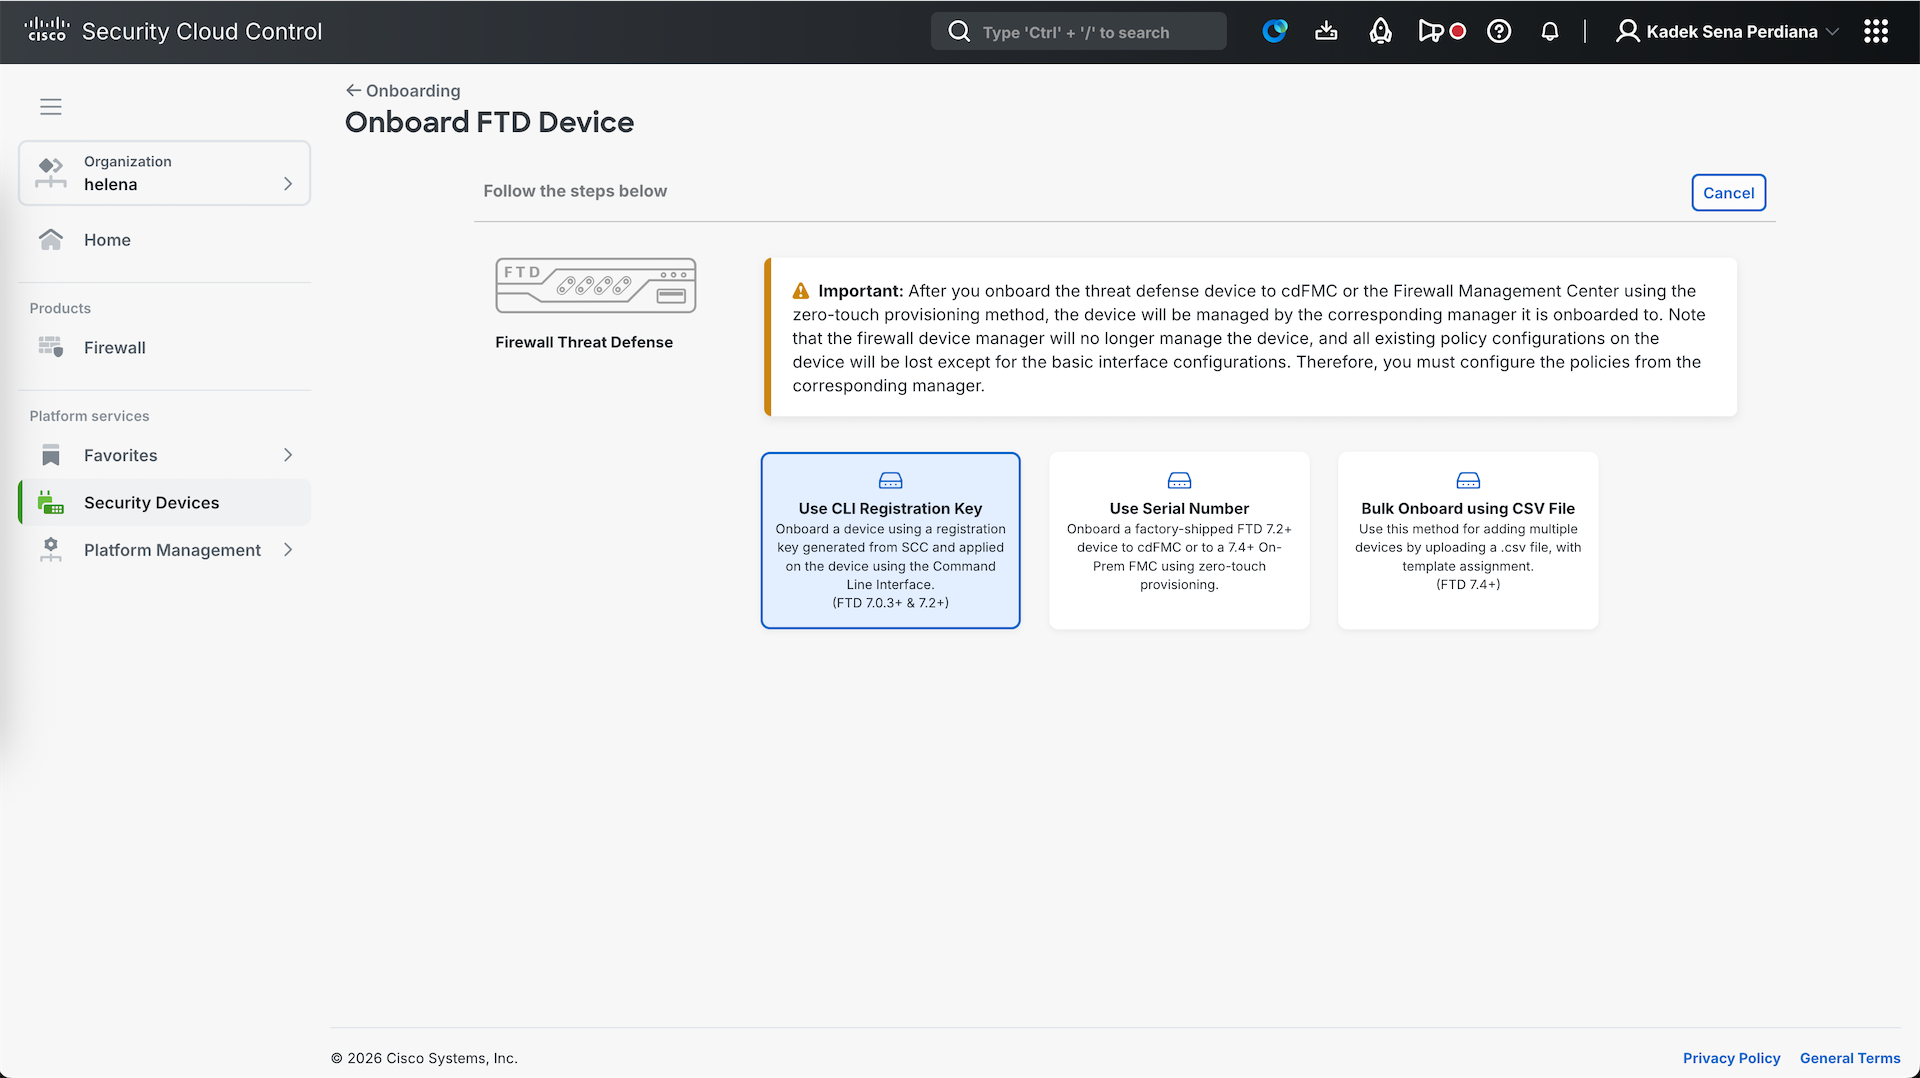
Then select the registration method, here we will use the CLI Registration Key method
Select the Policy and License type, and after that we will be provided with CLI Command that we can run on the FTD
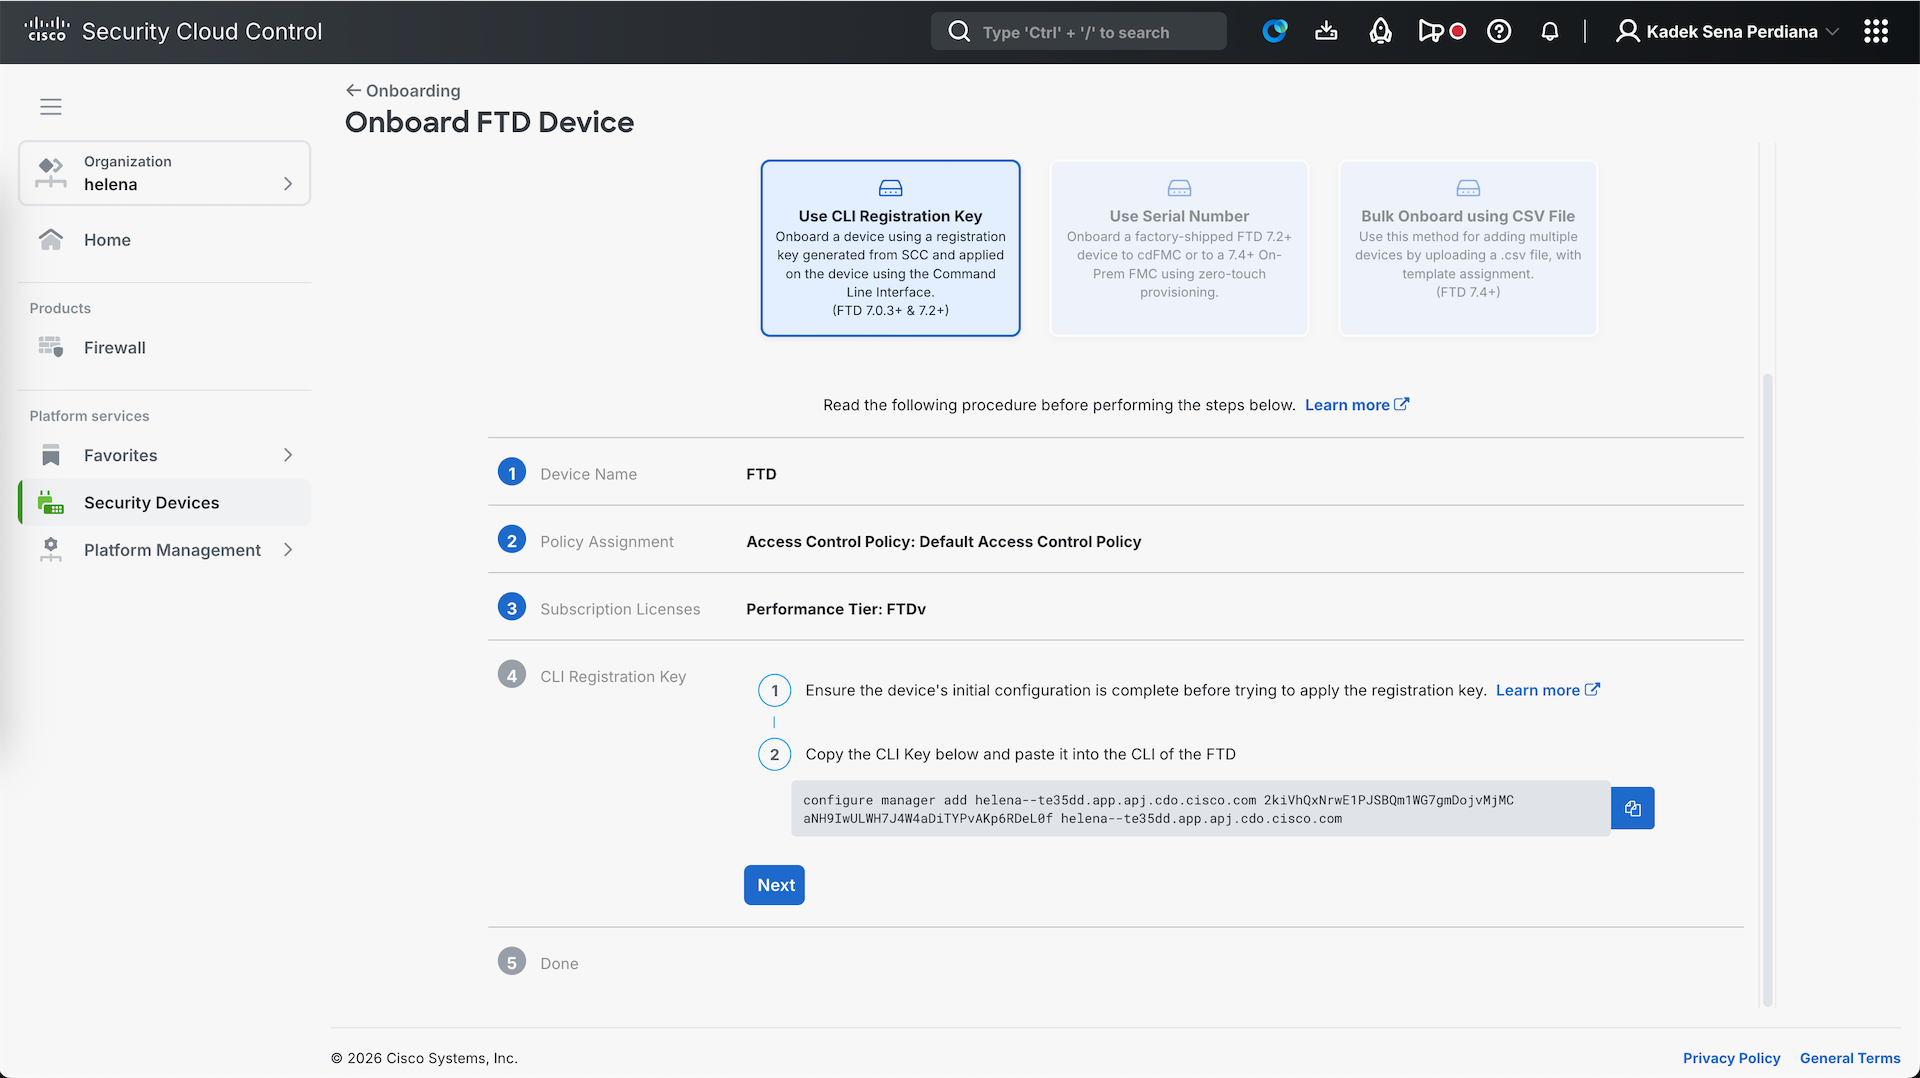
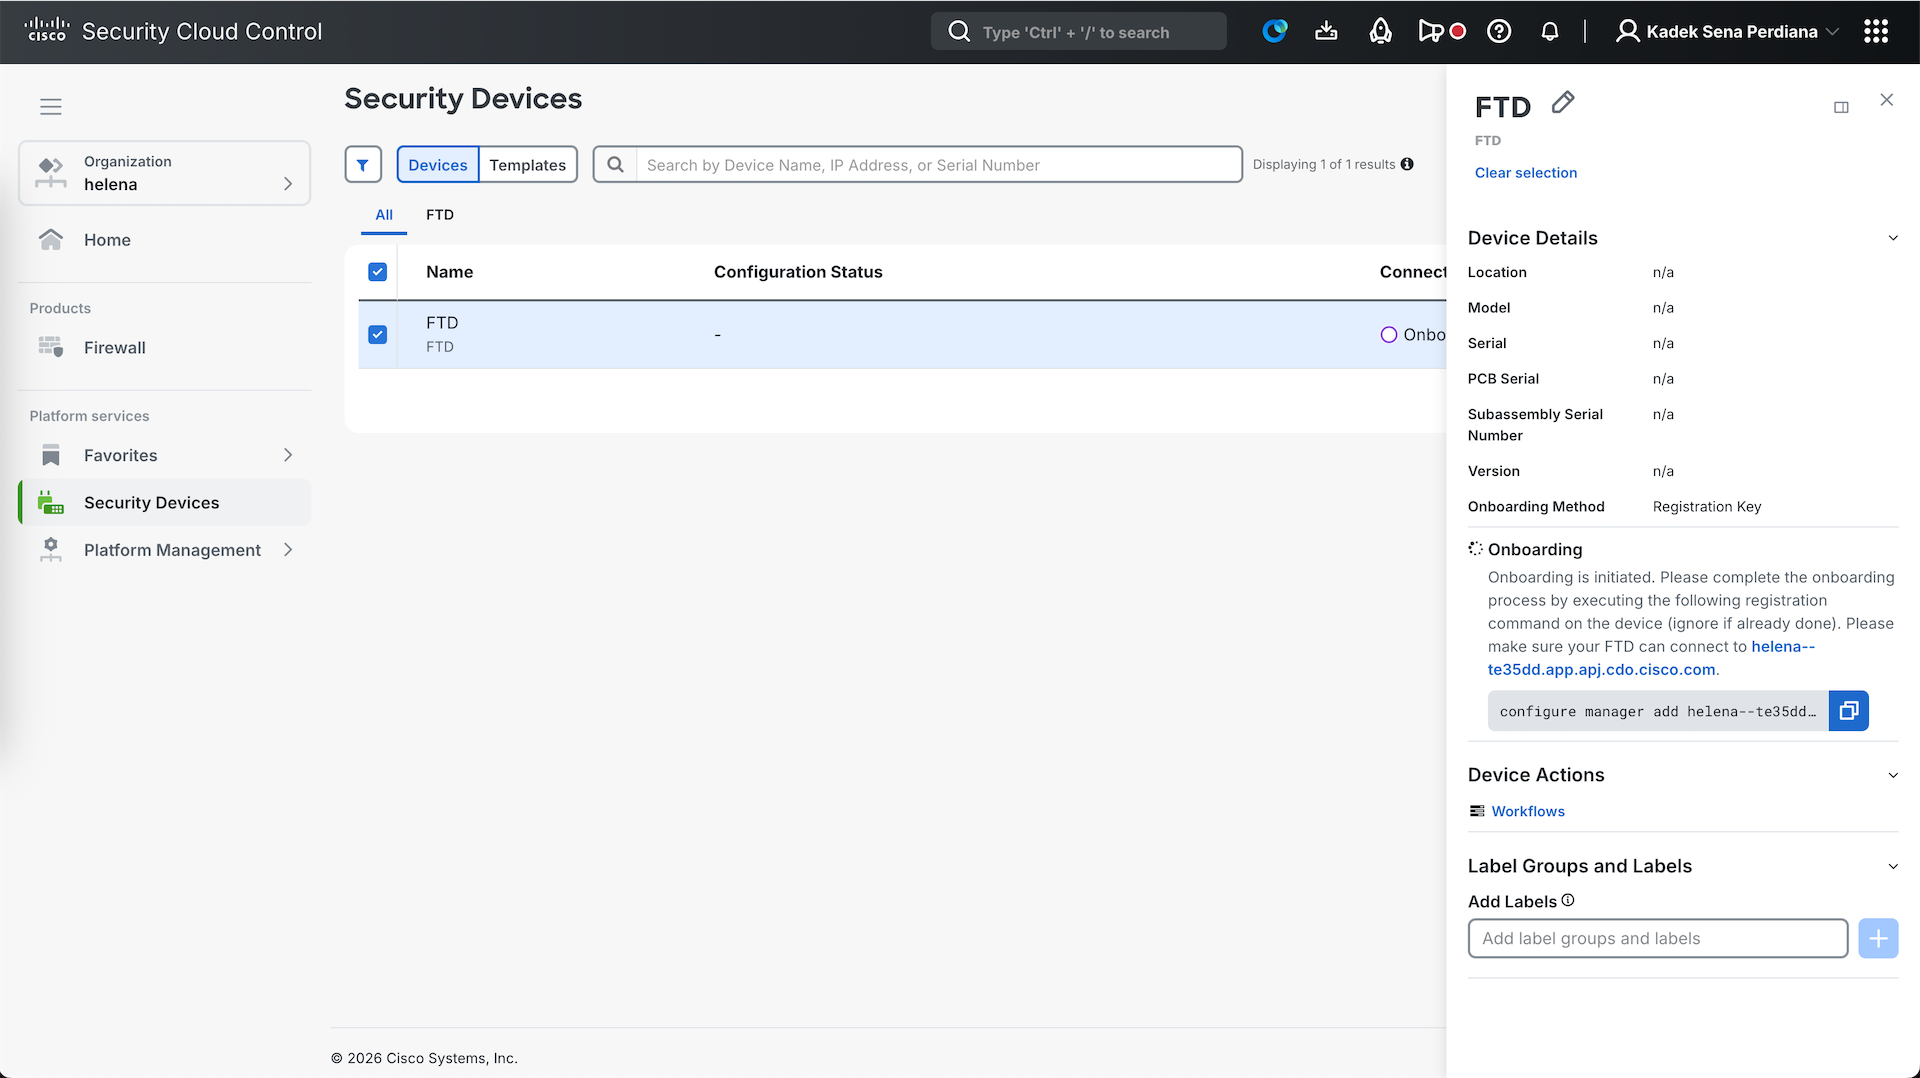
Now onto the FTD, we paste the command
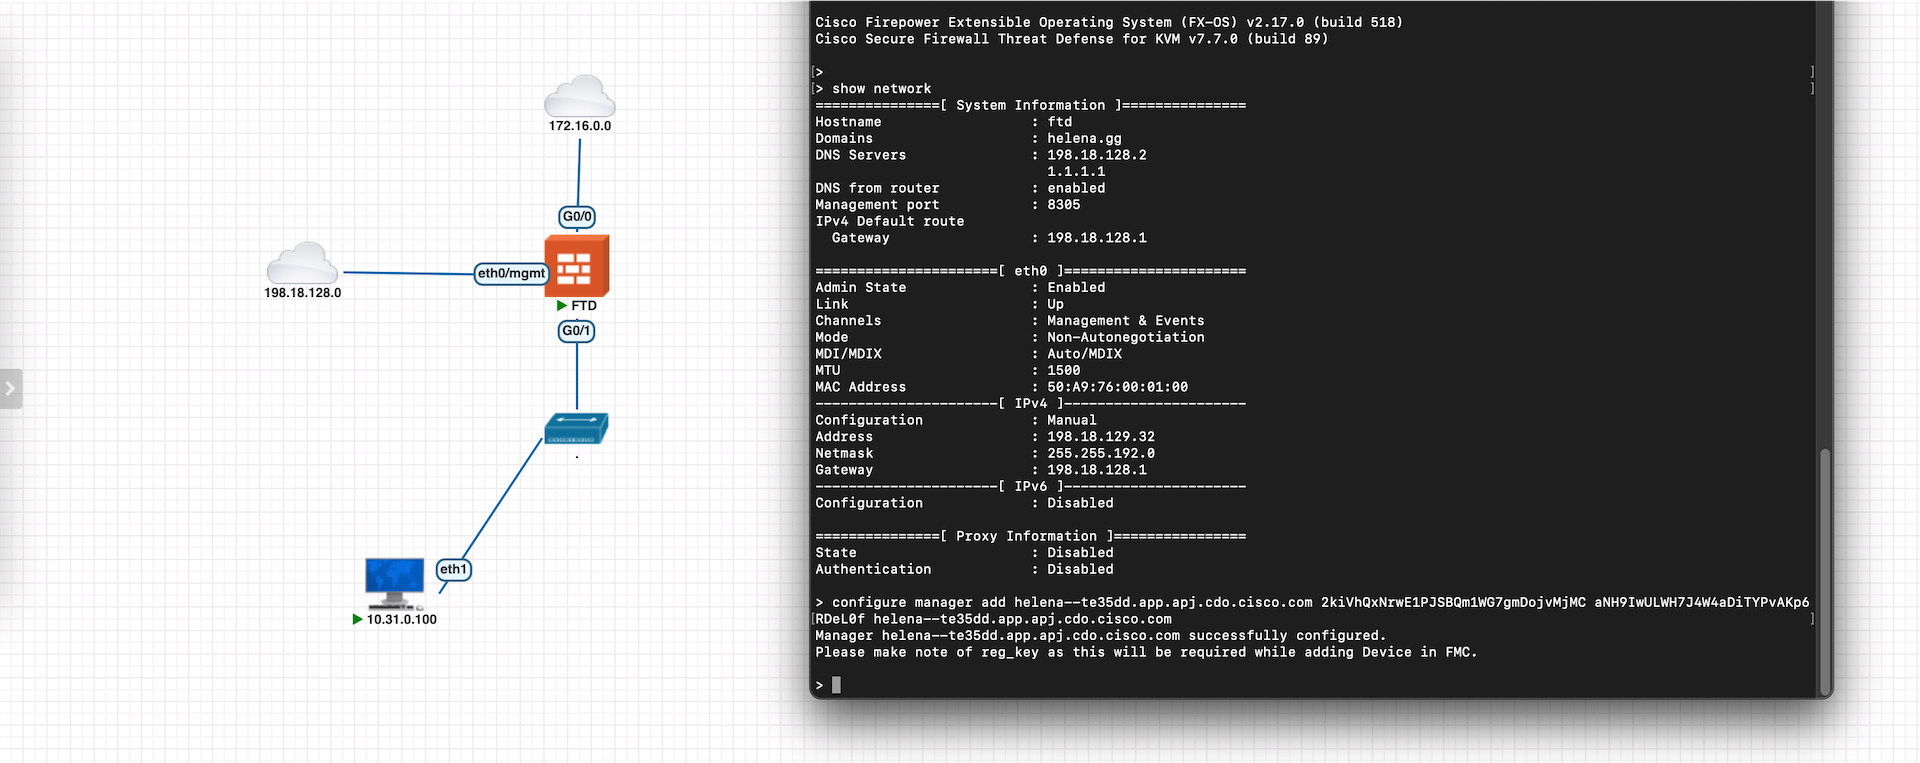
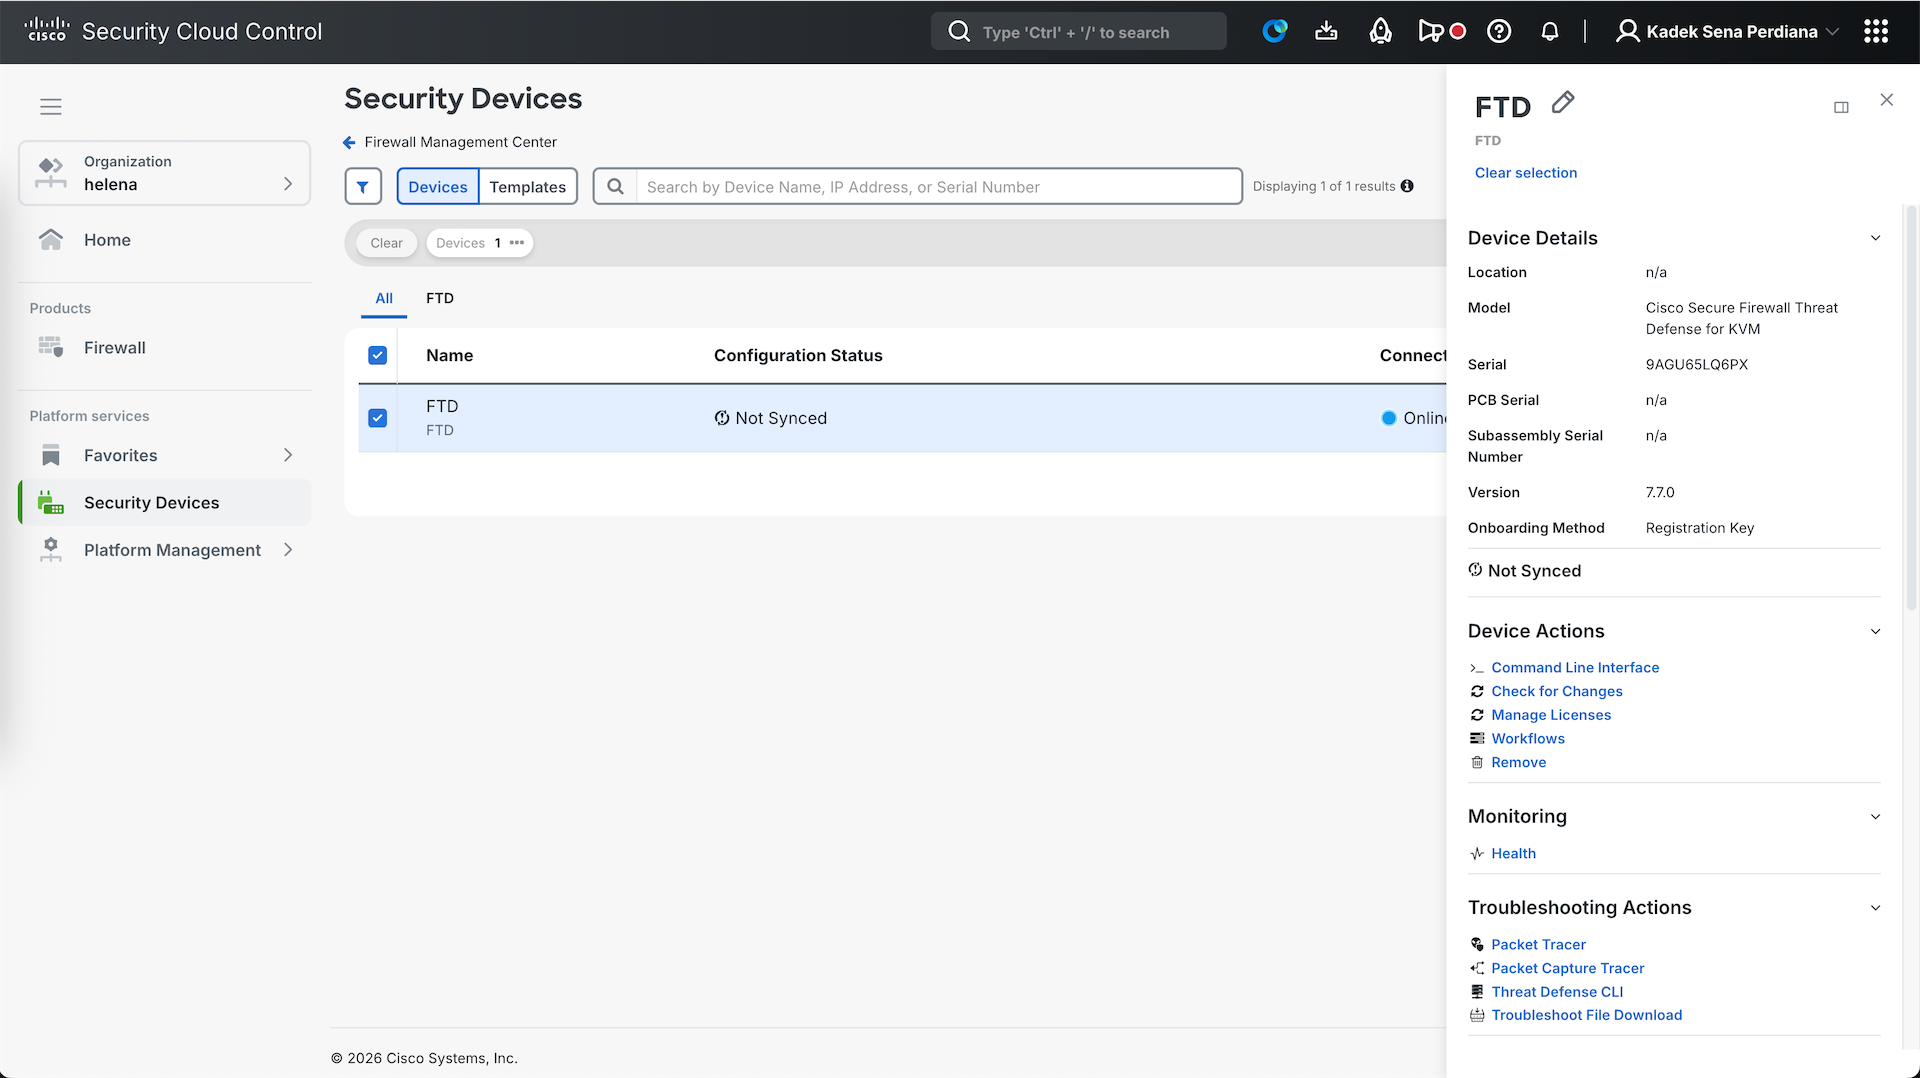
After a couple minutes, the onboarded FTD will become Online
On the Integration page, we can see that the FTD is automatically onboarded into the cdFMC
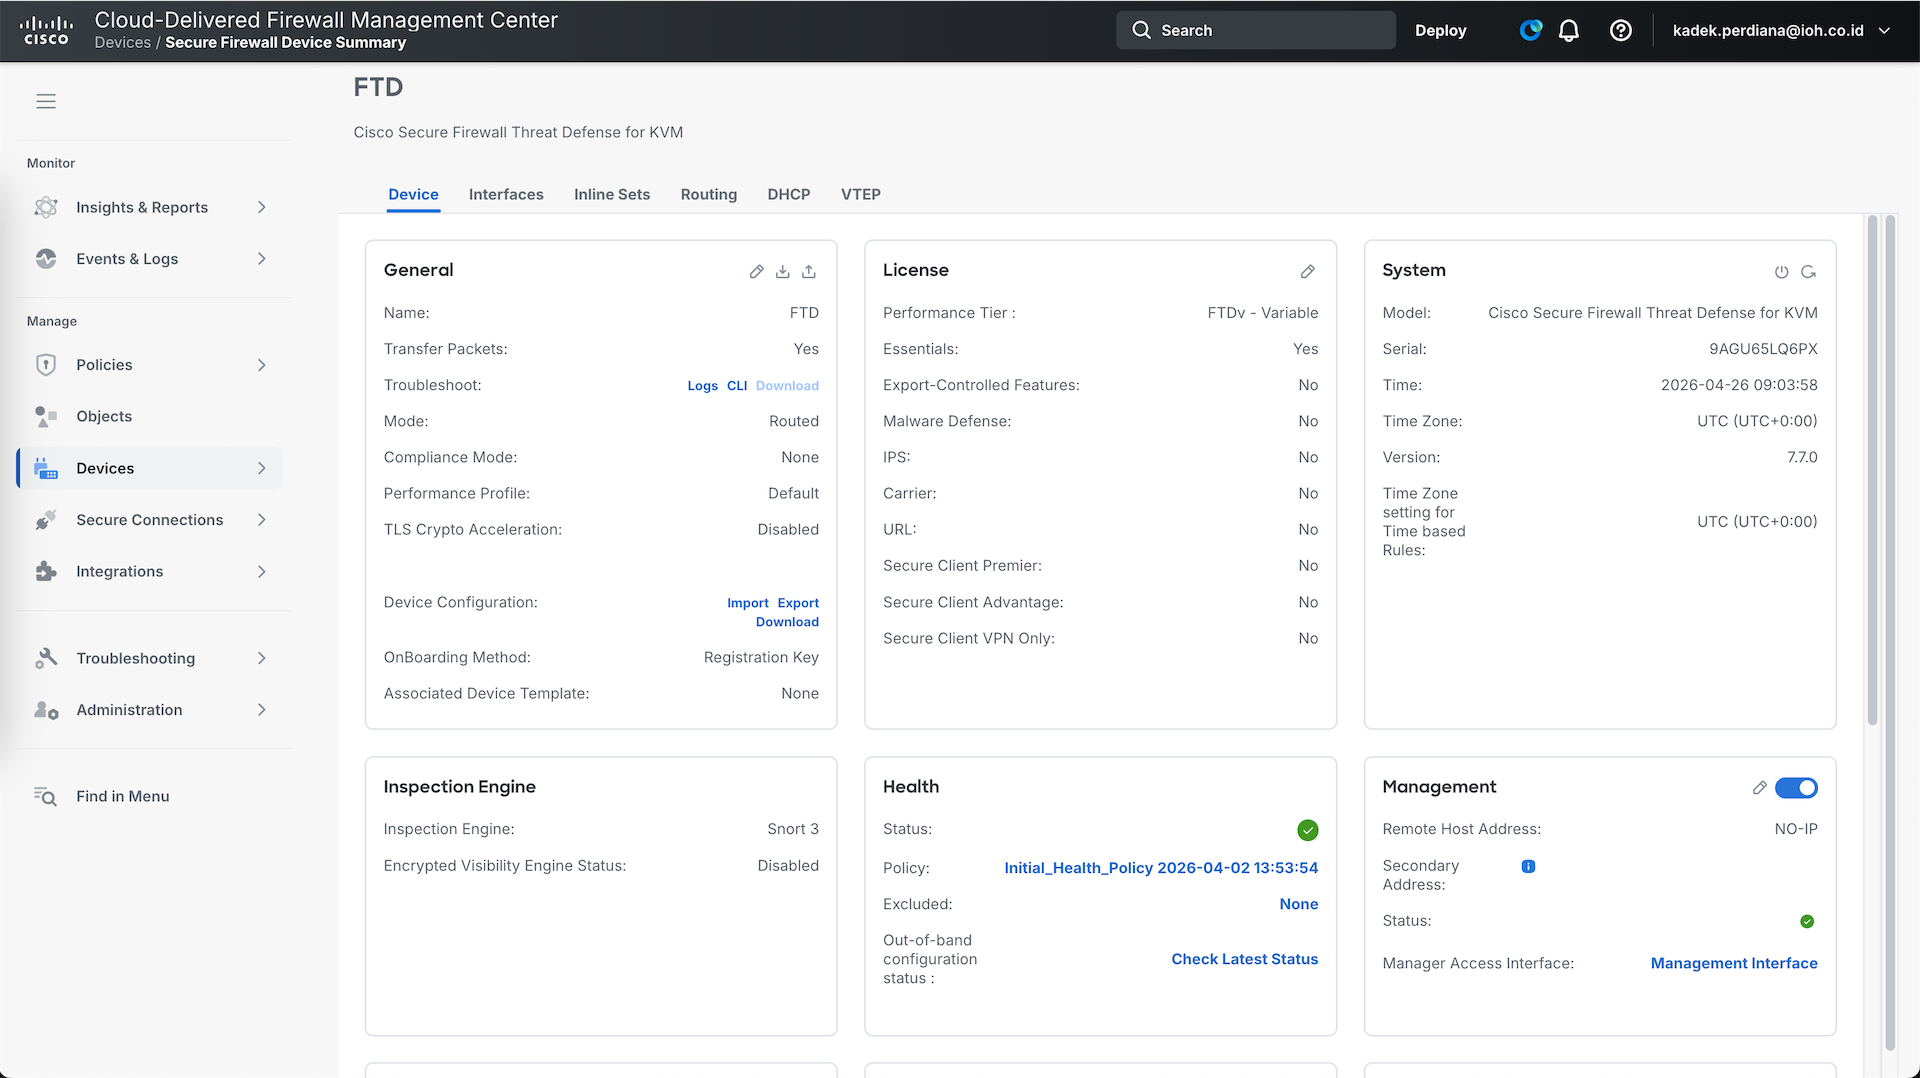
And when we open the cdFMC, we have one onboarded FTD

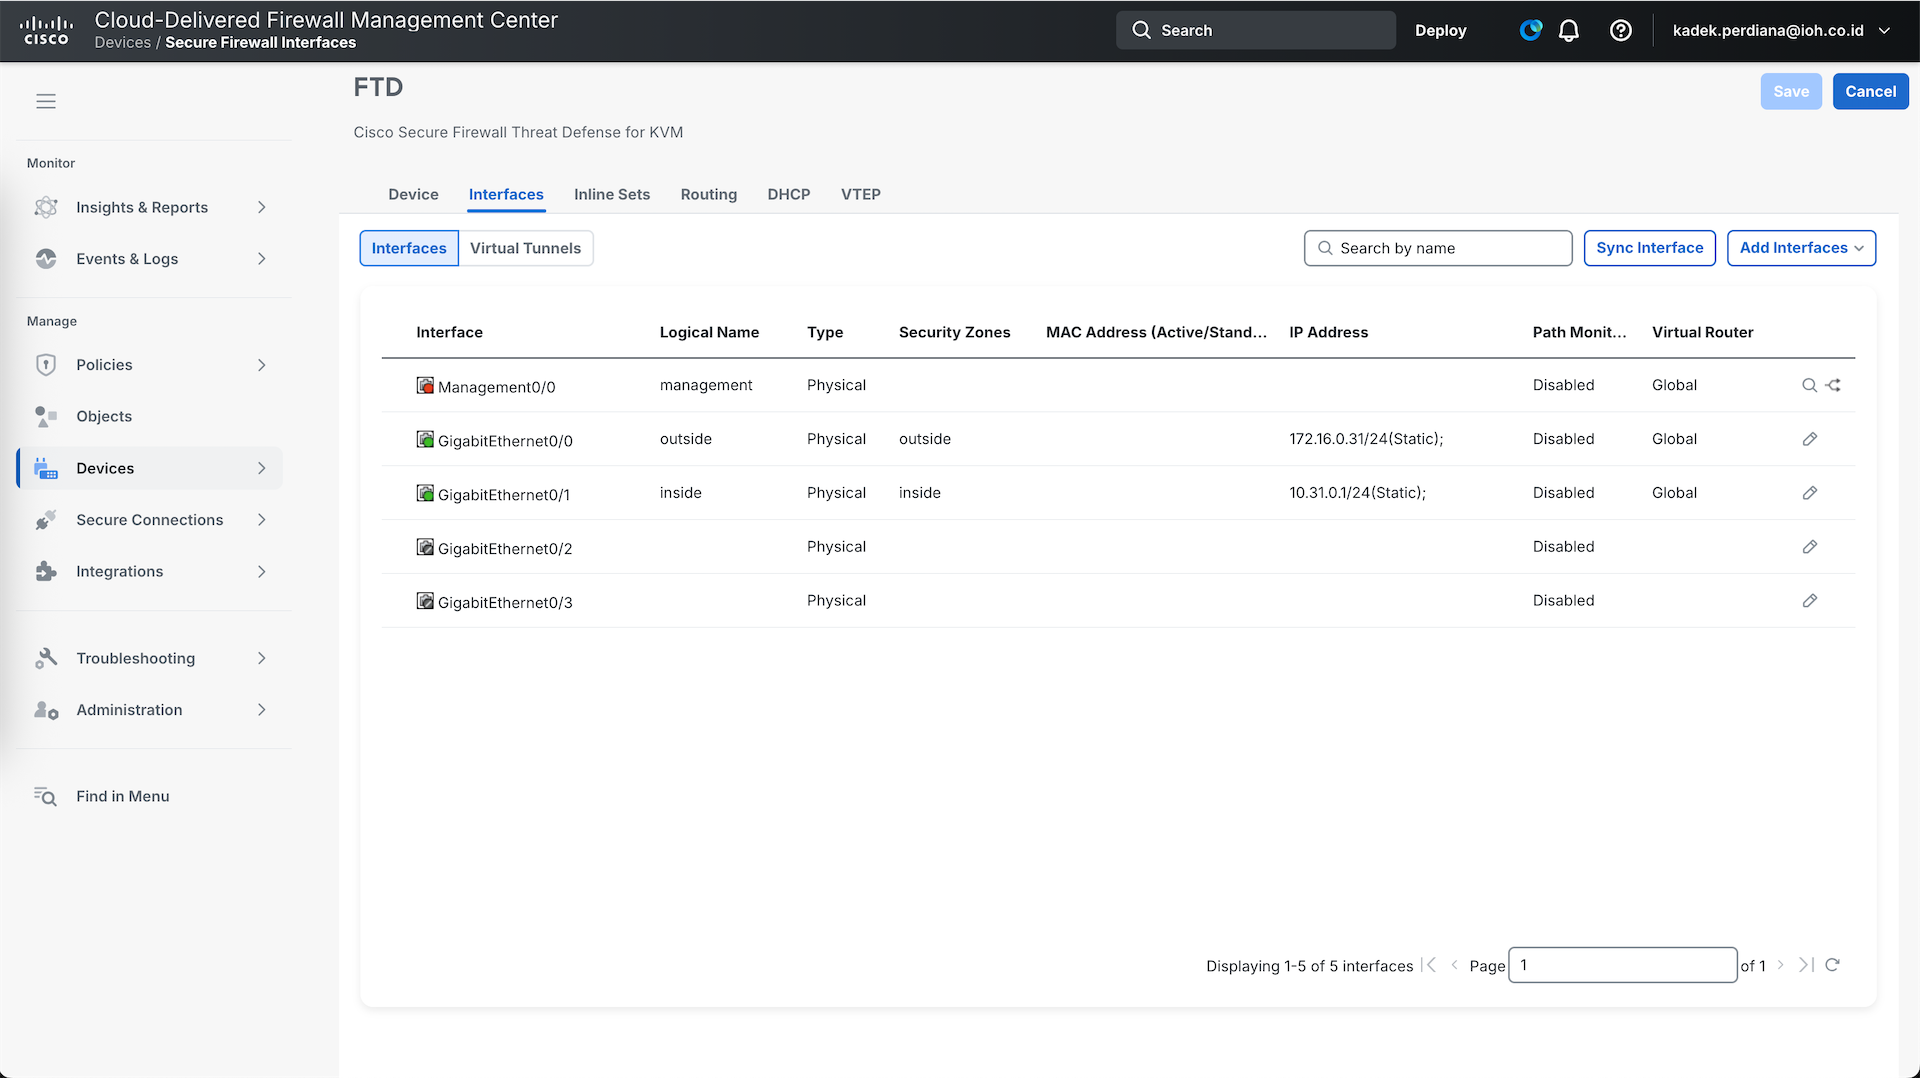
After that, we can just manage the FTD like we usually do using regular FMC
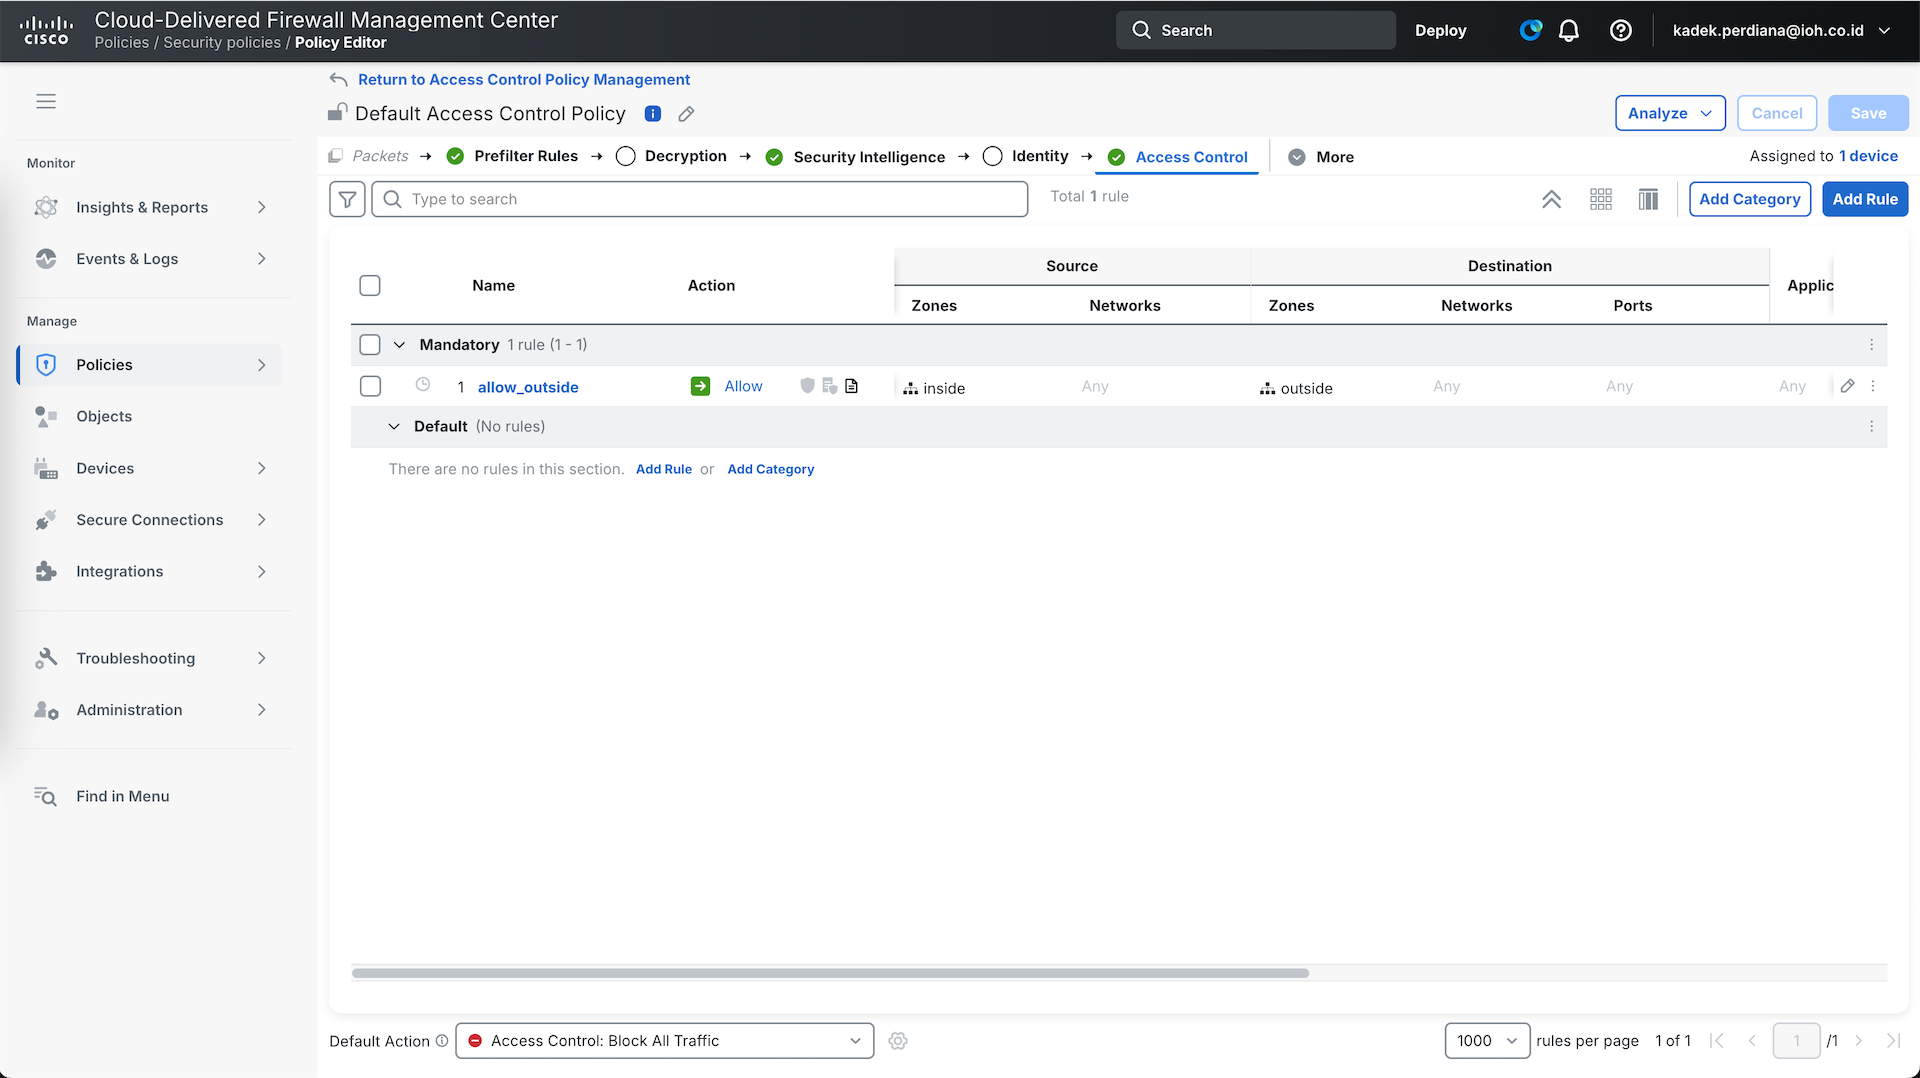
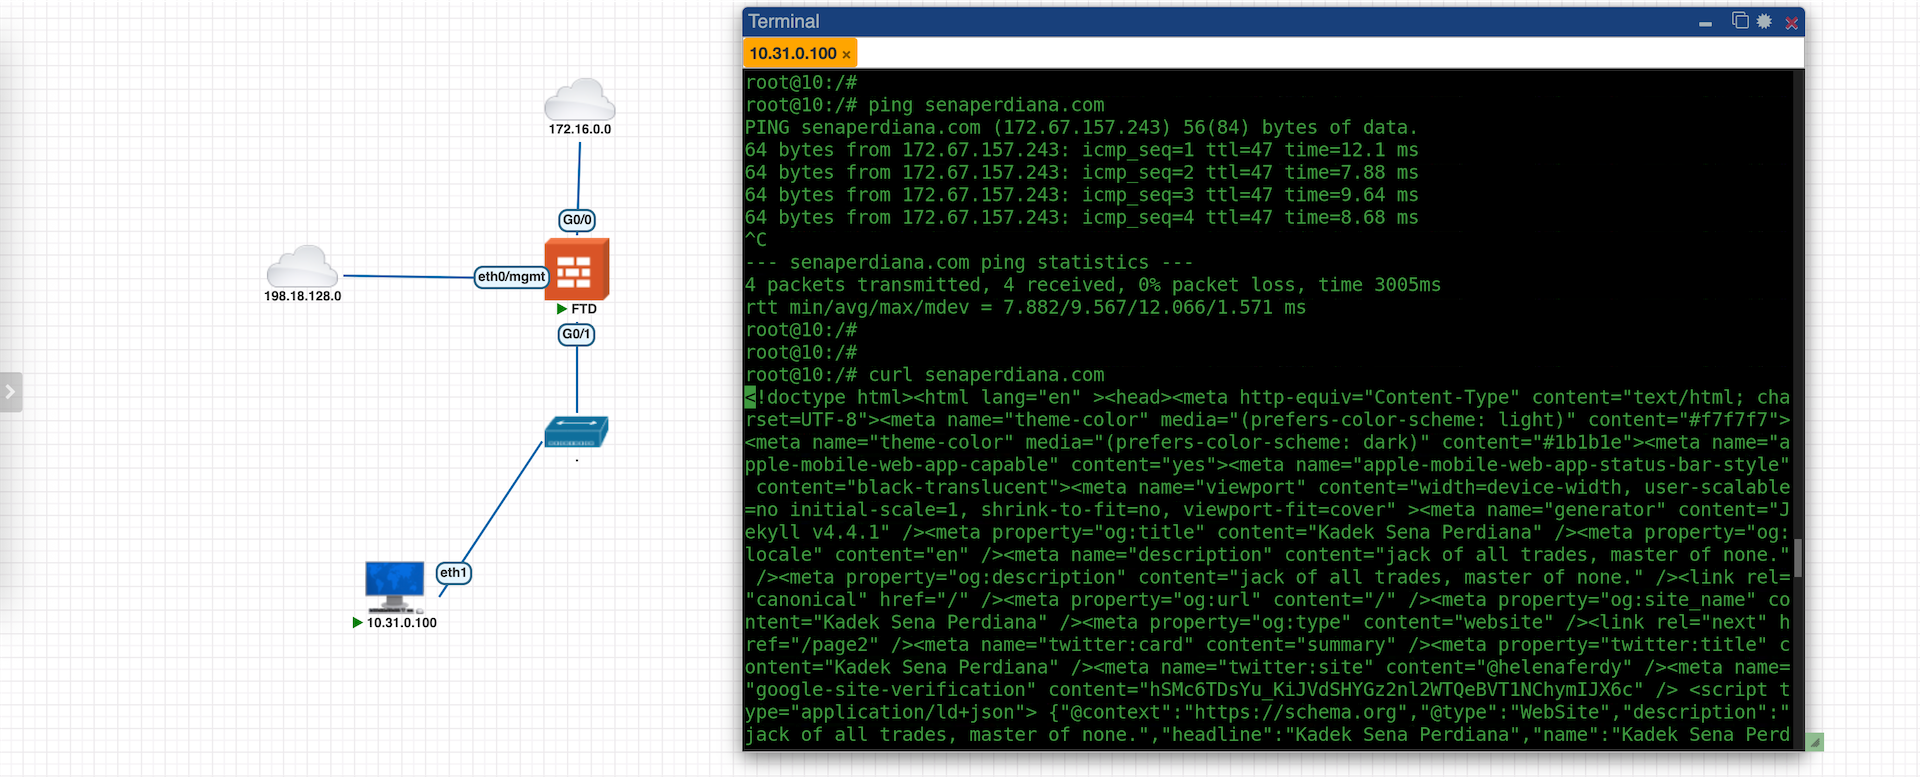
After deploying the policy, we confirm that our host can access internet through our FTD
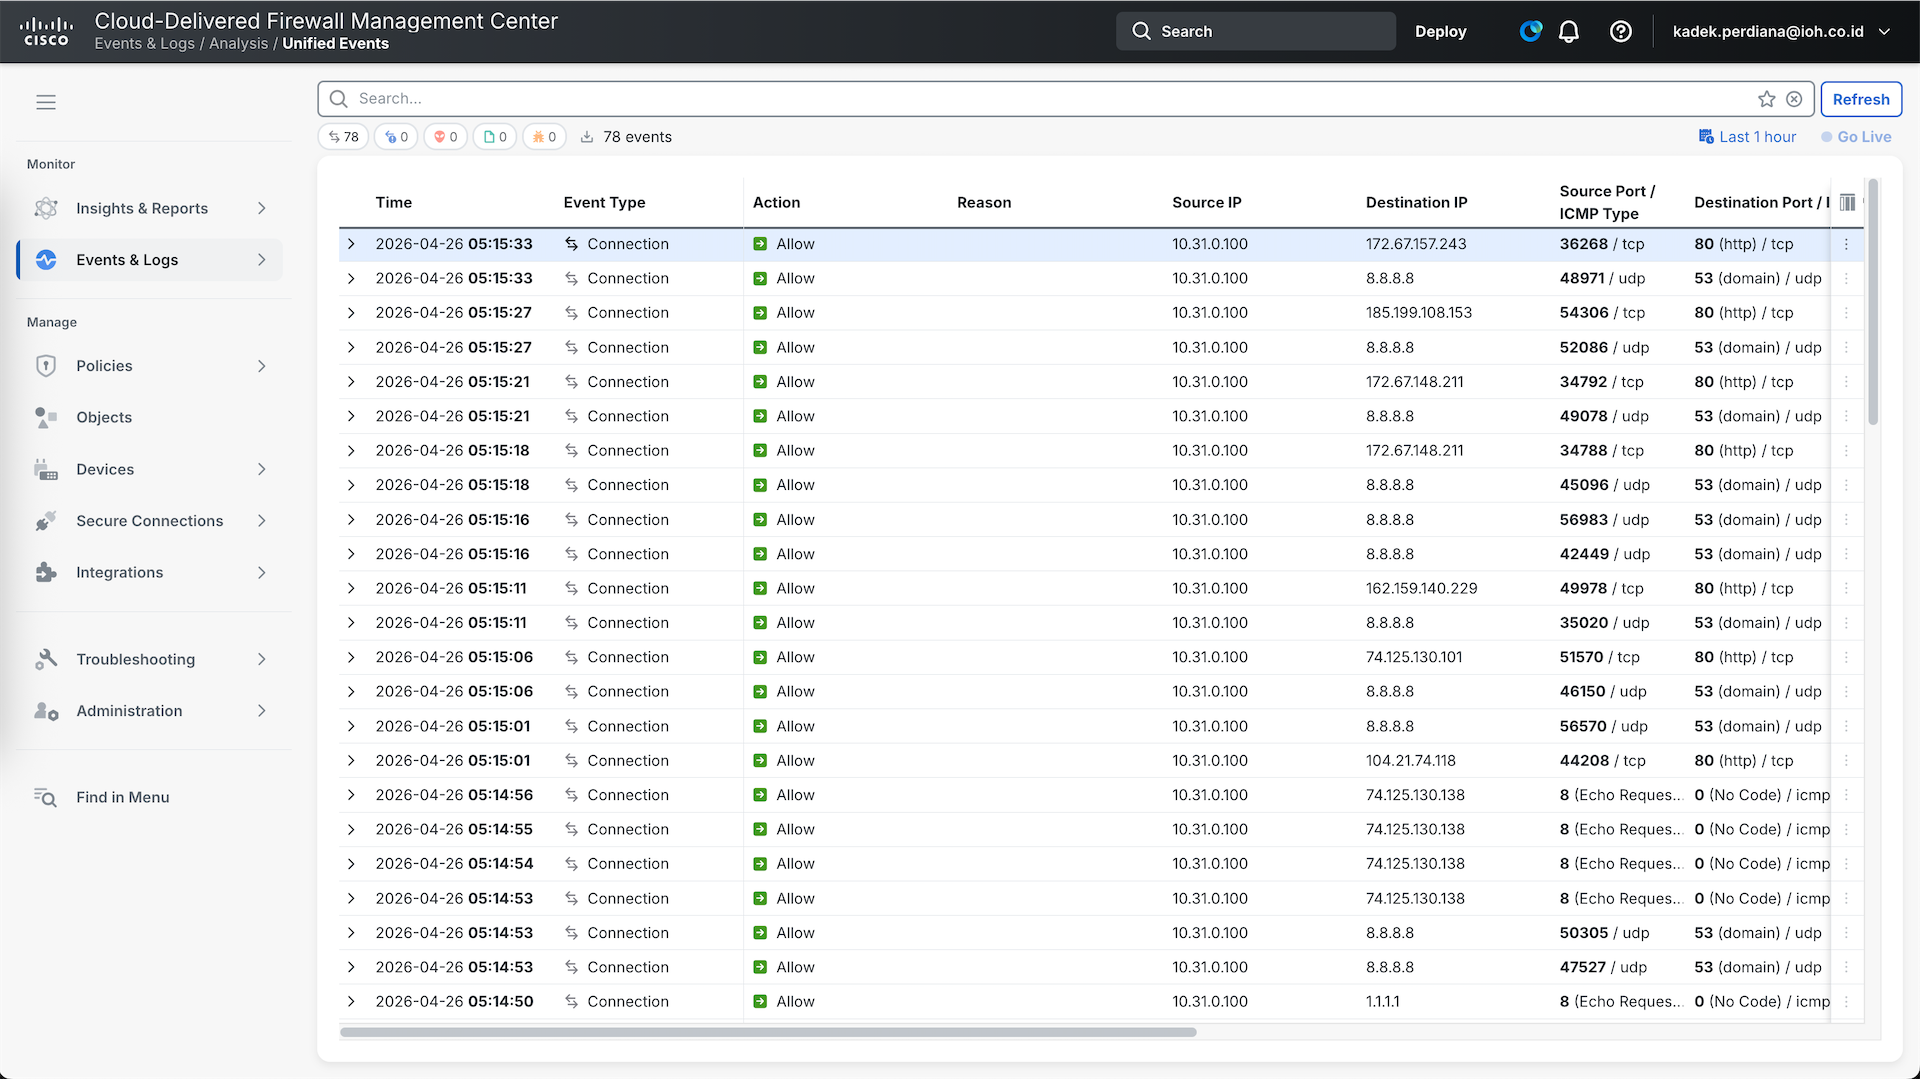
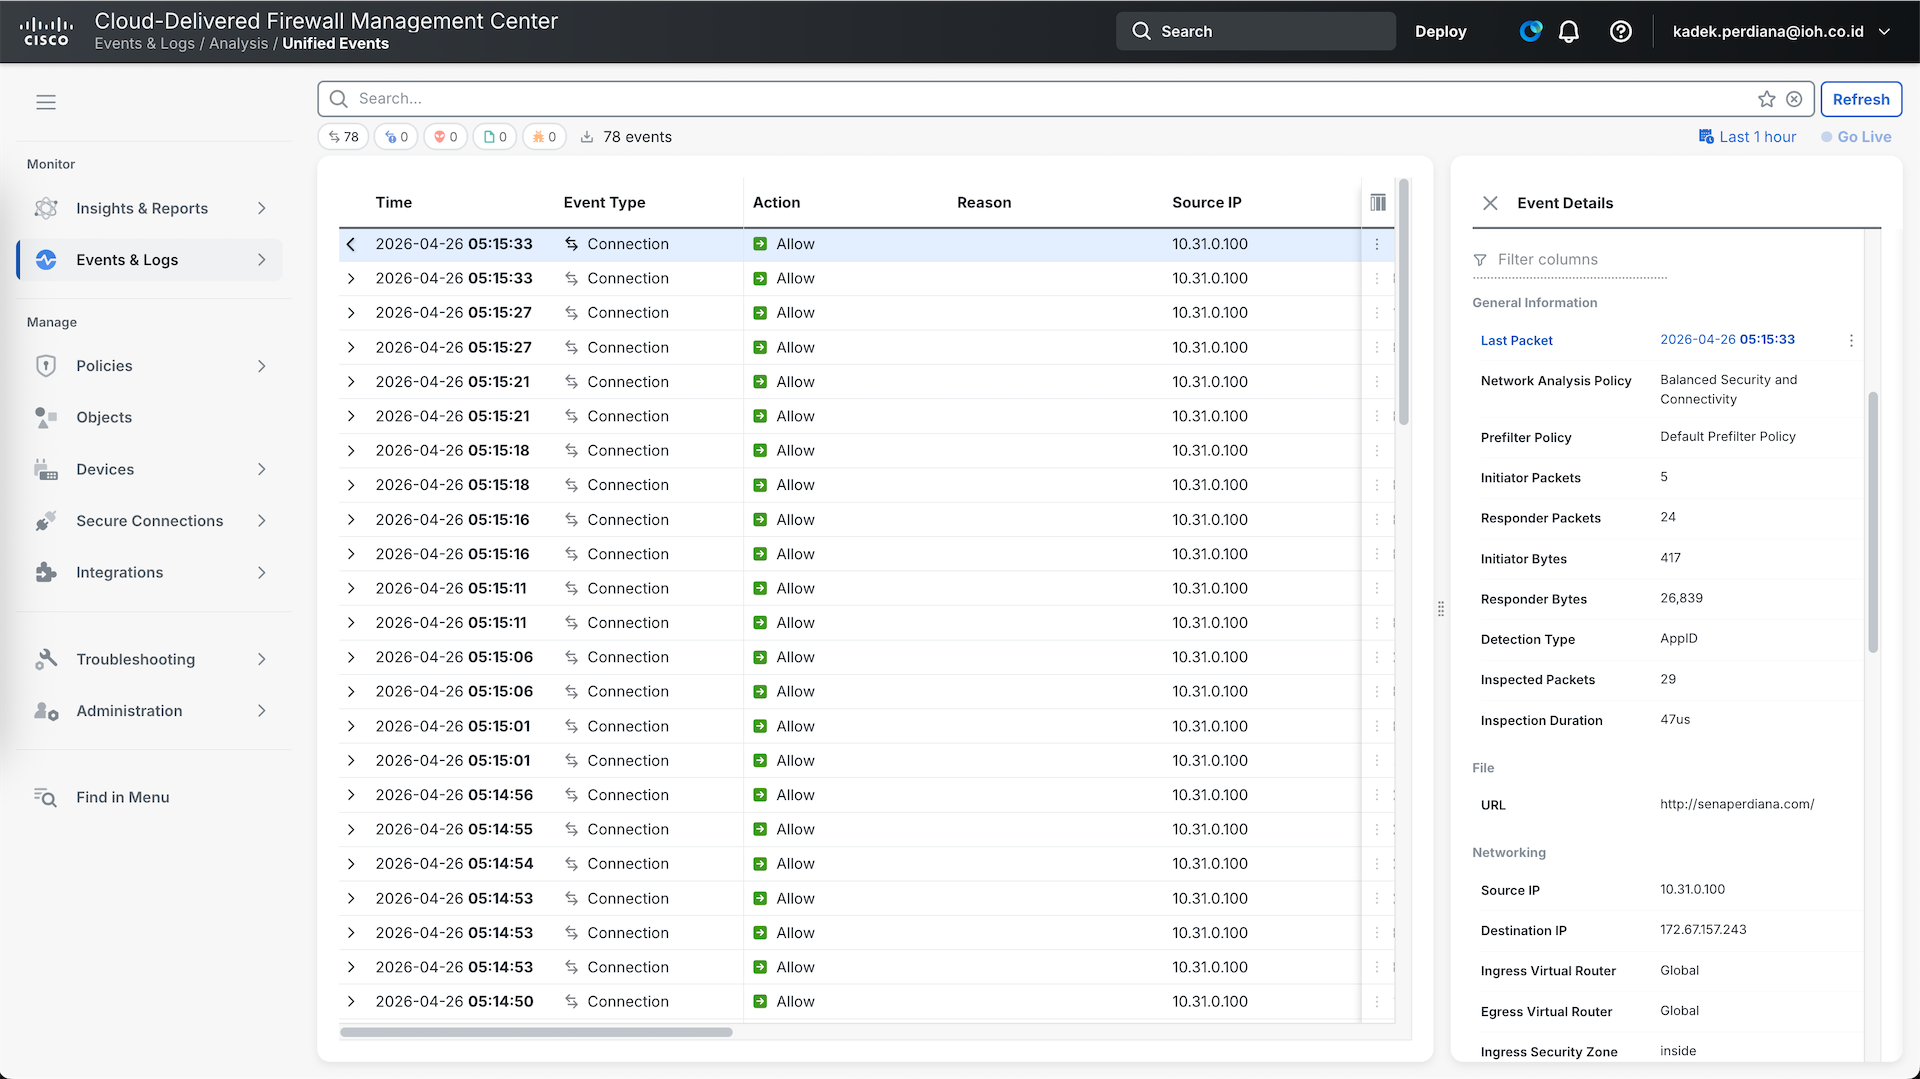
And we can also see the traffic logs directly on cdFMC
ASA
Next we will also onboard our On-prem ASA to SCC
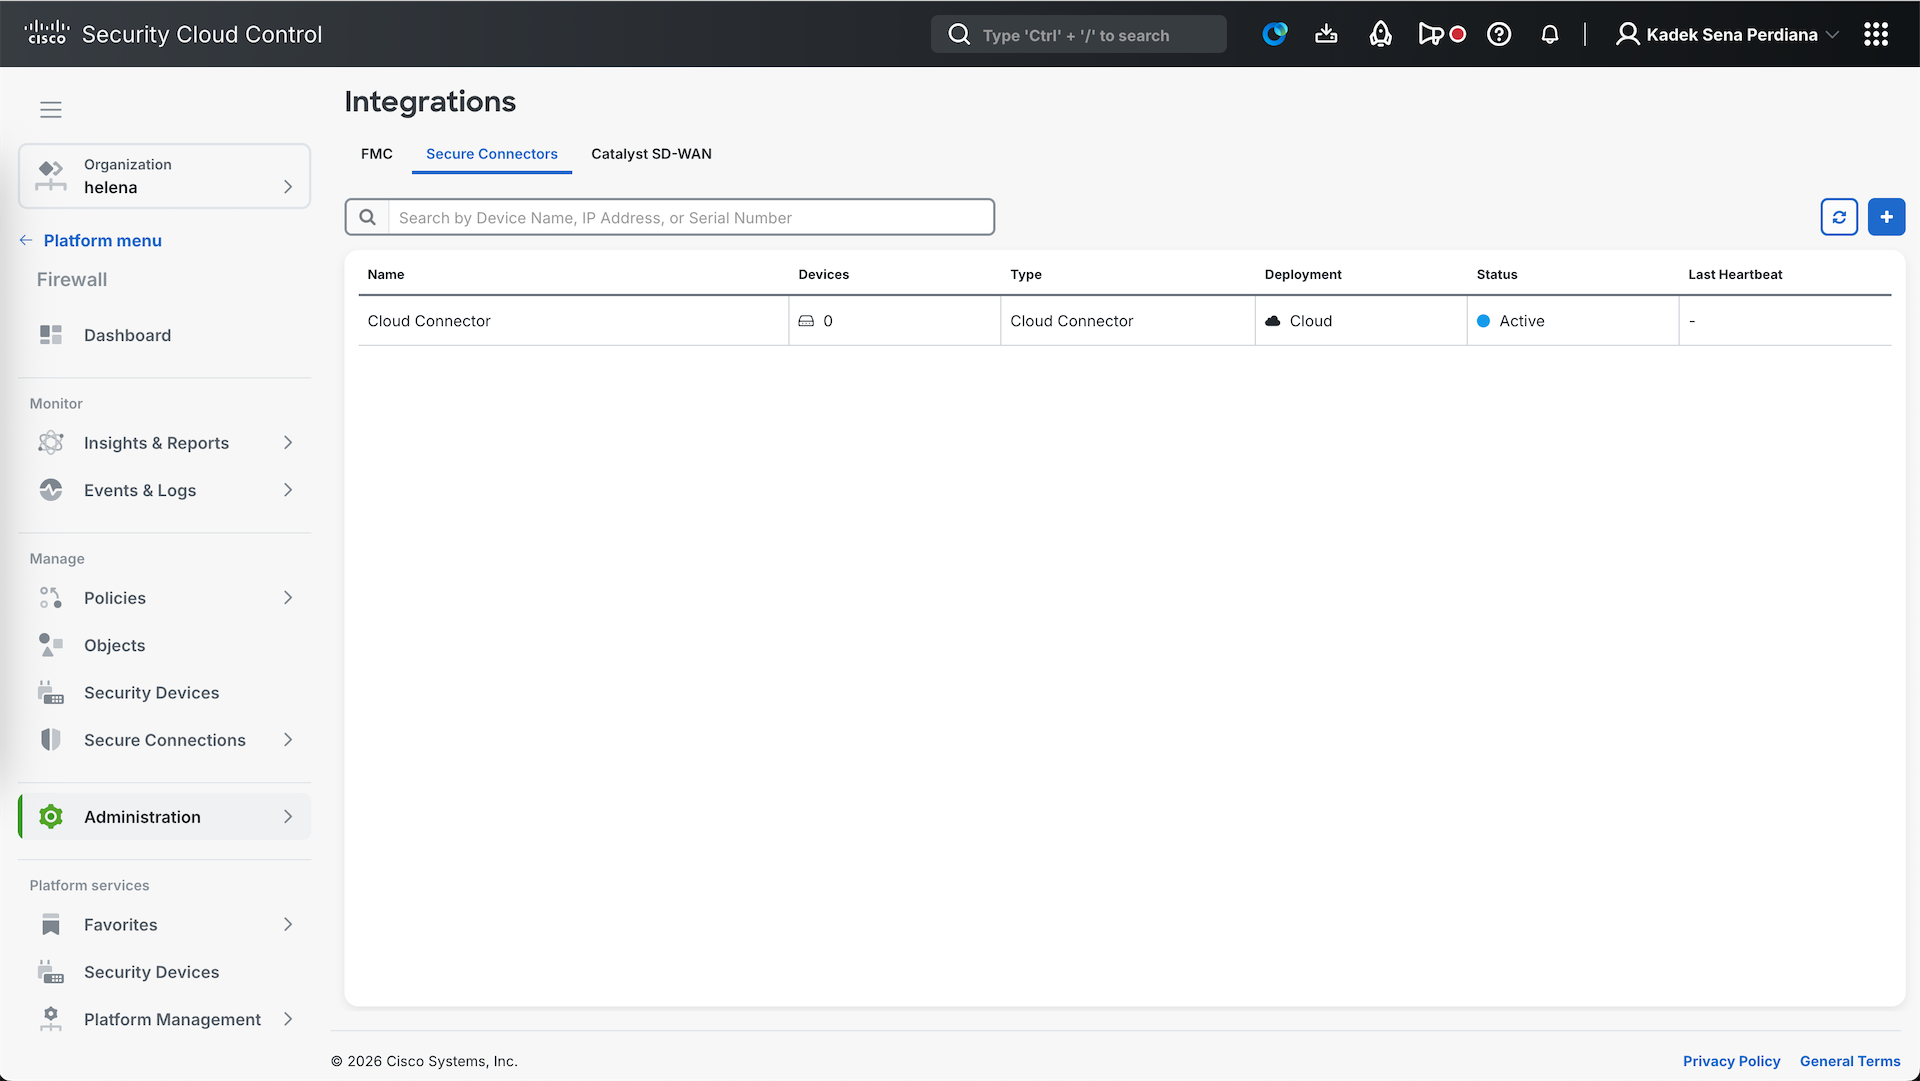
Because our ASA is not directly accessible over Internet, we need to deploy a Secure Device Connector (SDC) to act as a proxy between the internal network and SCC platform, here on Integration page we select Add and select SDC
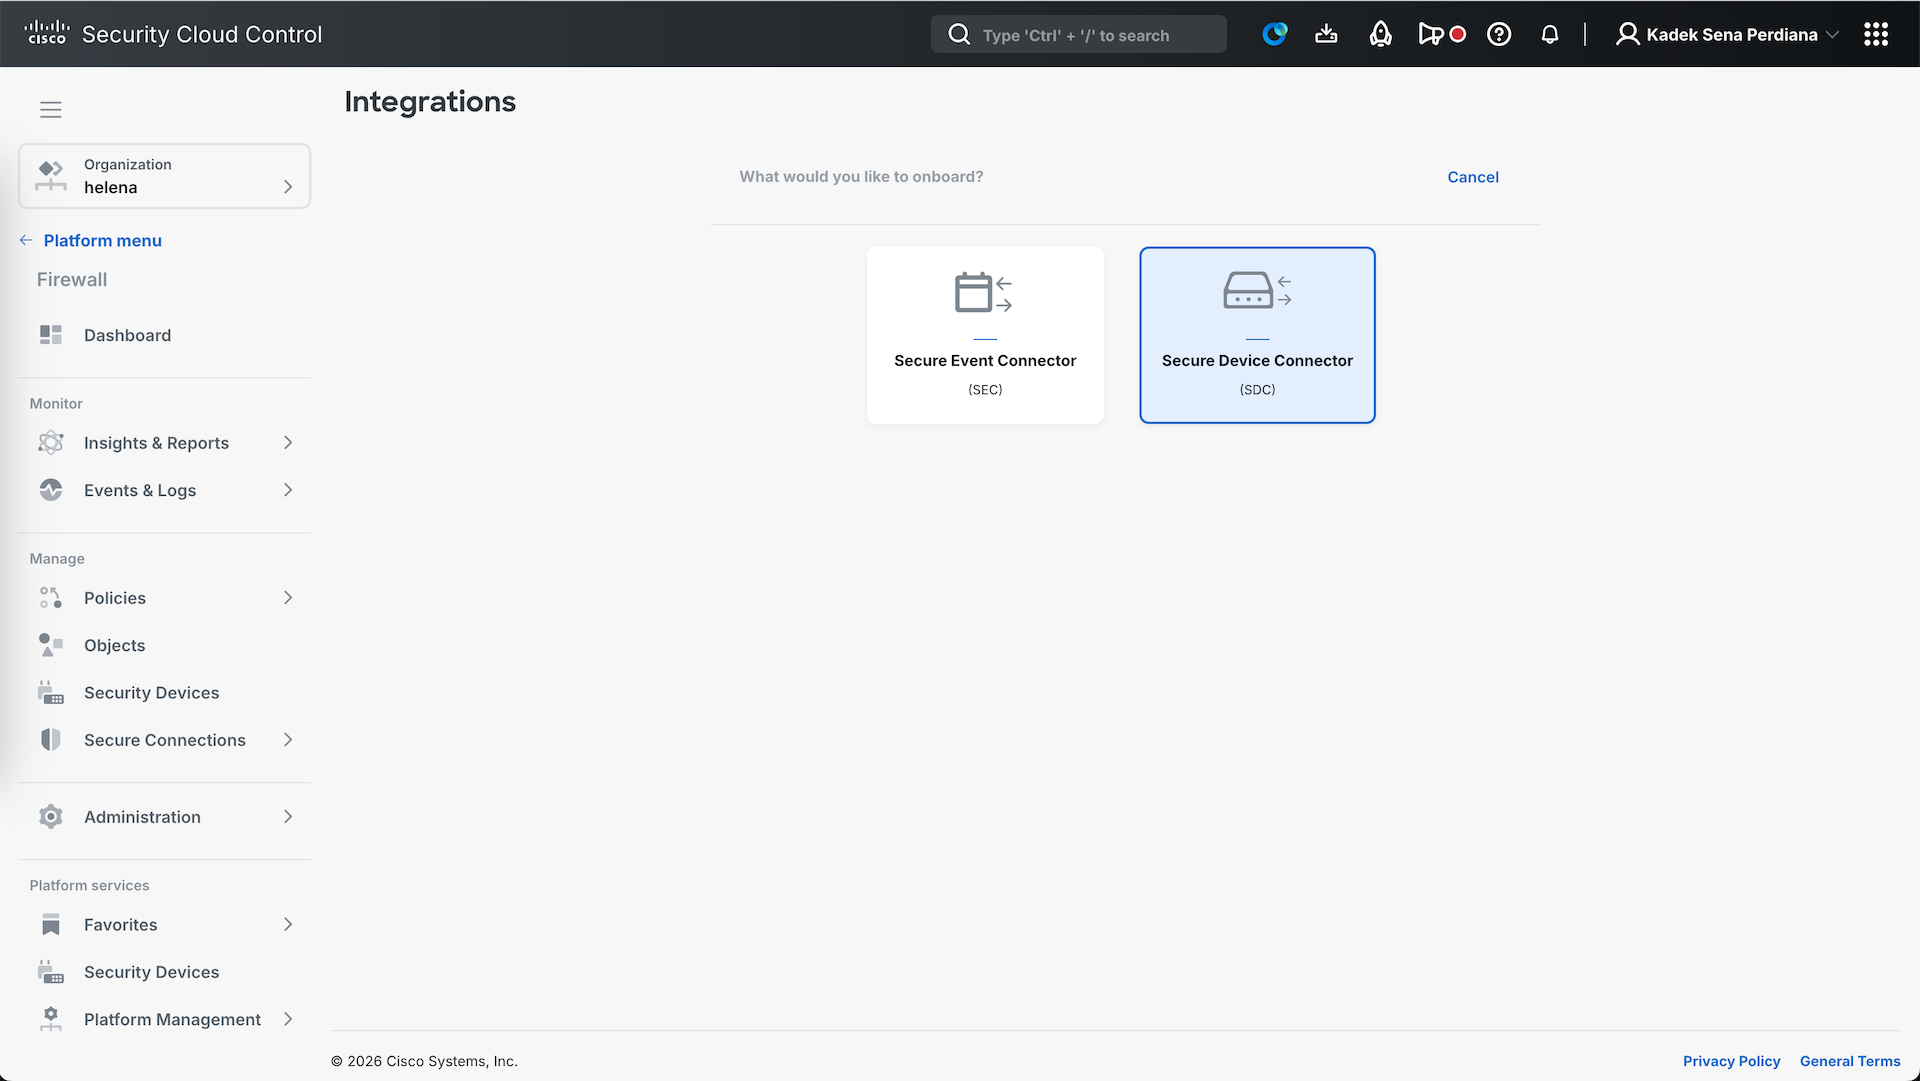
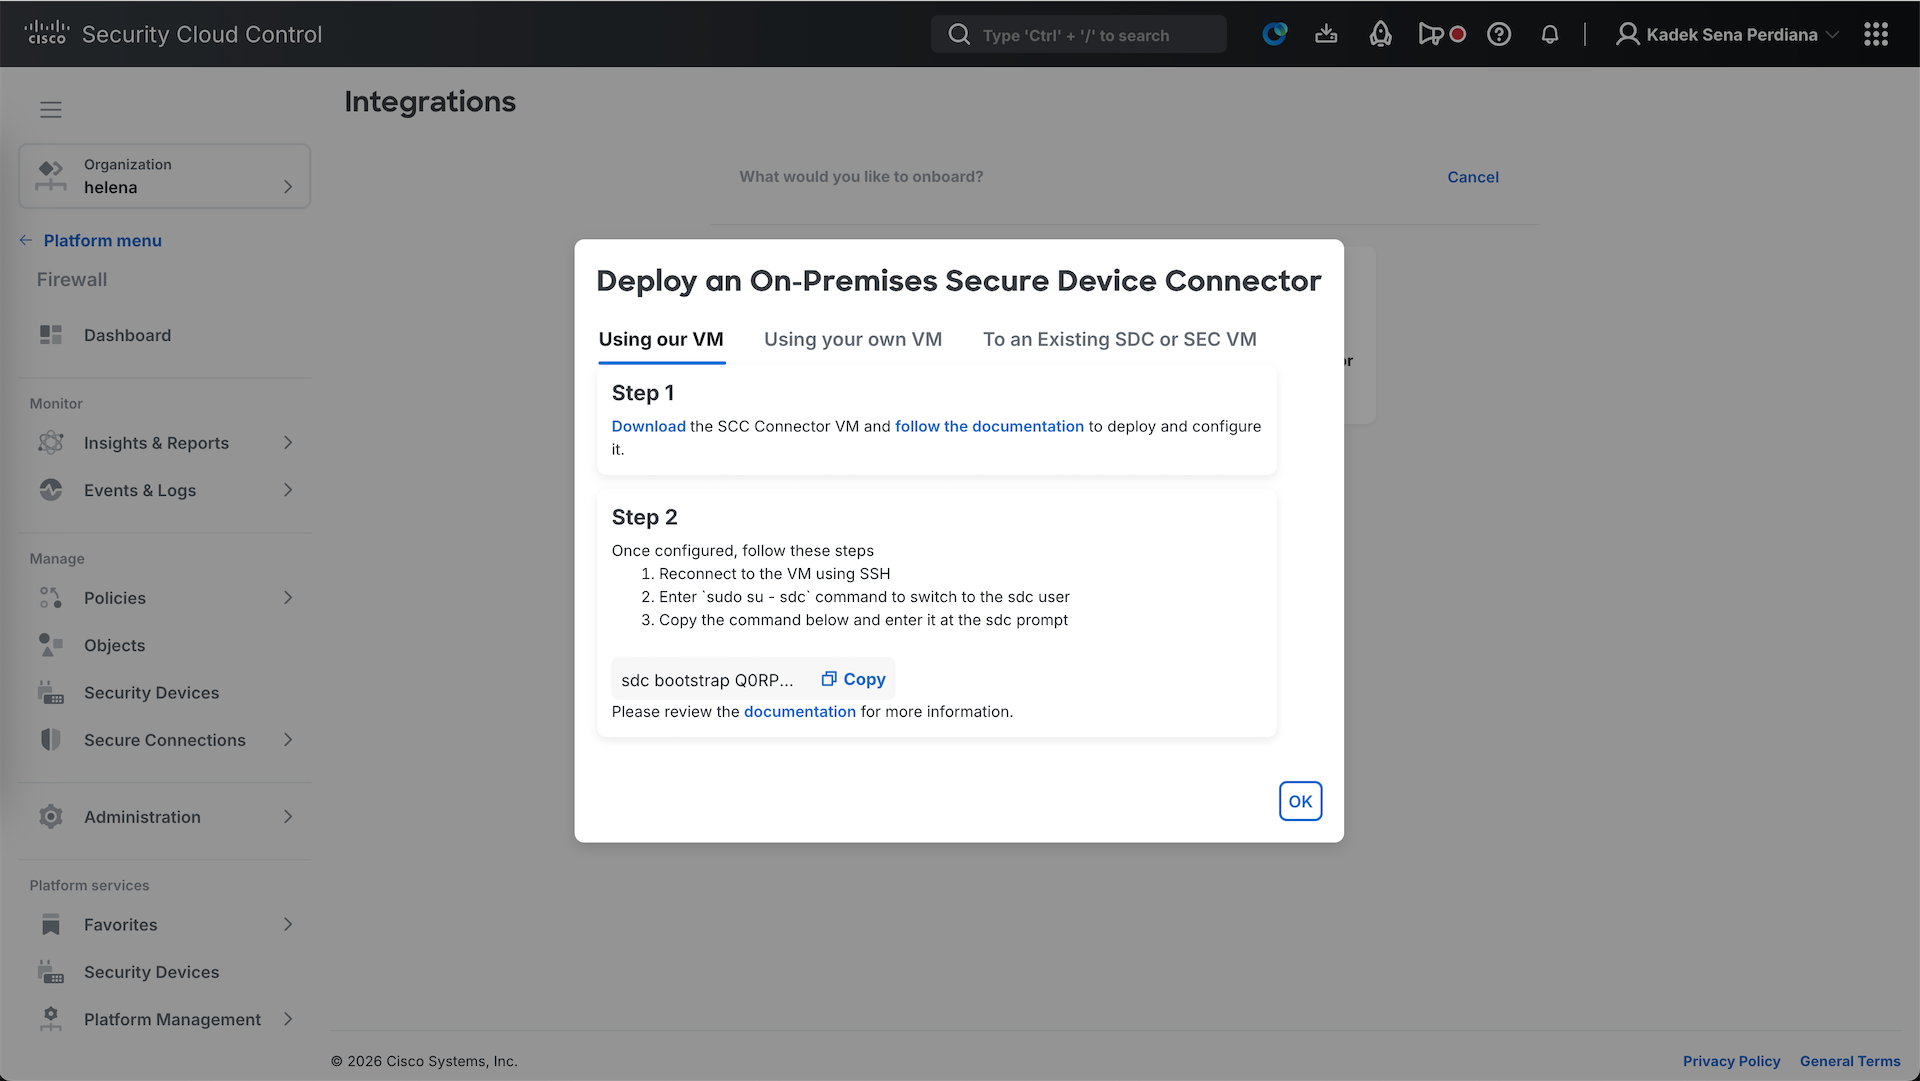
We are given options to either run the SDC service on existing Linux server or deploy a new VM. We will deploy a new VM for simplicity. Select download and follow the Documentation to set it up
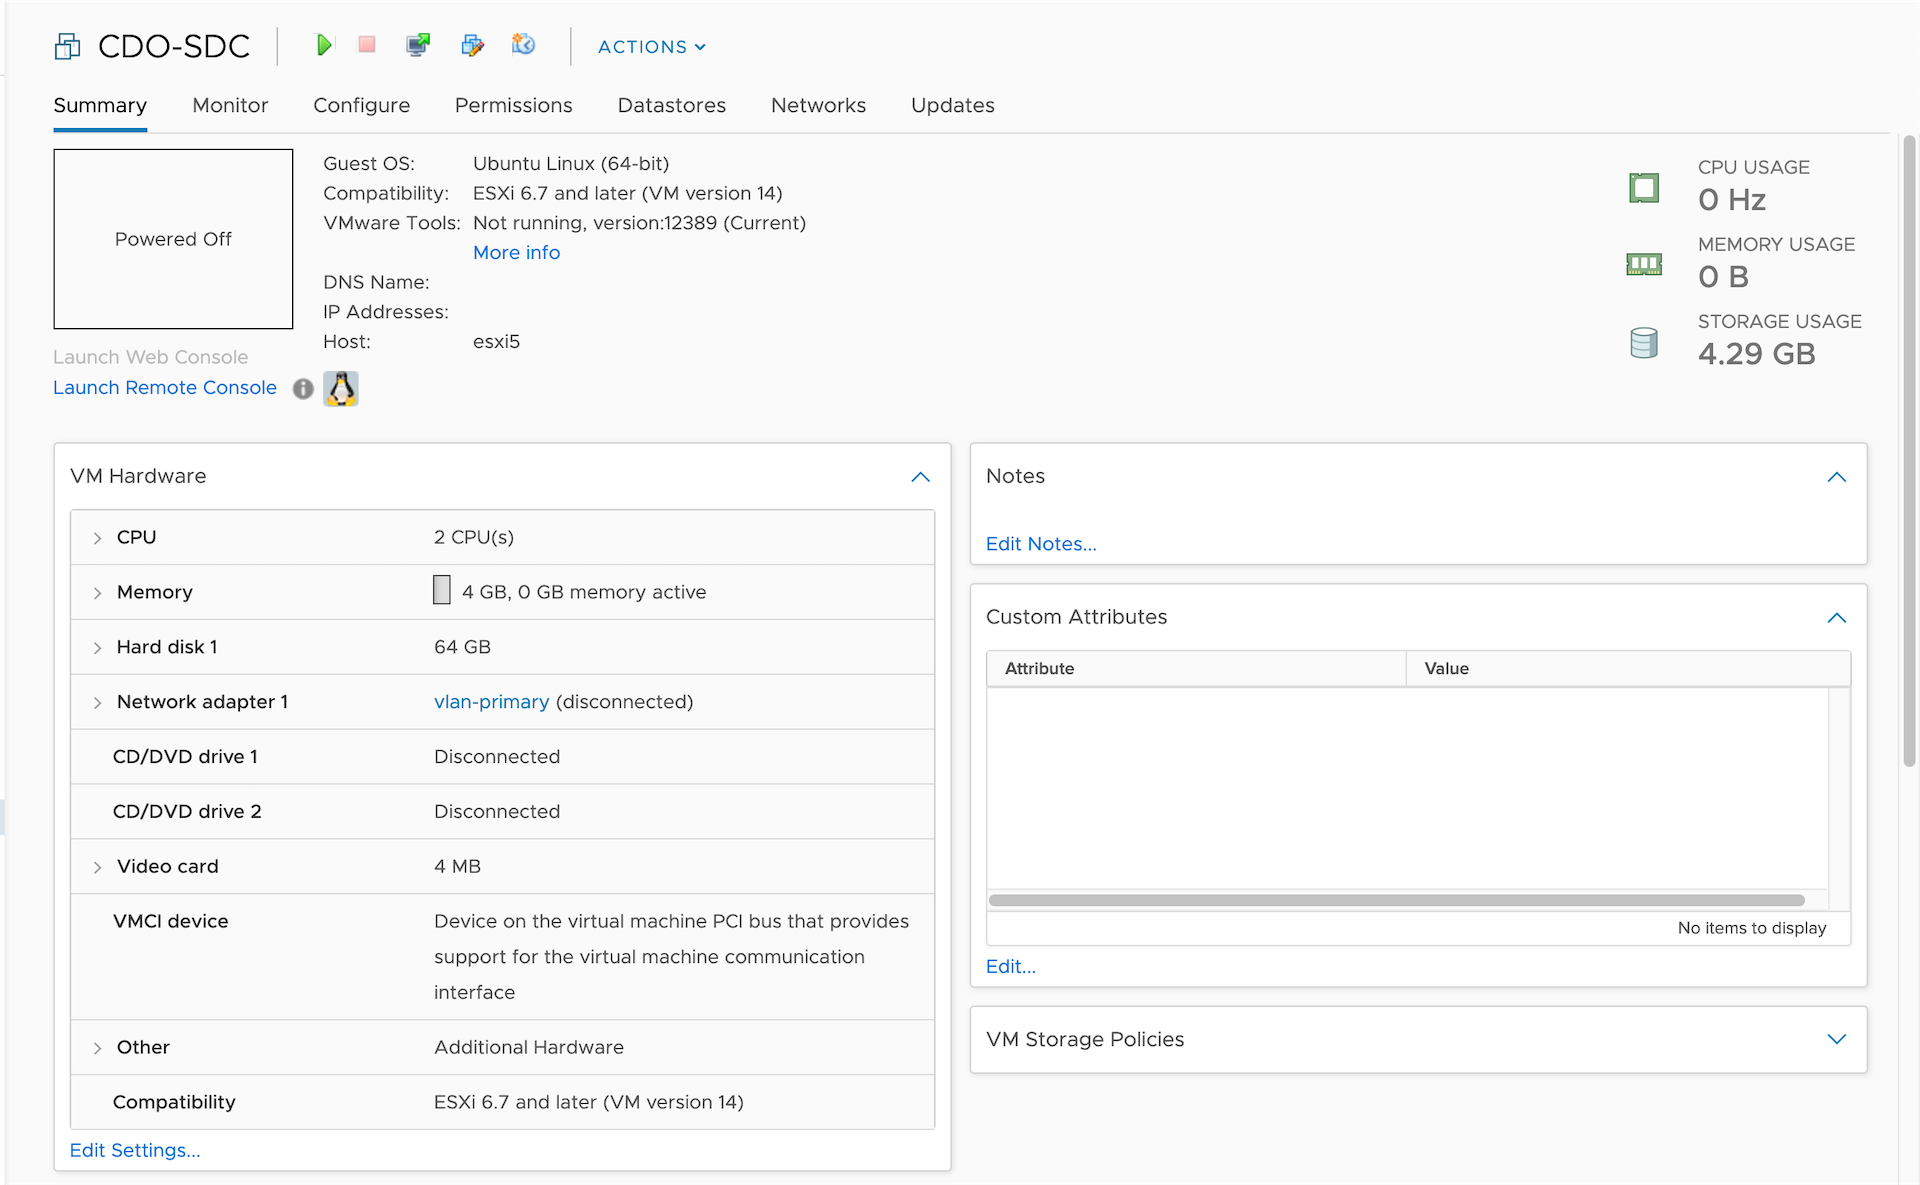
Here we have deployed the SDC VM, login with default credential cdo/adm123
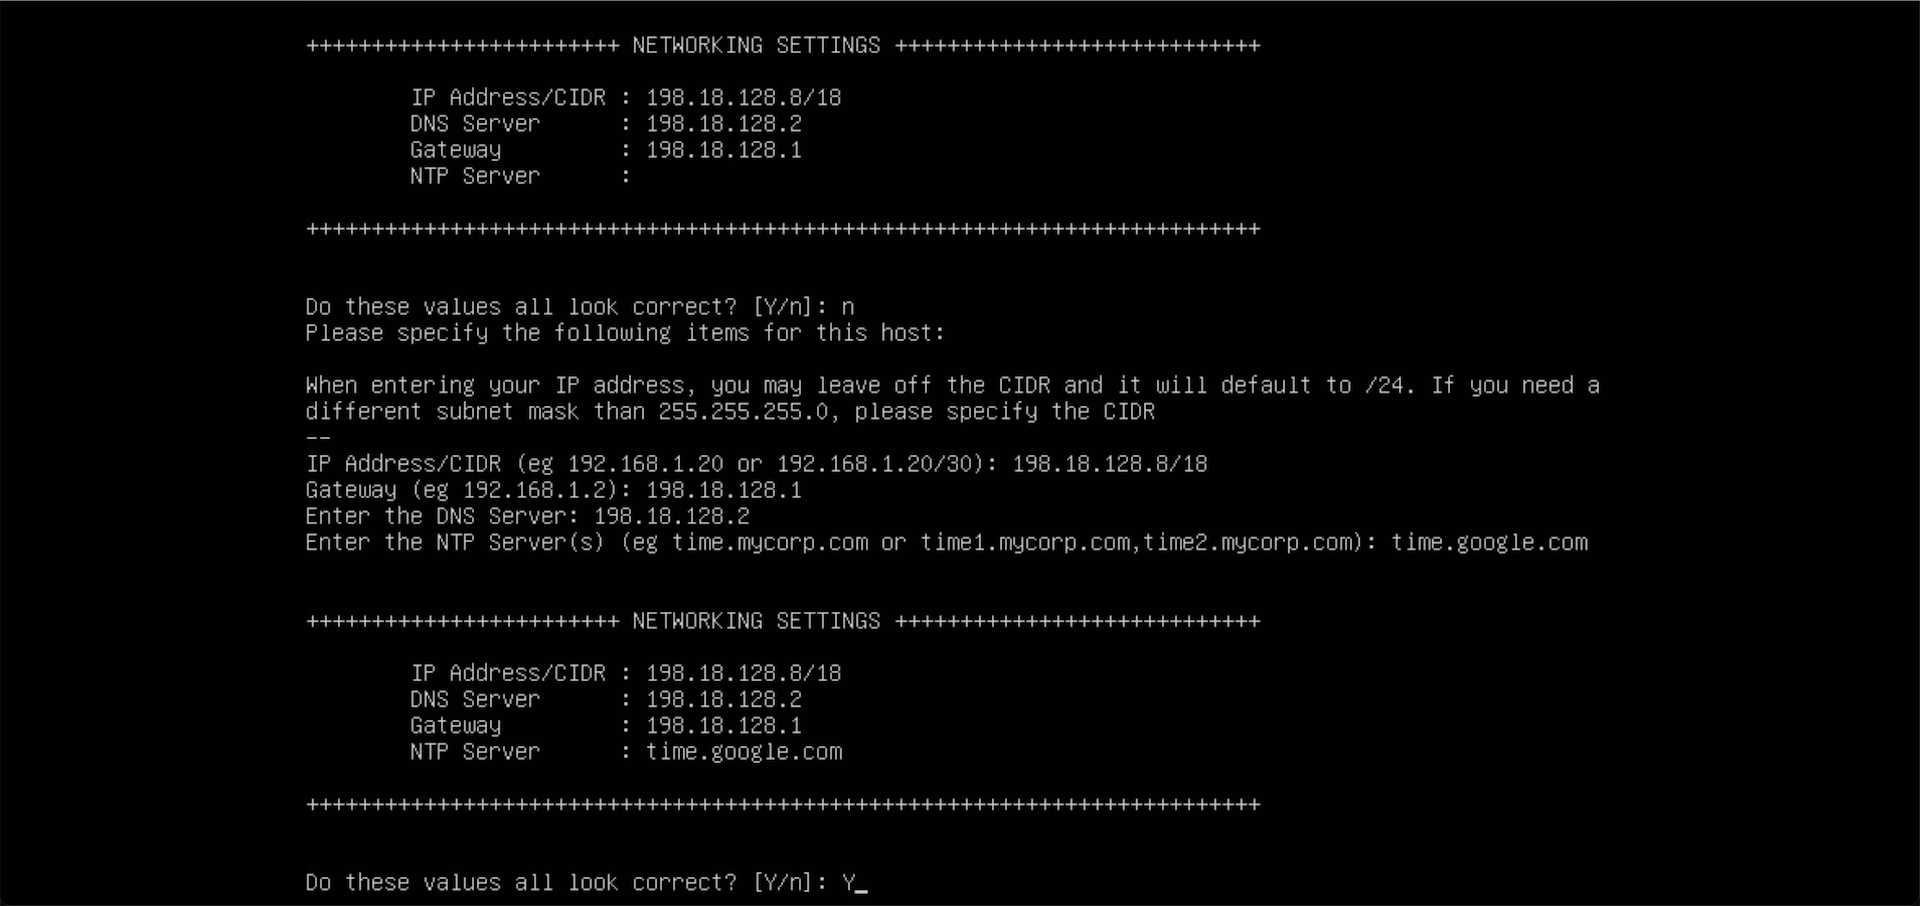
Then run “sdc host configure” to configure the network
After that, enter into sdc user and paste the provided cli command
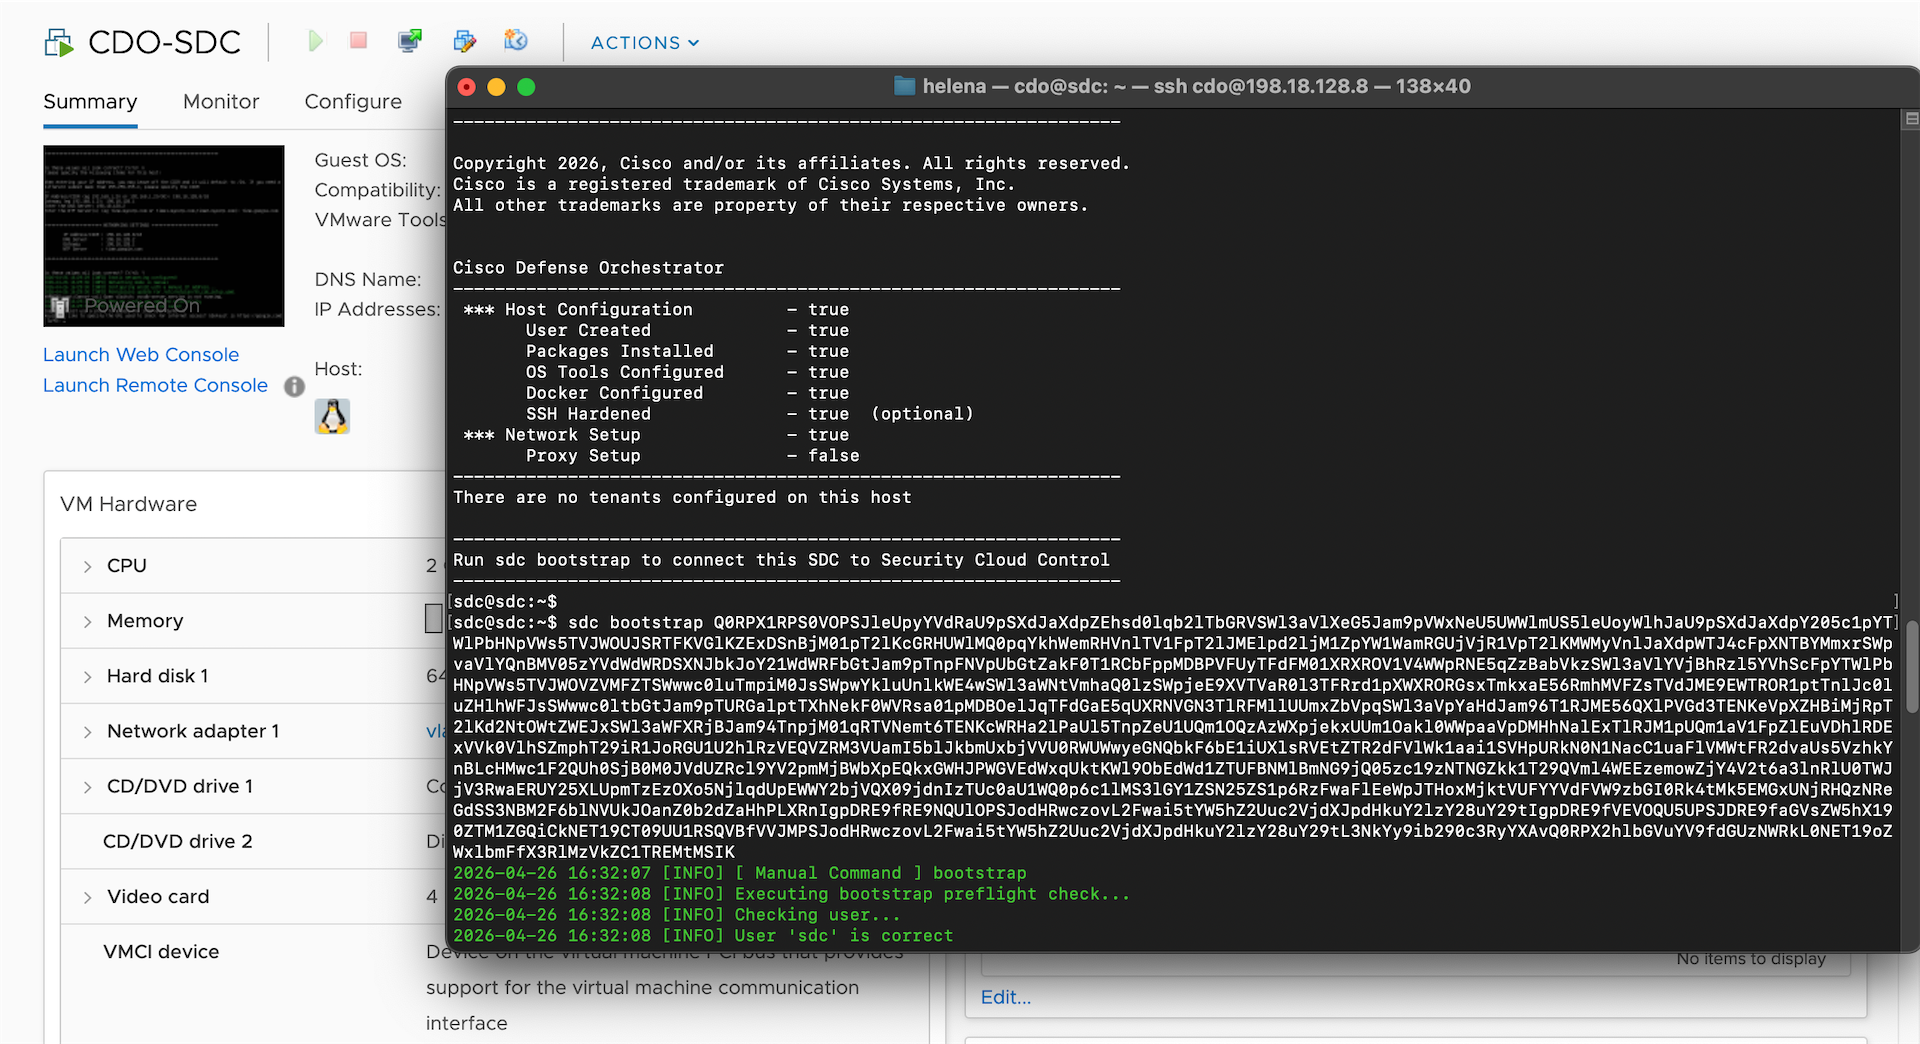

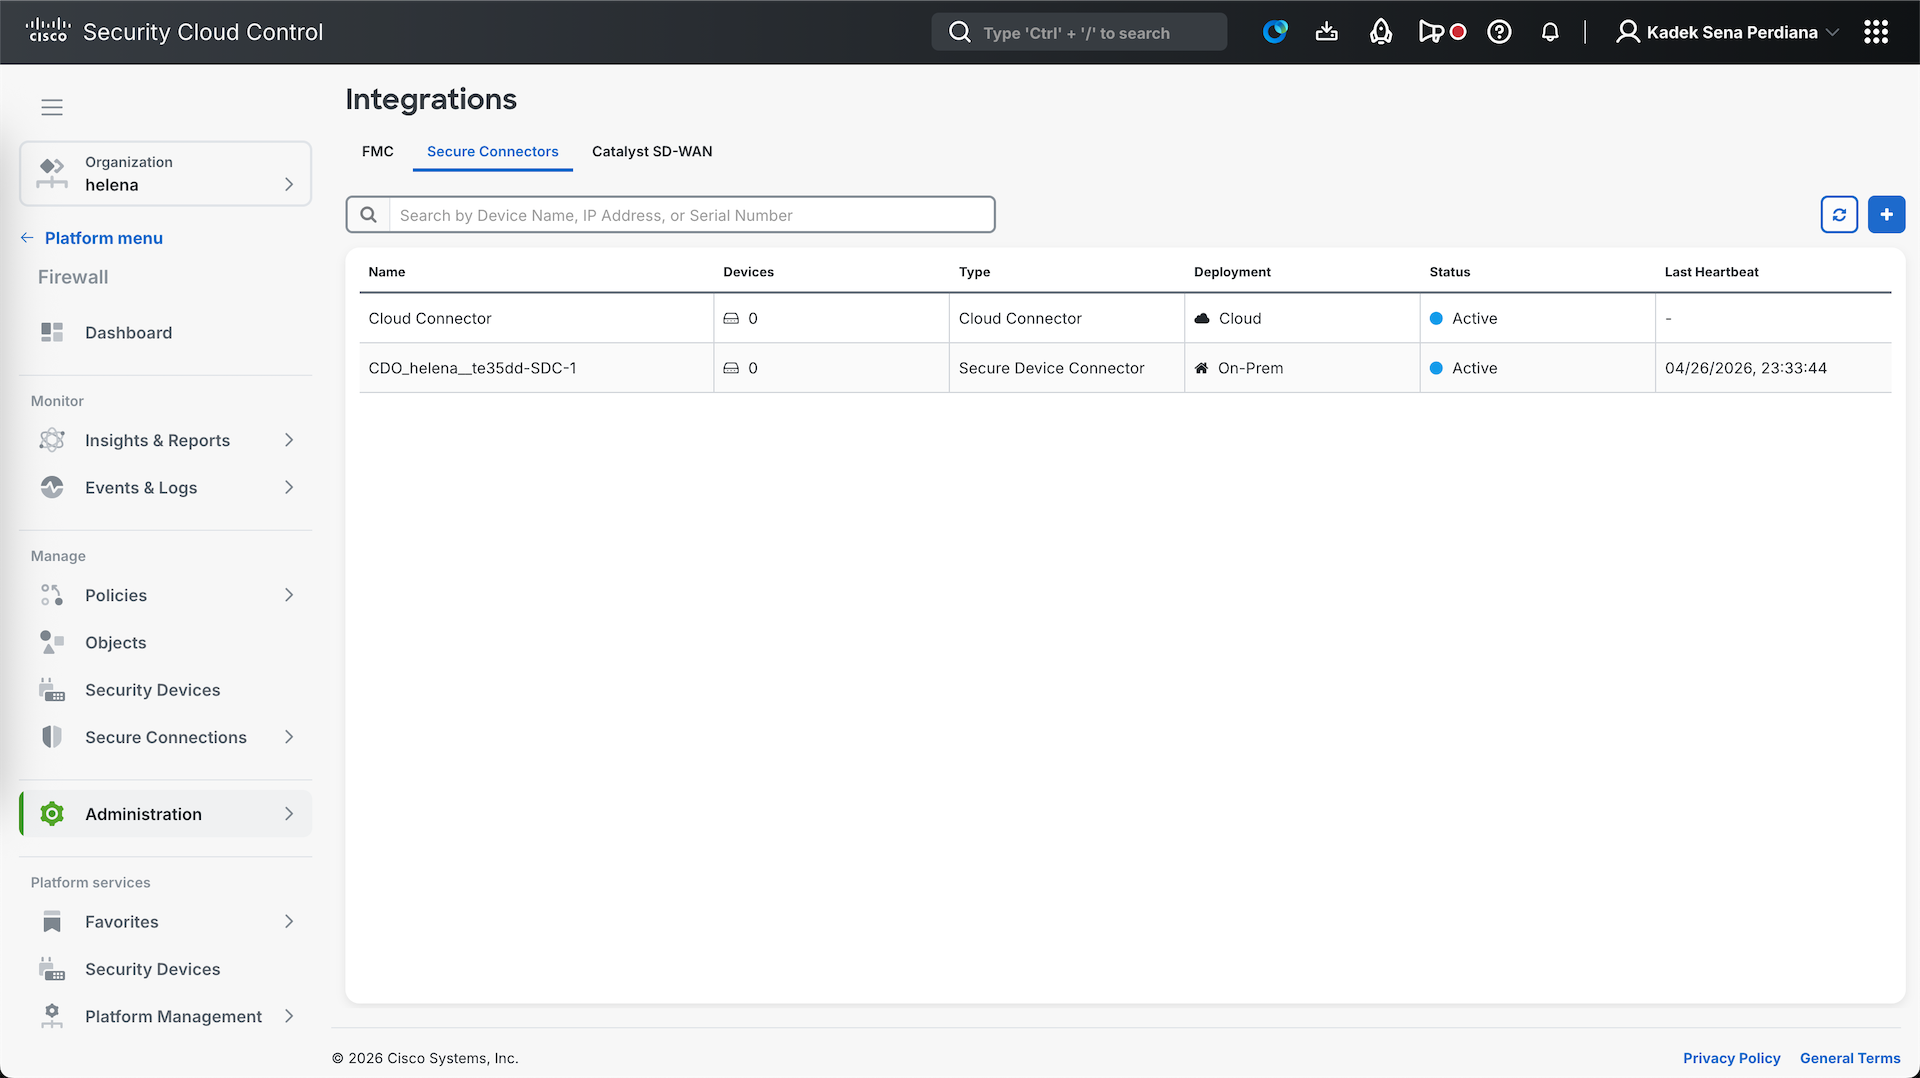
And now our SDC is active
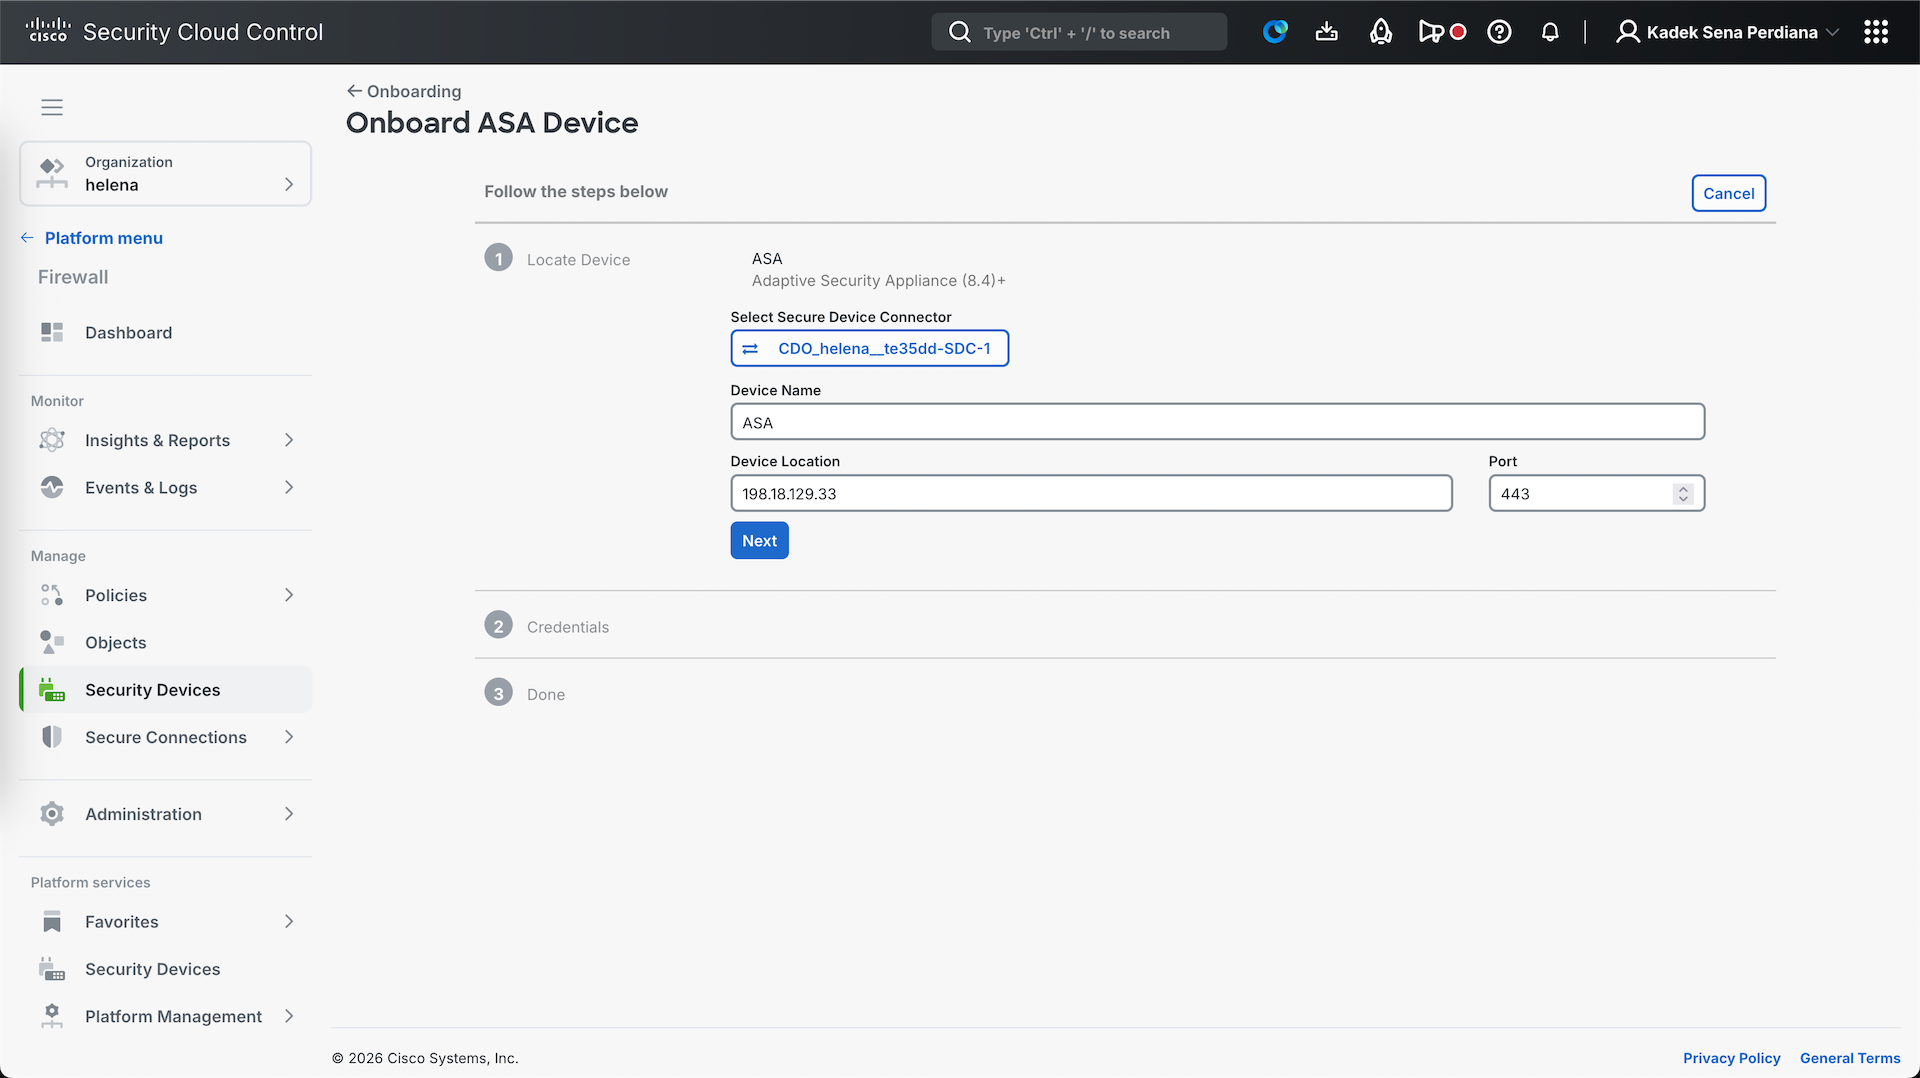
Next we can add the ASA device

We select our SDC and enter the ASA internal management IP Address
Then provide the credential to login to ASA, and give it label
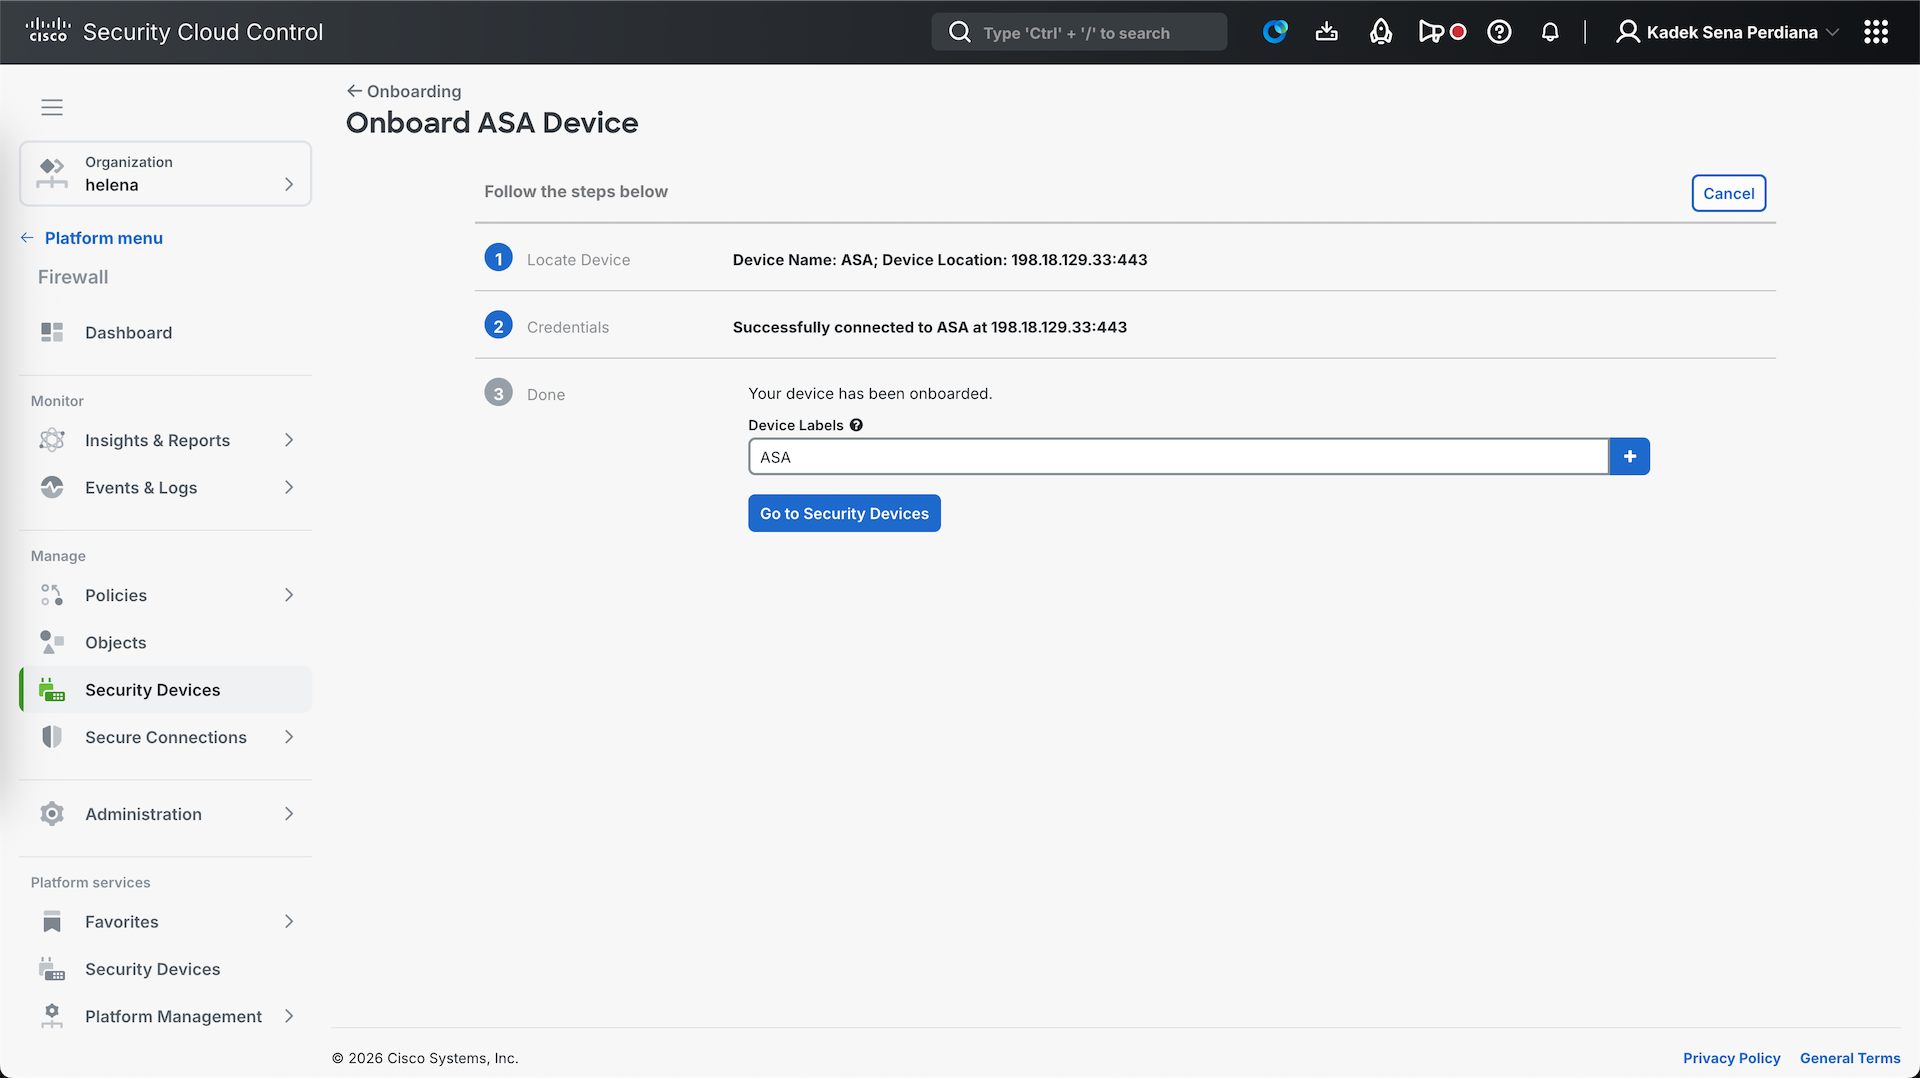
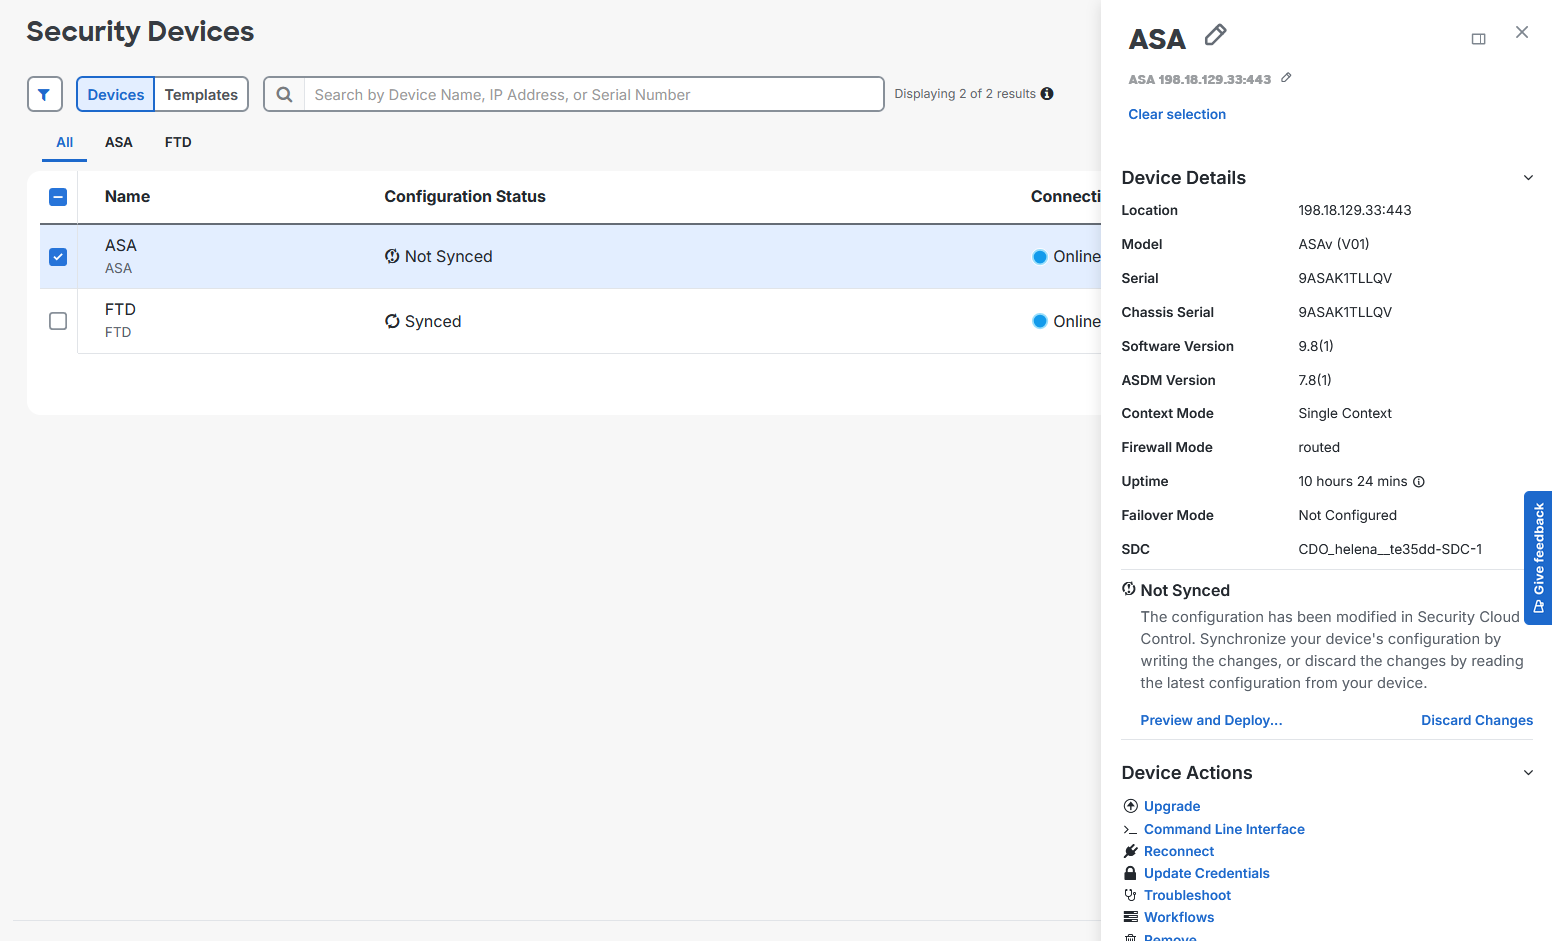
After a couple minutes the ASA should be onboarded
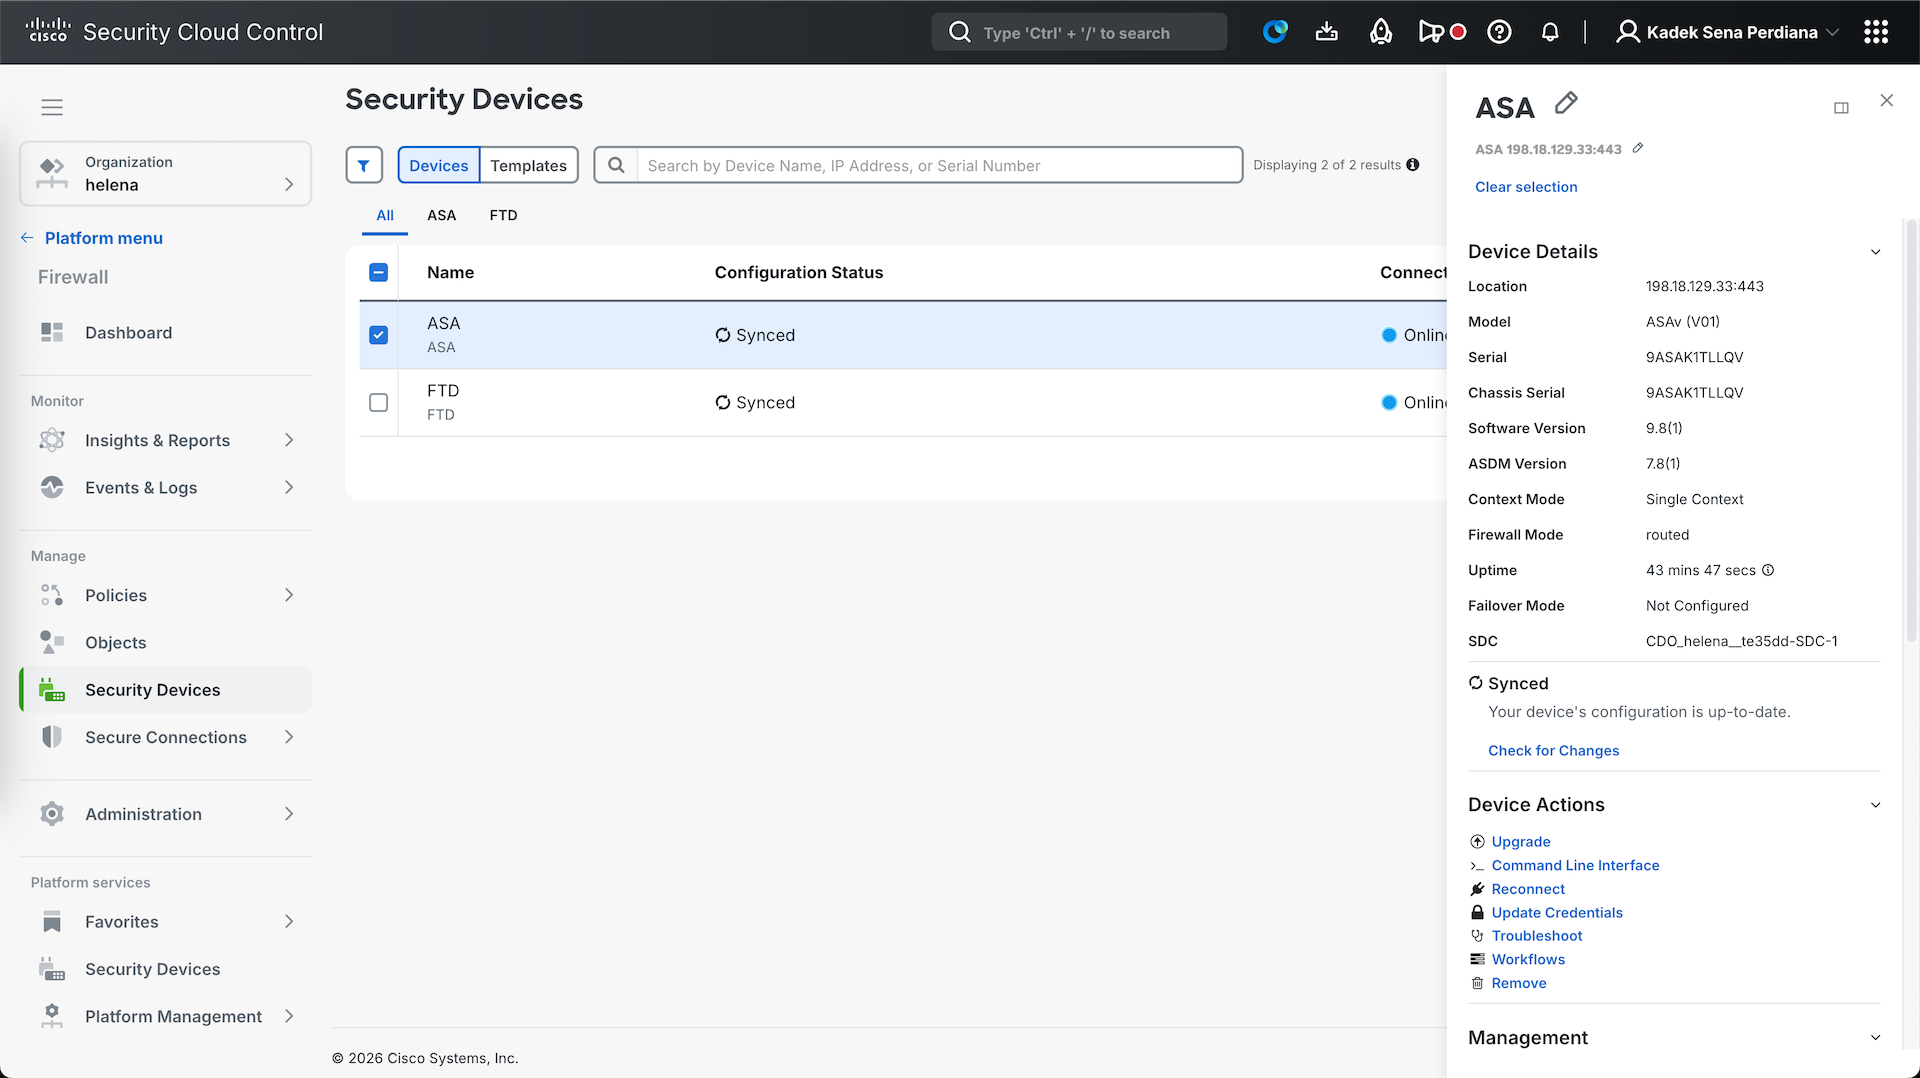
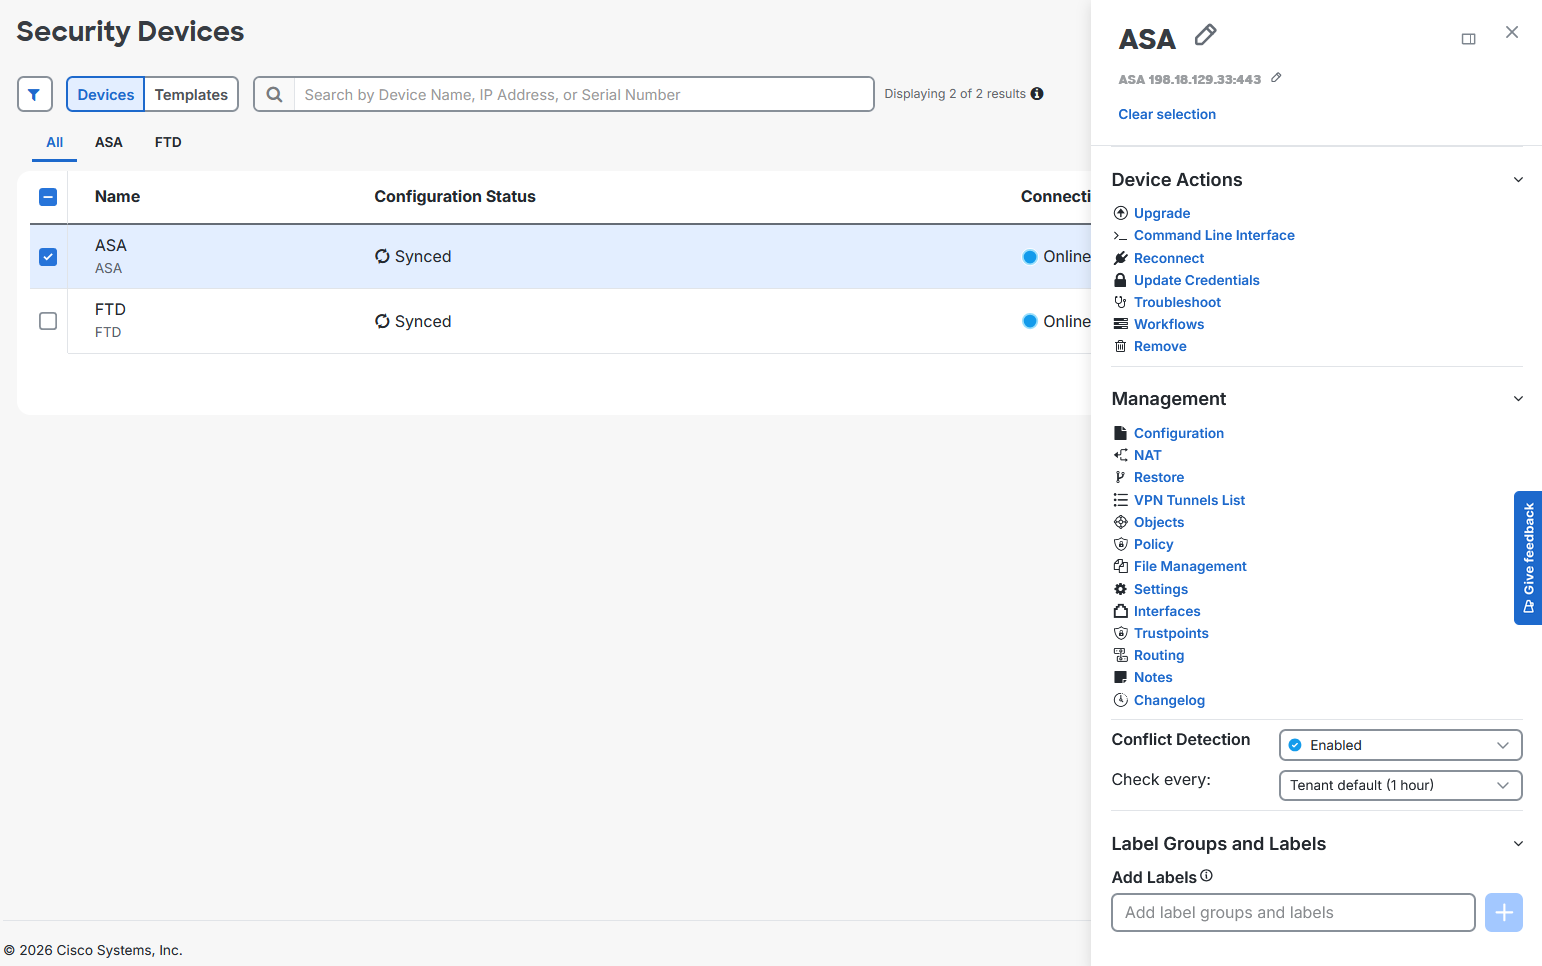
We can use the Management section to manage our ASA, replacing CLI configuration with GUI based one
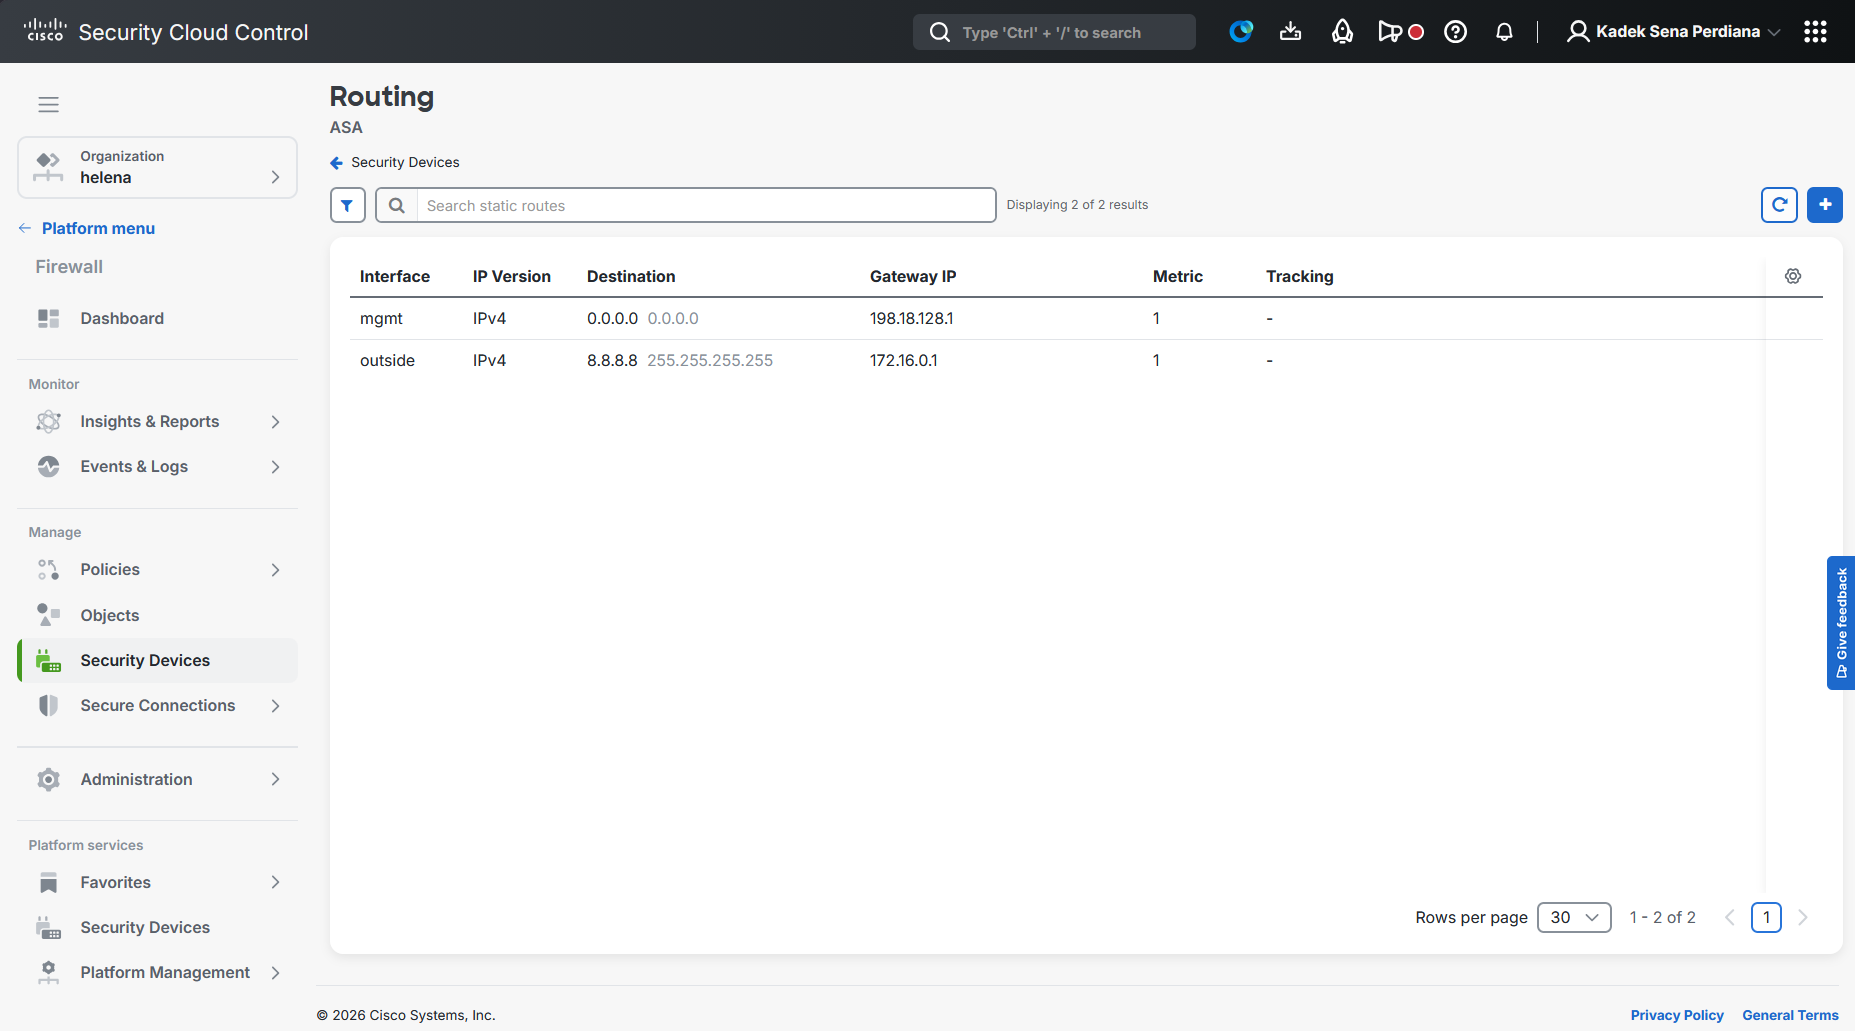
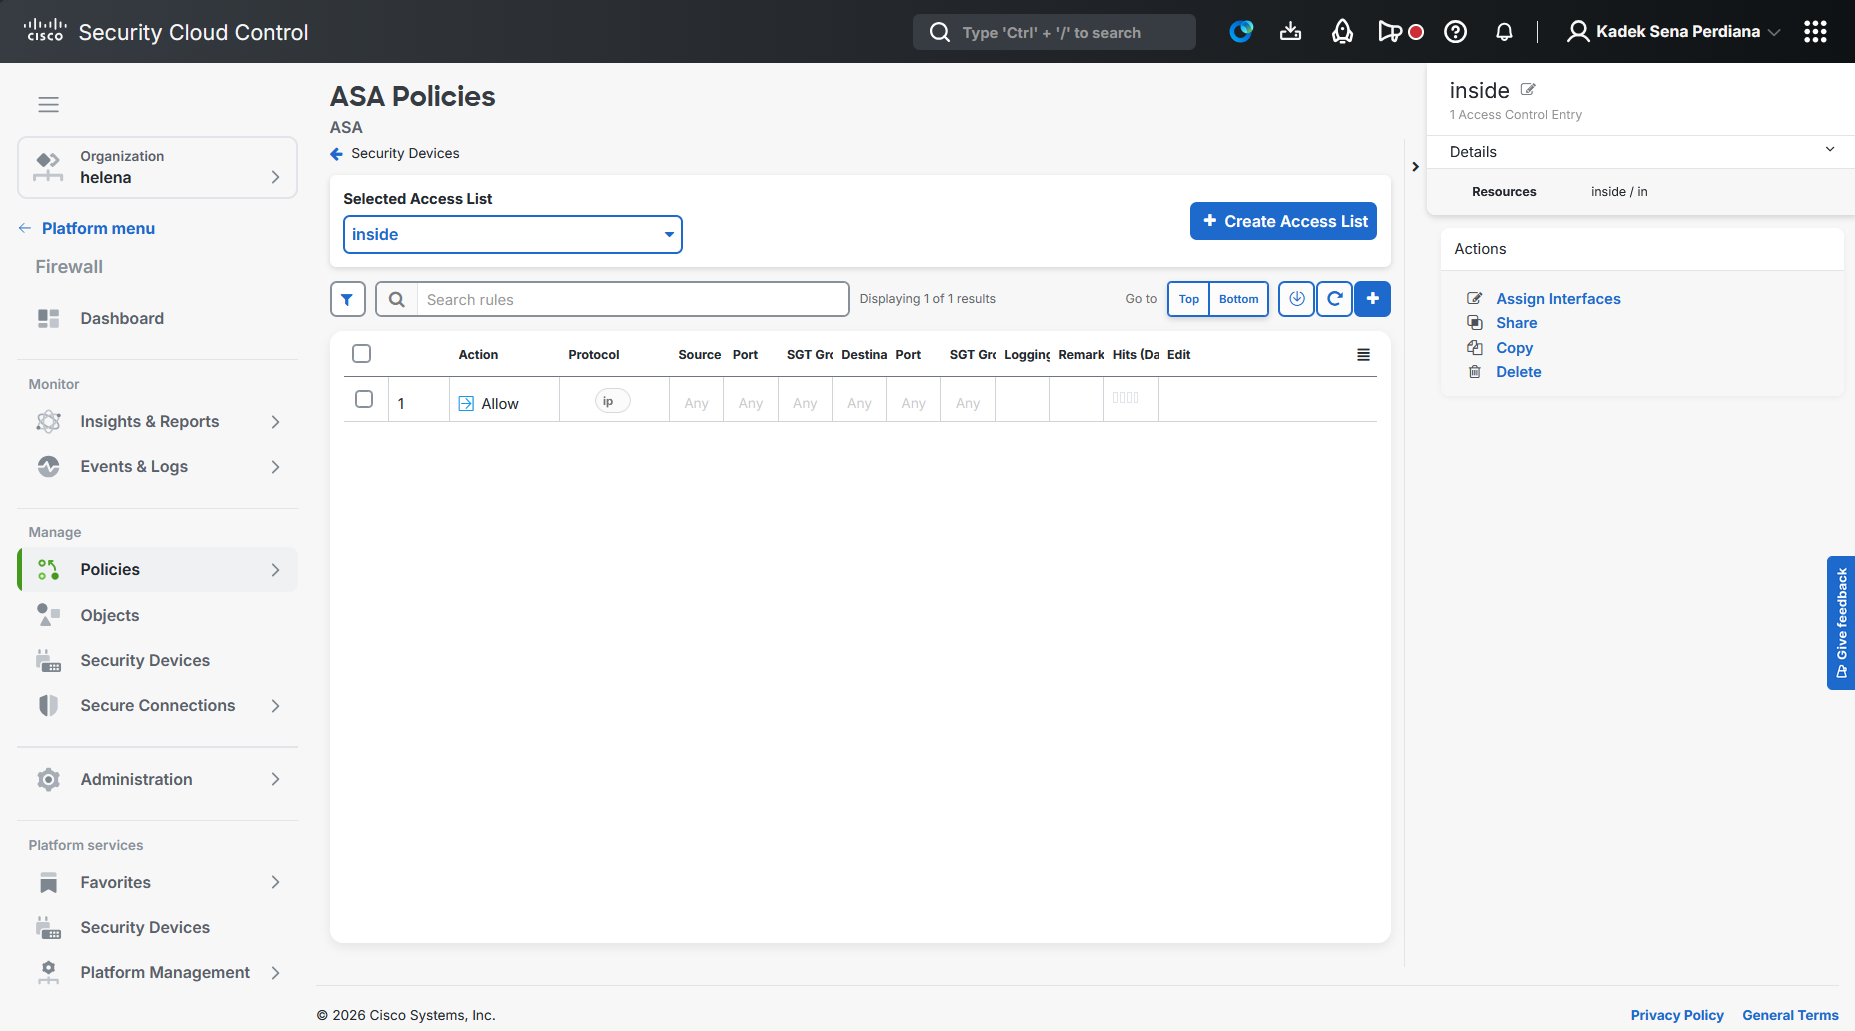
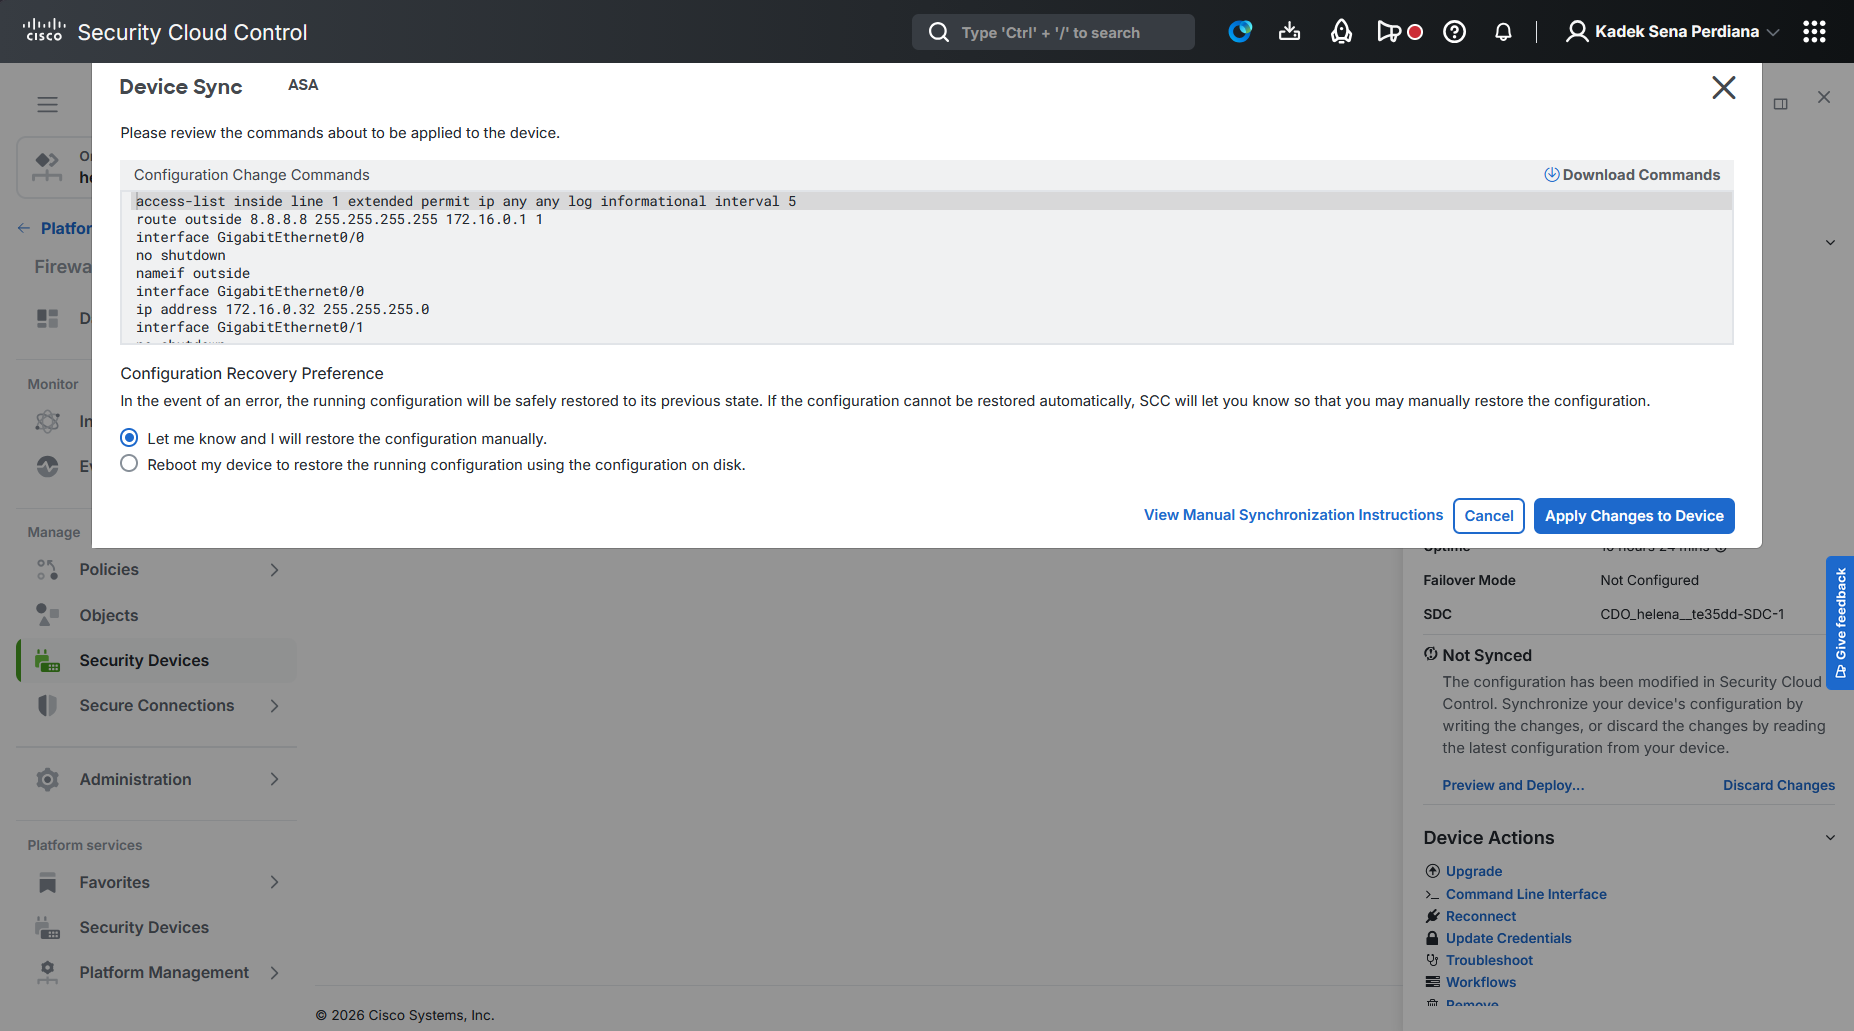
After all configuration is done, we then deploy the changes
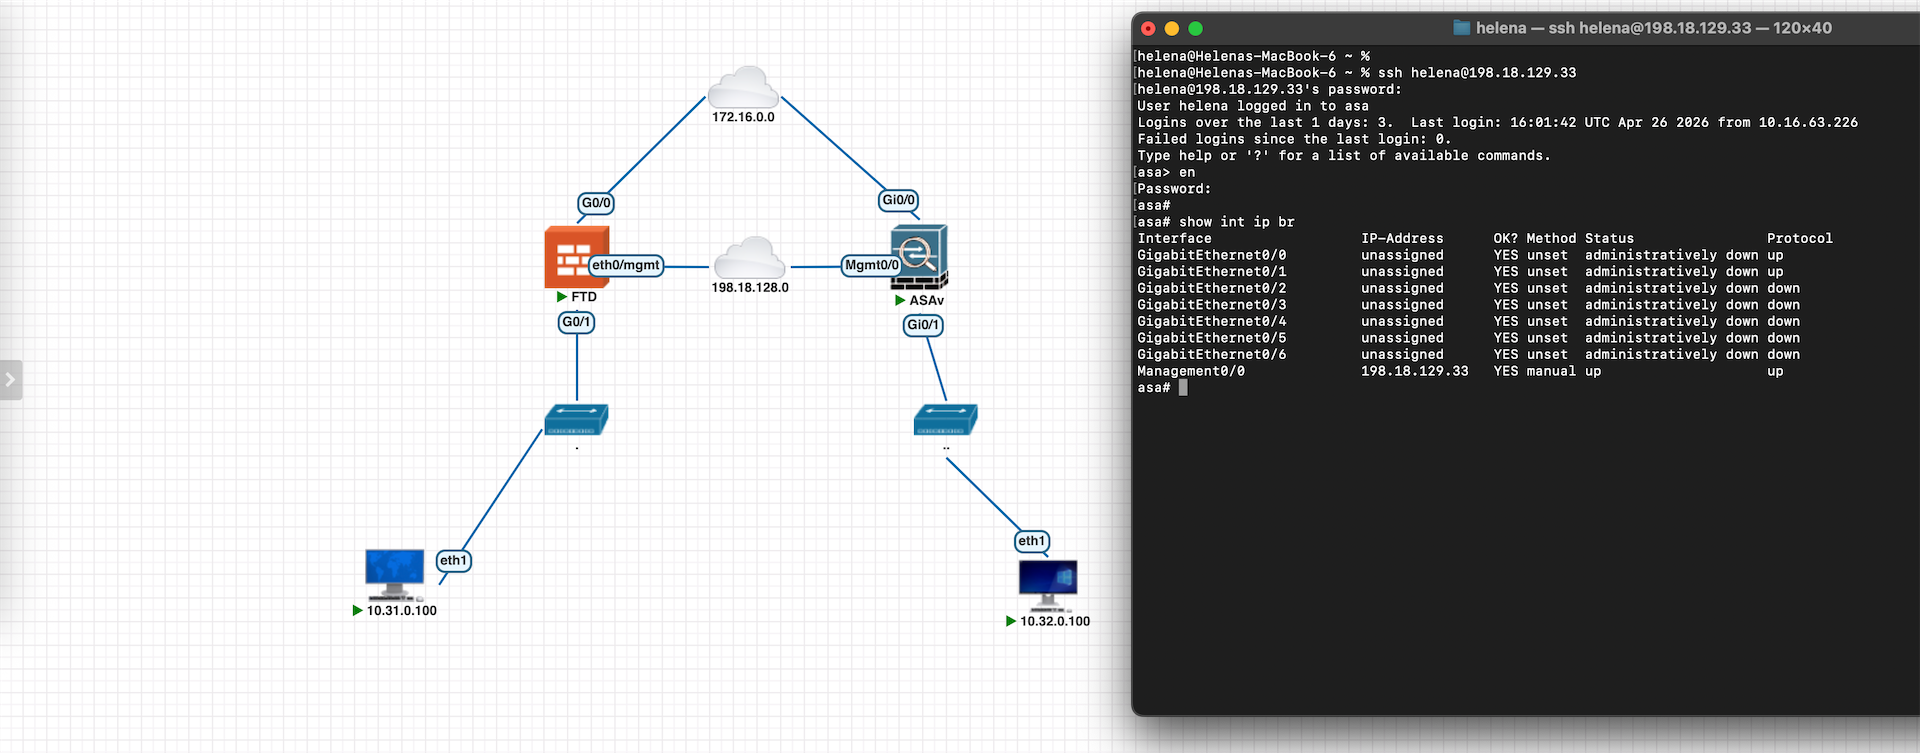
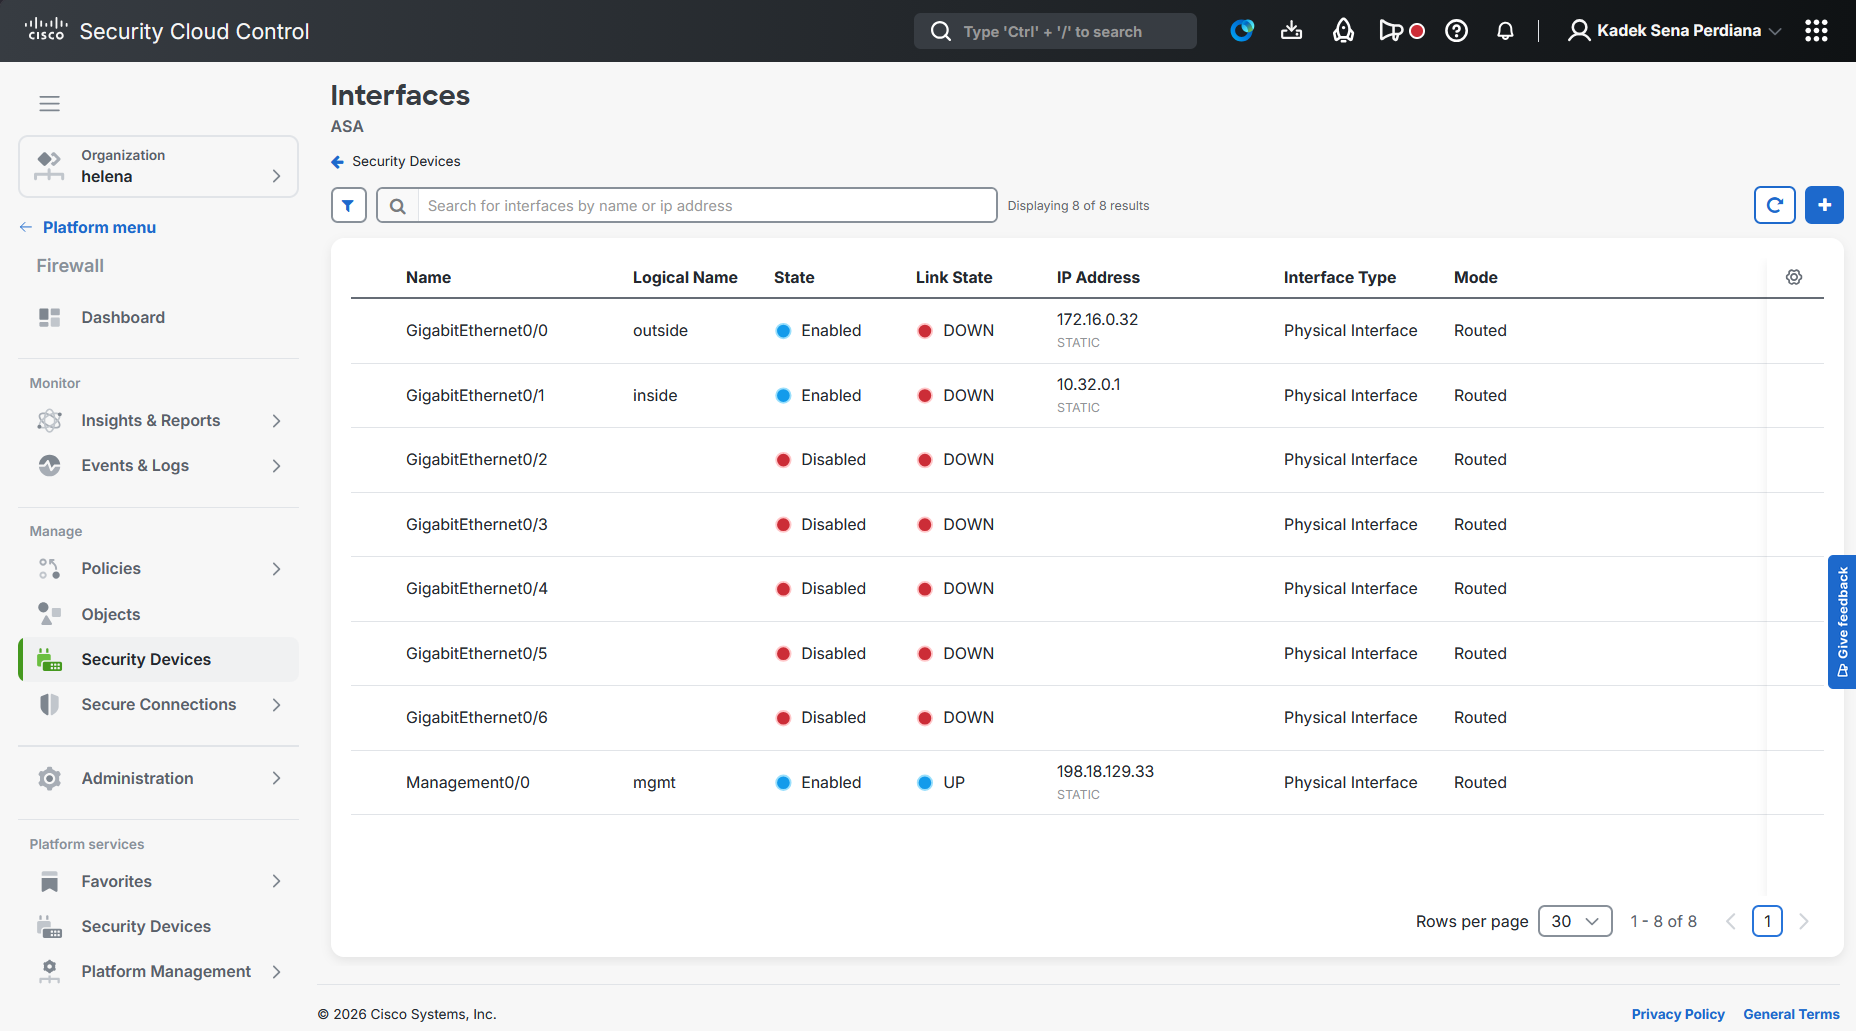
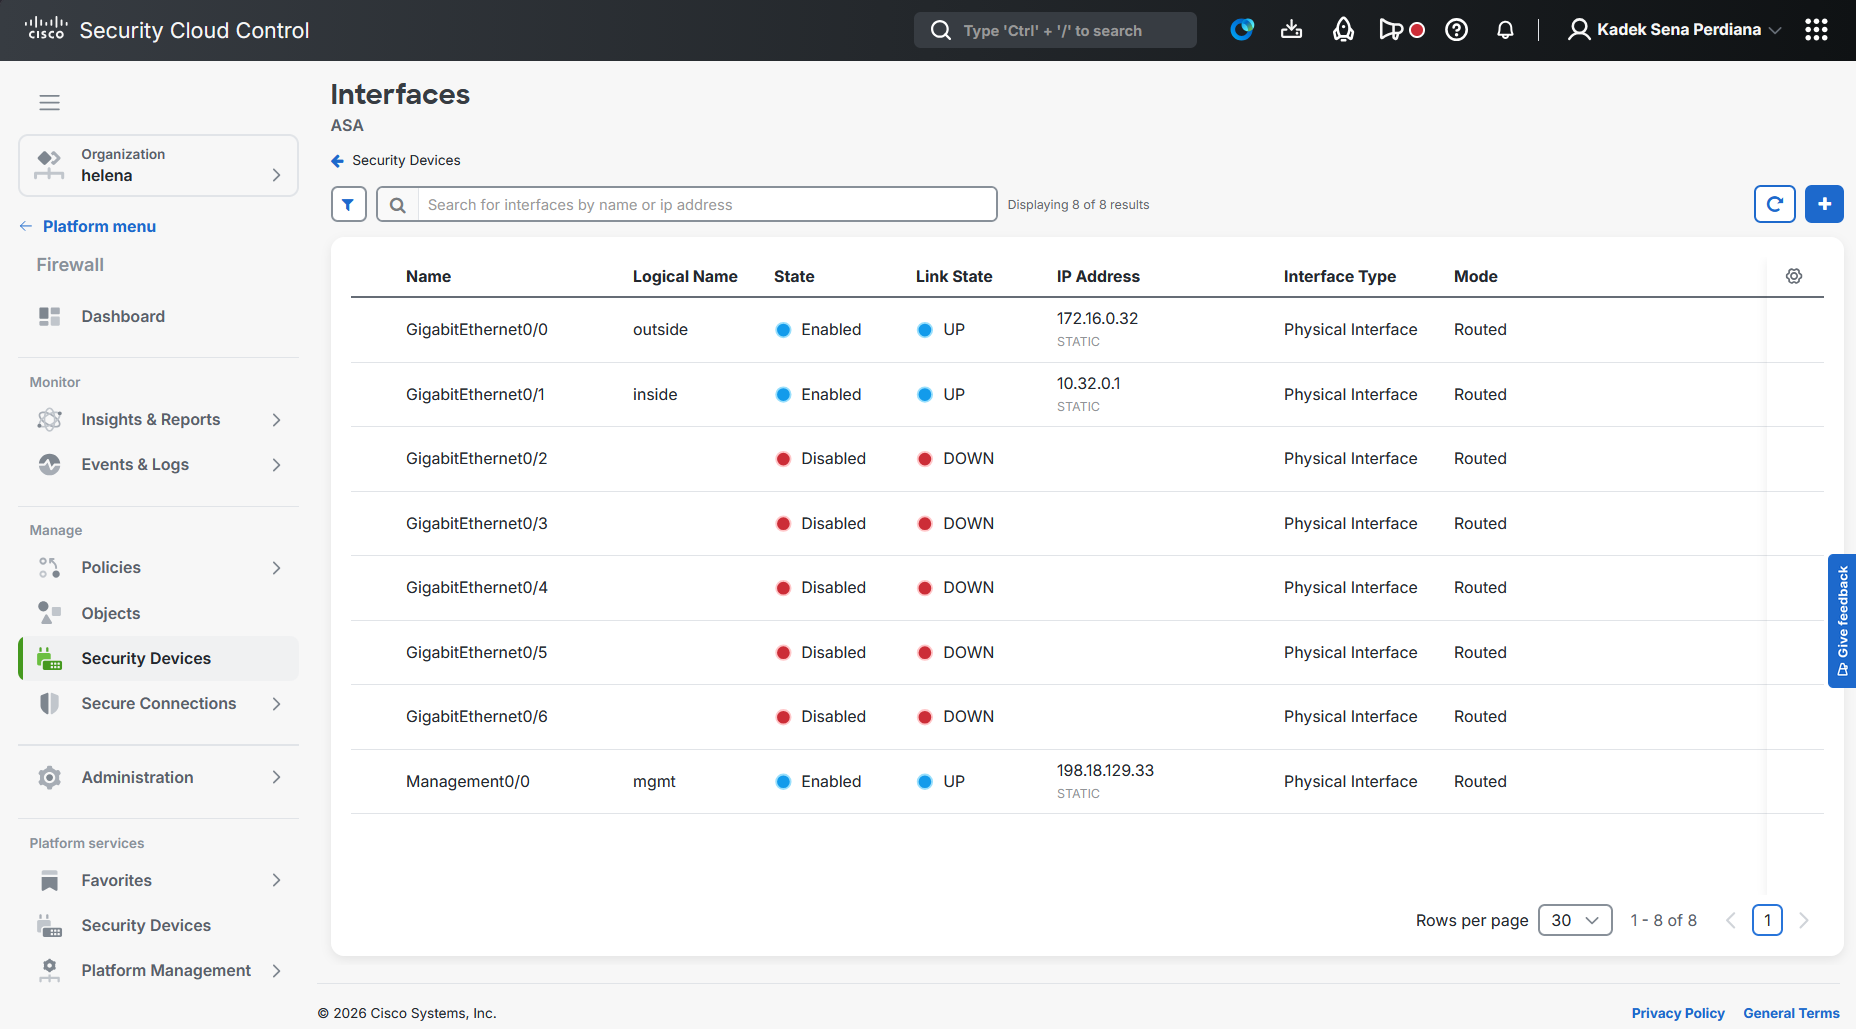
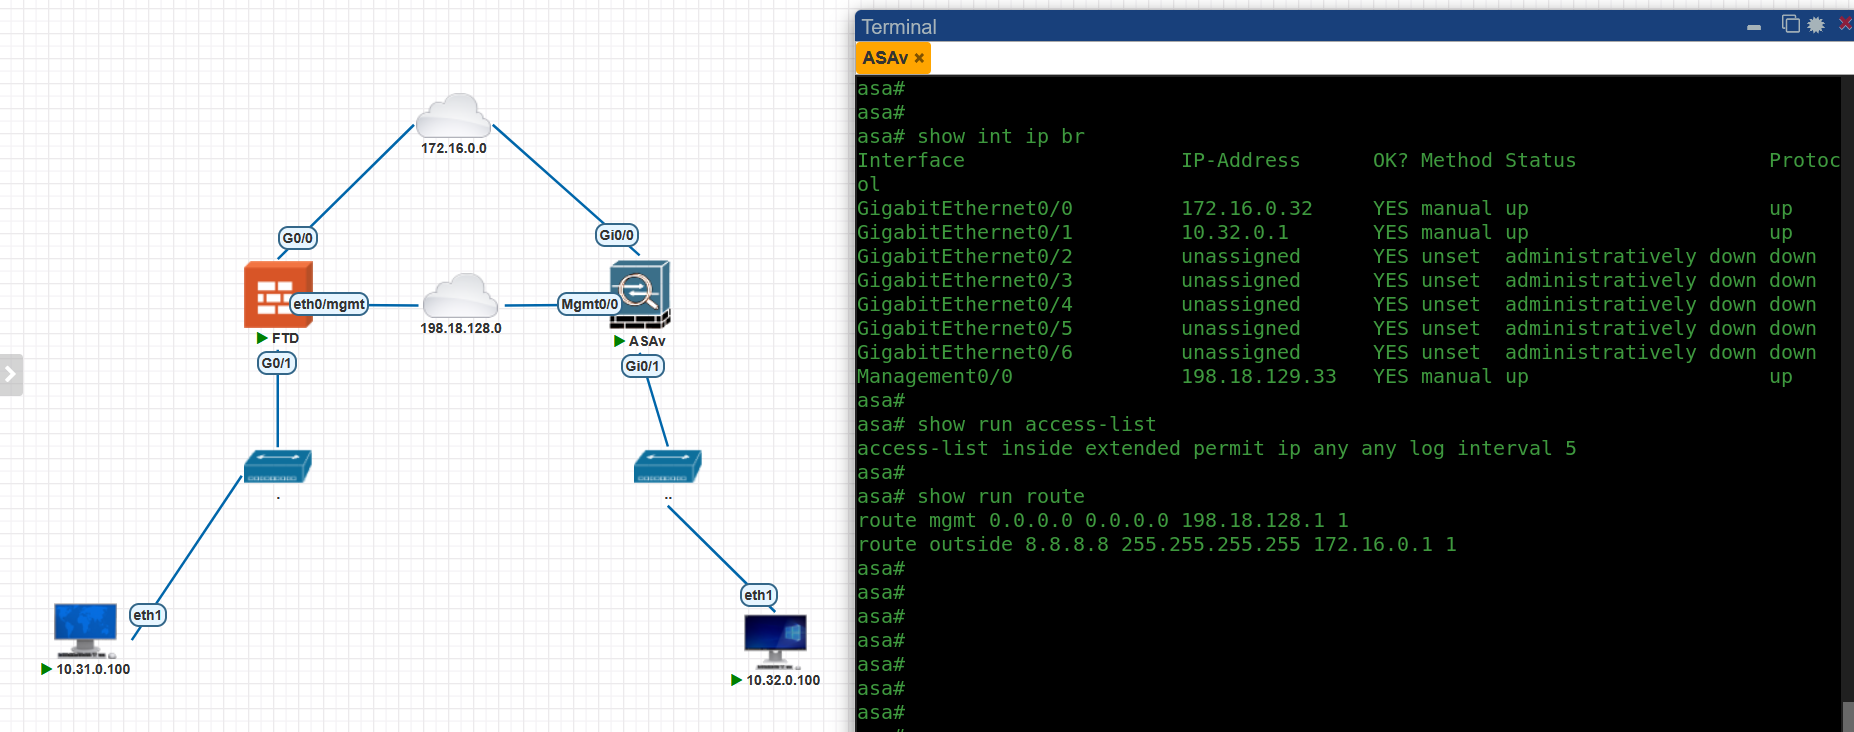
After the config is deployed, now our interfaces are up
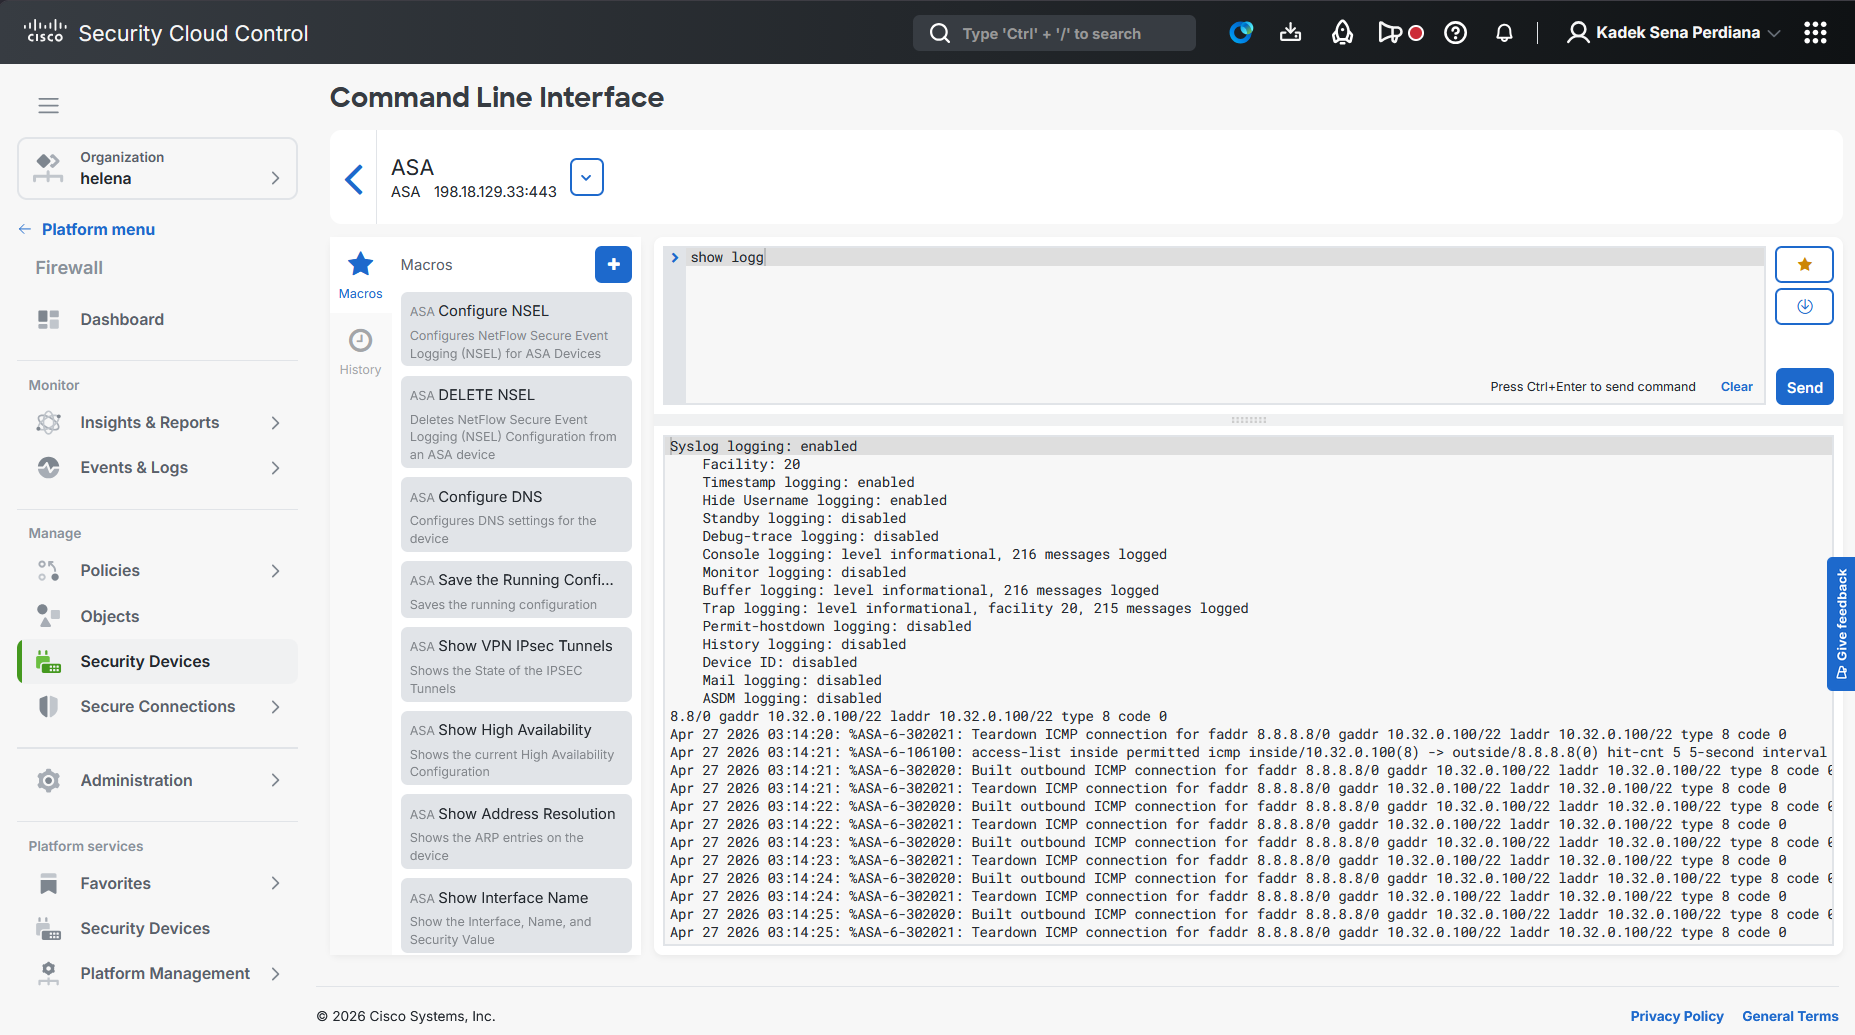
And on CLI we can verify that our changes have been pushed
And our host is also able to access internet through our ASA
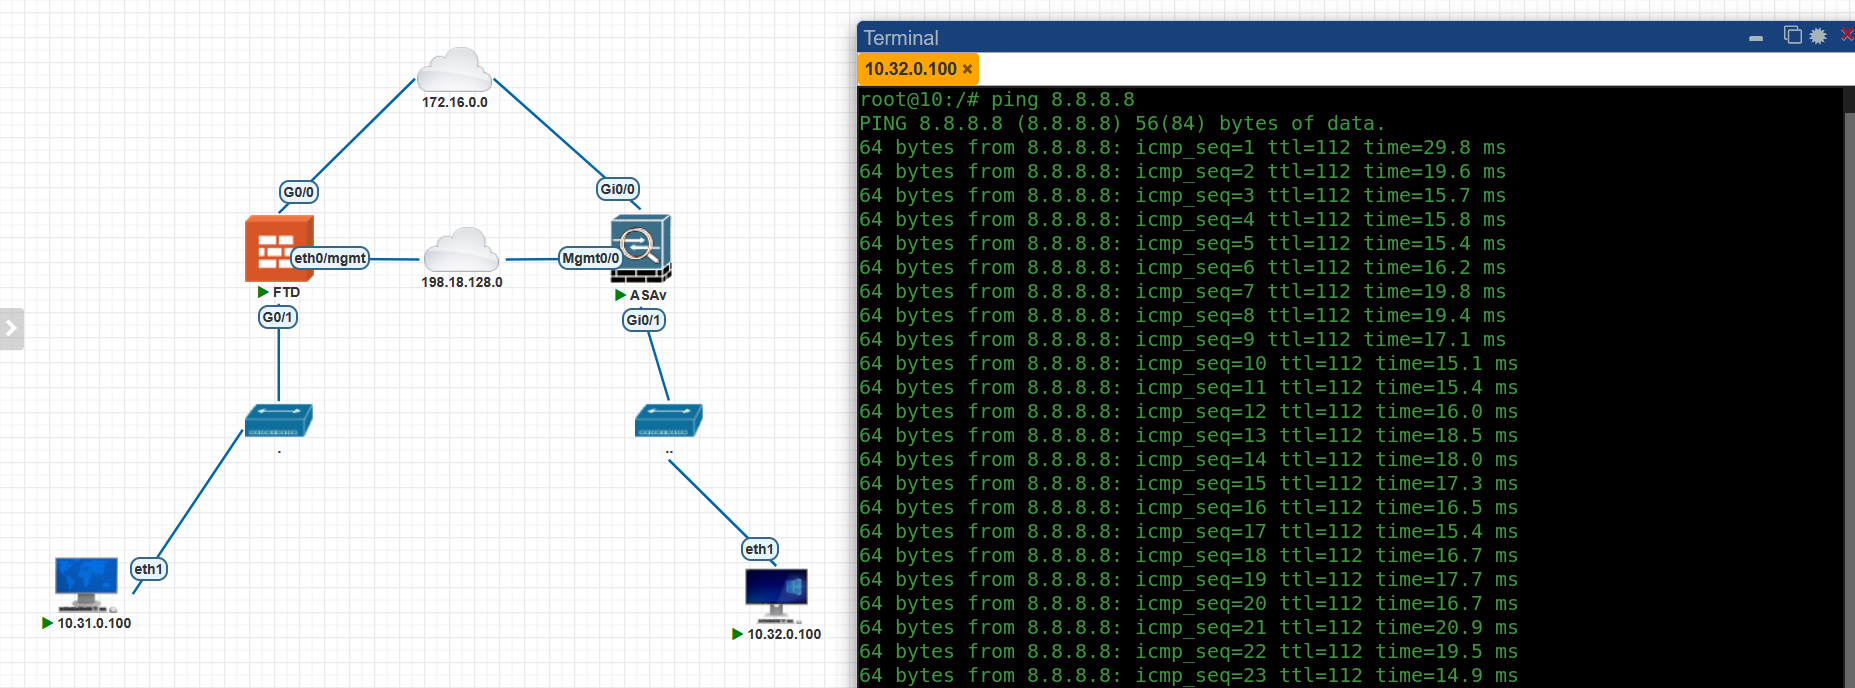
We can use SSC’s Command Line Interface to easily interact with our ASA